 EN
EN FRENCH
 繁体中文
繁体中文


Configuring Dolphin{Anty} with Swiftproxy


Why Anti-Detect Browsers?
Anti-detect browsers have surged in popularity due to their user-friendly design and versatile capabilities. These tools allow seamless management of multiple accounts across various platforms from a single device, making them indispensable in e-commerce, advertising, and web testing industries.
Today, we'll dive into Dolphin Anty, explore its key features, and guide you through configuring Dolphin Anty with Swiftproxy.
What is Dolphin Anty?
Dolphin Anty is an antidetect browser designed for efficient mass management of browser instances. Users can easily start and stop profiles, install extensions, and manage proxies and cookies. Each browser profile can have assigned statuses and notes, with one-click IP rotation and proxy replacement.
Configuring Dolphin Anty with Swiftproxy Residential Proxy
1. Download Dolphin Anty from the official website.
2. Launch the app, create an account, and log in.
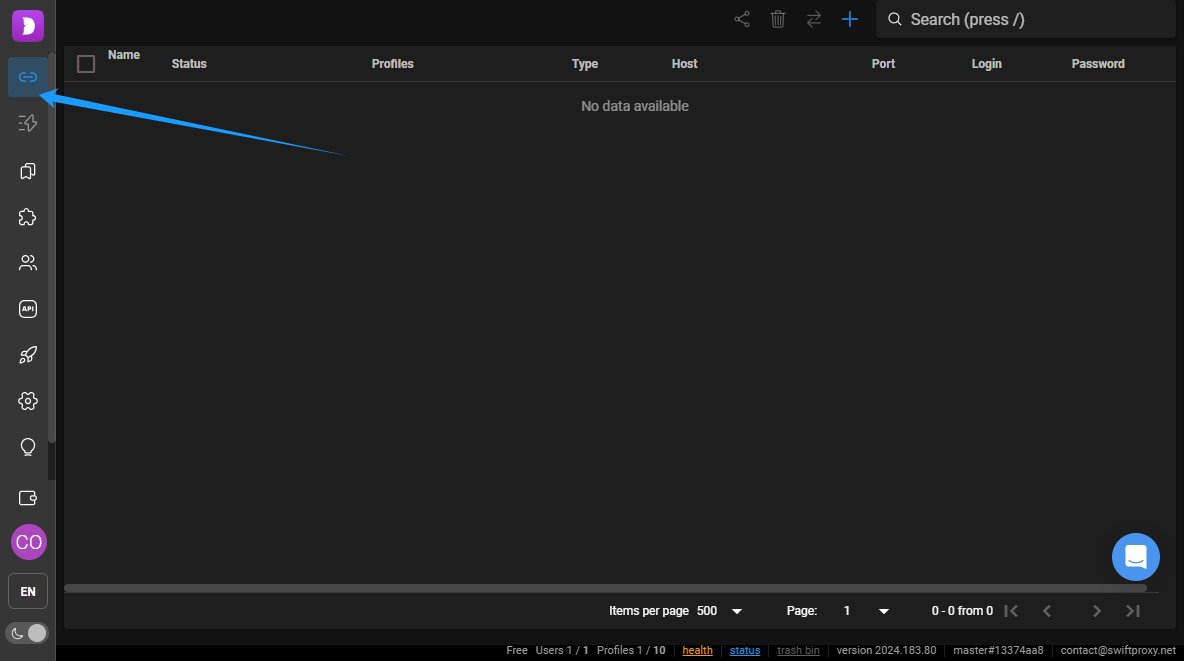
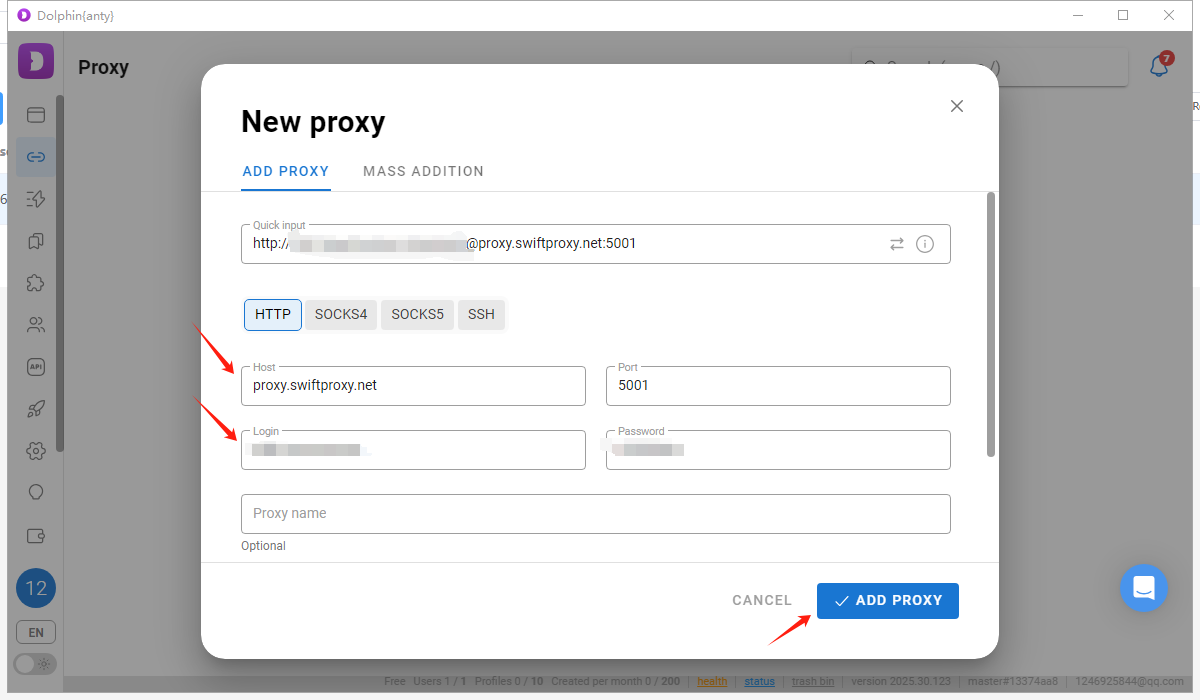
3. Once log in, select "Proxies" at the sidebar:
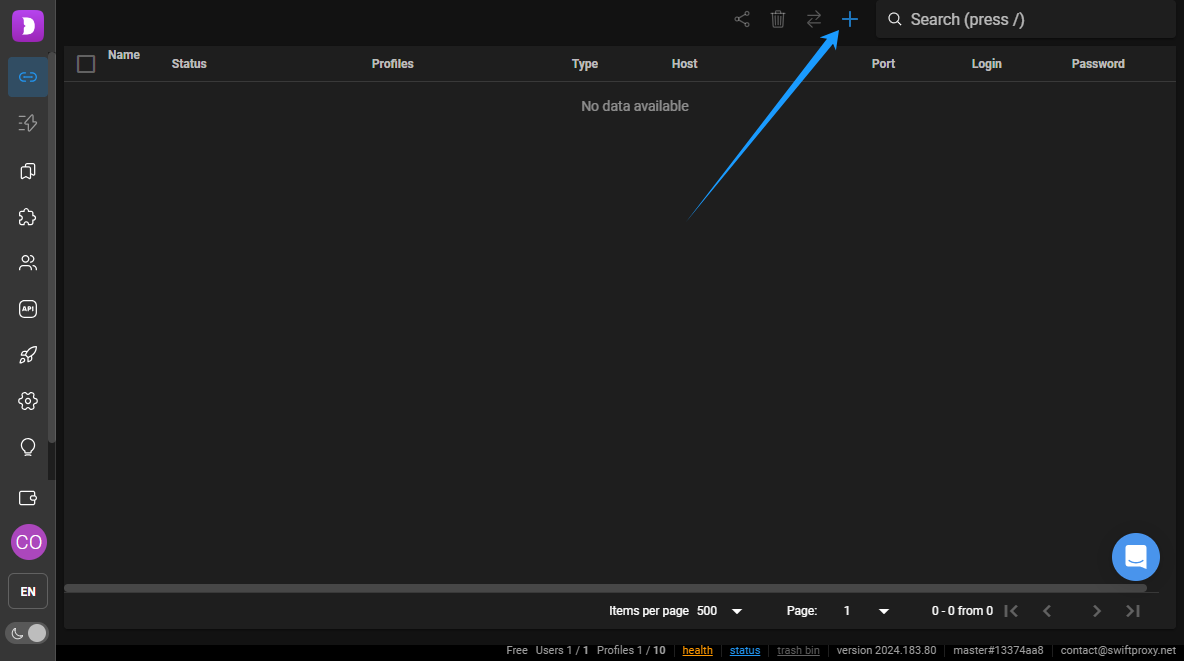
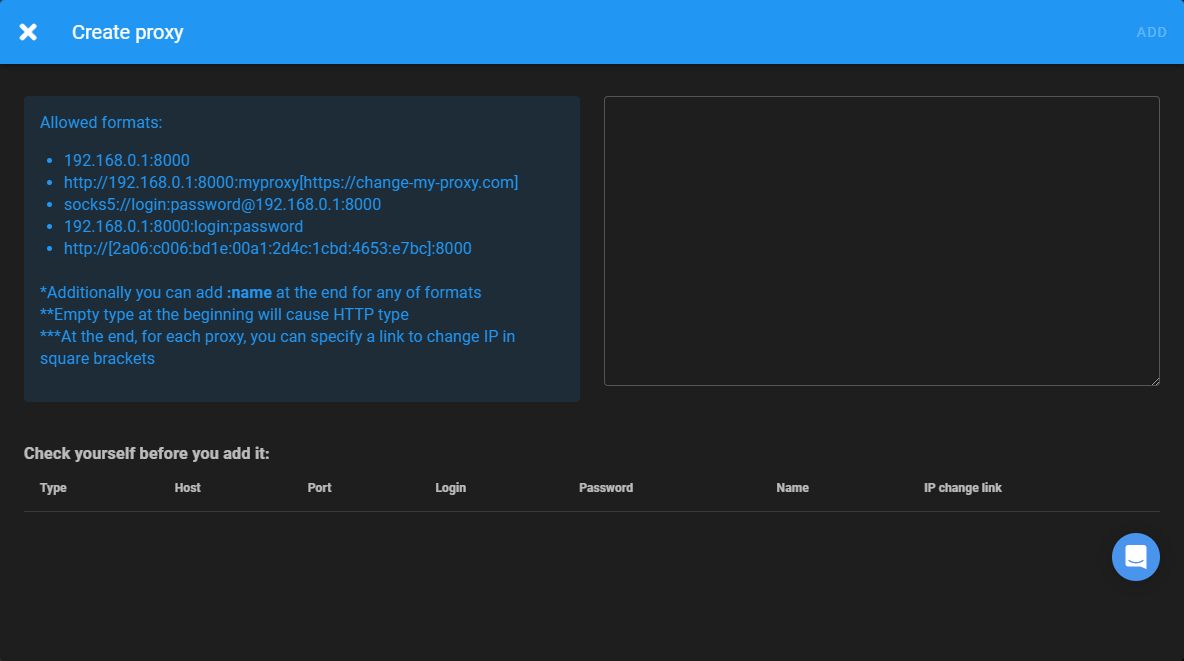
4. Tap "+" icon at the top right corner. Then a window will pop out for you to enter the proxy details:
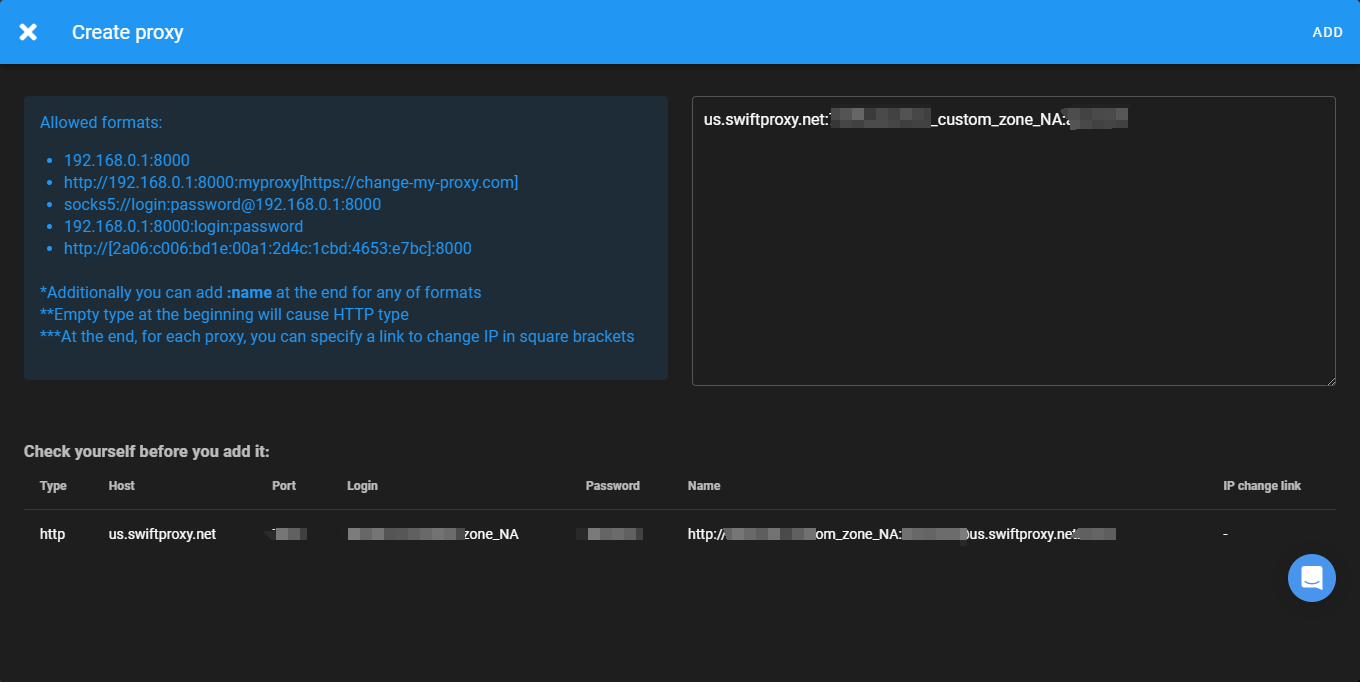
5. Now, visit the Swiftproxy dashboard and configure your proxies. We are using Random IPs from North America with IP rotation on each request using HTTP/HTTPS protocol in this case.
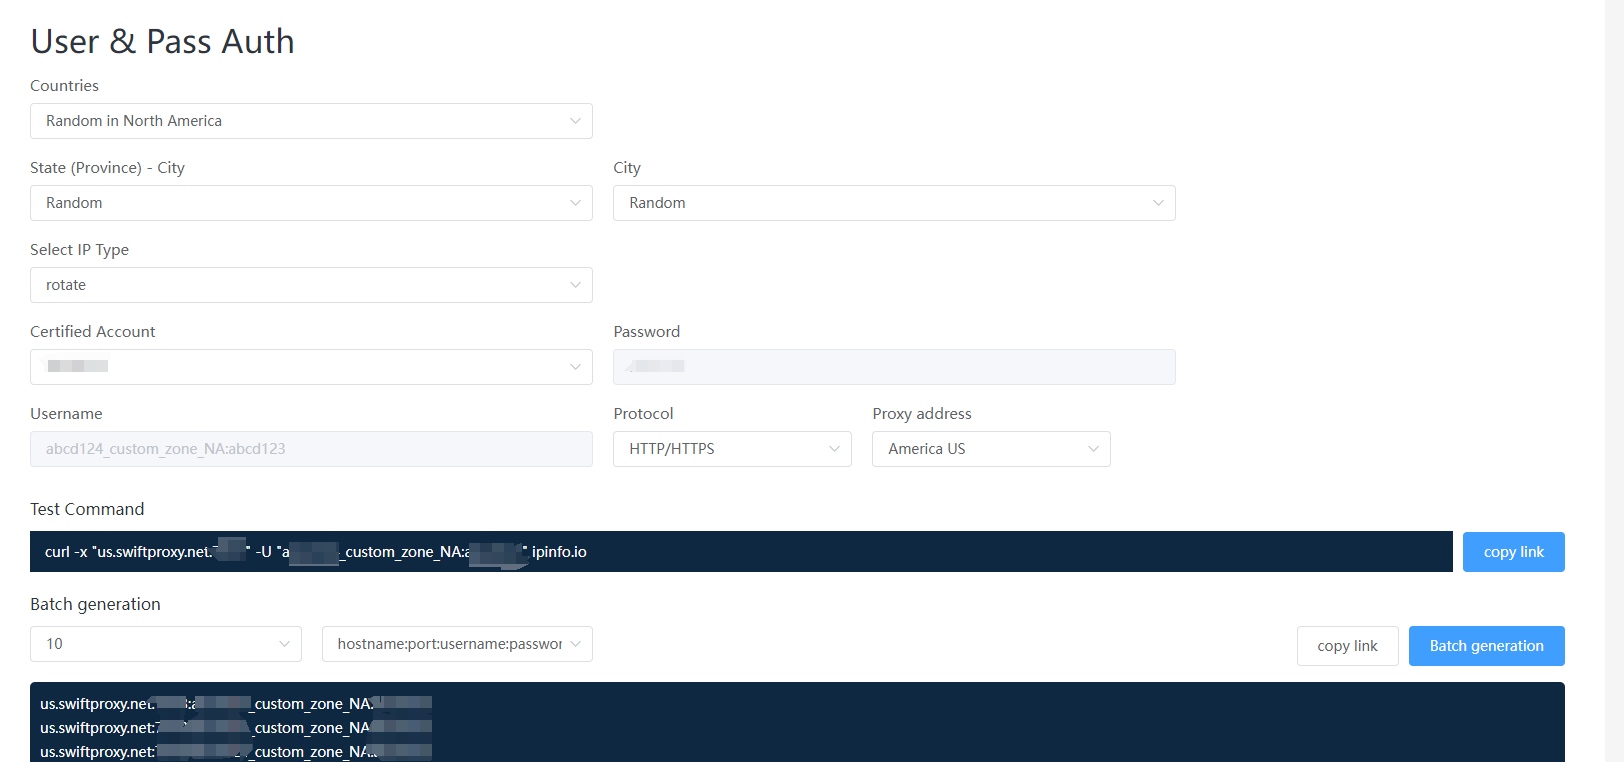
6. Copy the host:port:username:password at the bottom then head back to Dolphin Anty.
7. Paste the info you just copied into Dolphin Anty then hit "Add" at the top right corner.
8. After succesfully saved Swiftproxy, you may create a browser profile then select Swiftproxy as the preferred proxy for incoming new profile.
Configuring Incogniton Anti-Dectect Browser with Swiftproxy Static Proxy
1. The first four steps are the same as the first four steps of the previous part.
2. Then, visit the Swiftproxy dashboard and copy Username, Password, Hostname and Port.

3. Back to Proxy configuration in Dolphin, and paste the proxy information we copied from Swiftproxy dashboard, and tap "save proxies" in the end.
4. After succesfully saved Swiftproxy, you may create a browser profile then select Swiftproxy as the preferred proxy for incoming new profile.
Visit Dolphin Anty to Learn More About Adding a Proxy to Browser Profile.
About the author
Related articles


- Please provide your account number, or email address.
- Provide videos or screenshots, and simply describe the problems you are facing.
- Our staff will reply to your message within 24 hours.


