 EN
EN FRENCH
 繁体中文
繁体中文


Configuring OctoBrowser with Swiftproxy

Why choose OctoBrowser?
The main reasons for choosing Octo Browser are as follows:
Advanced multi-account management and anti-detection technology:
Octo Browser allows you to create and manage thousands of isolated browser profiles on a single device. Each profile has a unique, realistic digital fingerprint, significantly reducing the risk of account bans or linkage across platforms.
Efficient team collaboration and automation features:
It offers flexible team role management, label-based profile access control, and detailed activity logs. Additionally, Octo supports full API access, enabling automation of profile creation, usage, and deletion with your preferred programming language.
Strong data security and privacy protection:
Octo Browser uses multiple layers of encryption to protect sensitive data—user passwords, database keys, and profile credentials. With added features like two-factor authentication and password-protected profiles, your data stays safe even in shared environments.
Overall, Octo Browser stands out for its robust anti-detection capabilities, powerful automation, and enterprise-grade security—making it ideal for digital marketers, e-commerce sellers, and anyone managing multiple online identities.
Configuring OctoBrowser with Swiftproxy
Step 1: Get proxy information
1.Register and log in to Swiftproxy and enter the dashboard
2.Configure your proxies. We are using Random IPs from United States of America with IP rotation on each request using HTTP/HTTPS protocol in this case. Copy host:port:username:password in the first proxy string and save it for later use in OctoBrowser.

Step 2: Configure Swiftproxy in OctoBrowser
1. Download OctoBrowser.
2. Open OctoBrowser for the first time, log in and click "Proxy" and then click “Add Proxy".
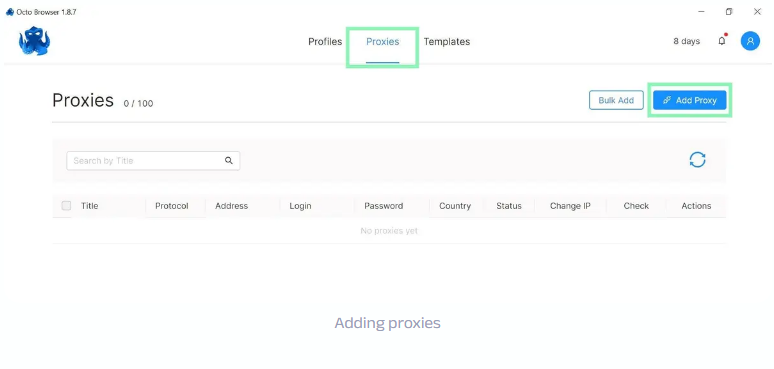
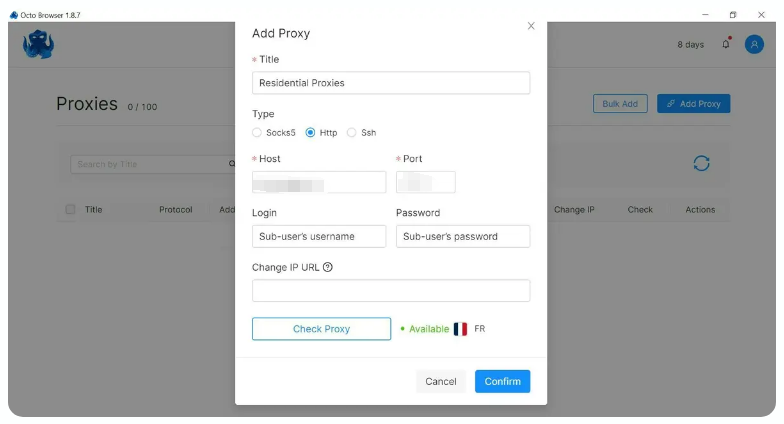
3. Enter the proxy settings page, and paste the proxy string we copied from Swiftproxy dashboard, click "check proxy", if it work, click "confirm" in the end.
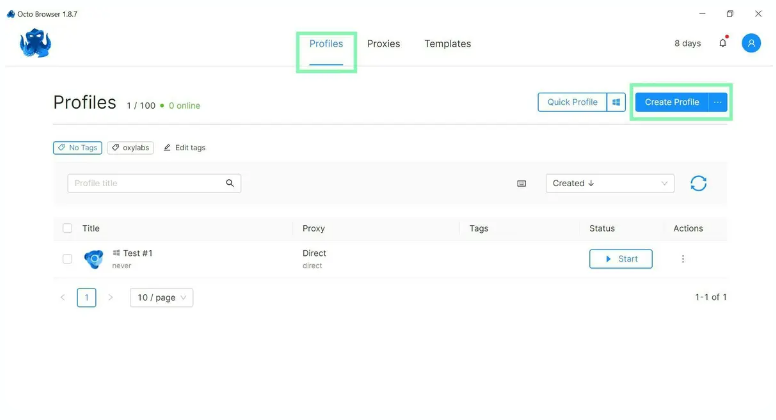
4. Go to Profiles and click "Create Profile" and set up a new profile.
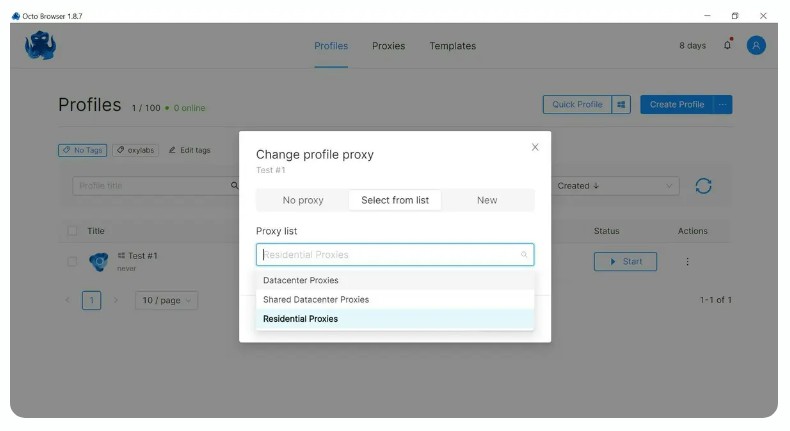
5. Once set up, add a proxy from your pre-configured list. You can do this by either selecting the Proxy section within your profile or navigating to the Connections tab while editing the profile.
6. Your profile is all set with a proxy!
About the author
Related articles


- Please provide your account number, or email address.
- Provide videos or screenshots, and simply describe the problems you are facing.
- Our staff will reply to your message within 24 hours.


