How to Set Up and Manage a Proxy in Firefox Like a Pro
Picture that you want to test a website from Tokyo, check prices in New York, or scrape data without hitting blocks. Your regular connection just won’t cut it. That’s where a Firefox proxy steps in. It’s not magic—it’s control. You decide where your traffic appears to come from, which opens doors for testing, research, and efficiency. Whether you’re a developer, marketer, or a power user craving flexibility, mastering proxy setup in Firefox is a skill worth having. Don’t let the technical jargon intimidate you; this guide will break everything down step by step. By the end, you’ll know how to manually configure Firefox, leverage a proxy extension, and choose a top-tier proxy provider to keep your connection fast, secure, and reliable.

What Is a Proxy Server
A proxy server acts as the middleman between your browser and the websites you visit. Think of it as a mailroom: you drop off your requests, the proxy delivers them, fetches the responses, and hands them back to you. Websites only see the proxy's IP address—not yours.
Here's the flow:
You type a URL into Firefox.
Firefox sends the request to your proxy server.
The proxy forwards the request to the website.
The website responds to the proxy.
The proxy sends the data back to you.
This simple rerouting is powerful. Suddenly, location restrictions, access limits, and data-gathering barriers are no longer roadblocks—they're challenges you can control.
Why Use a Proxy in Firefox
There are countless reasons professionals use proxies. Here's why it matters:
Access Geo-Specific Content: See websites exactly as a local user would. This is vital for market research, ad verification, and price comparisons.
Web Scraping and Data Collection: Rotate IP addresses to avoid blocks and keep your data flowing.
Application and Website Testing: Simulate real-world traffic from different regions without leaving your desk.
Improved Performance and Caching: Corporate or institutional proxies can store frequently accessed pages, speeding up load times.
Configuring Firefox Proxy Settings Manually
Firefox has built-in tools to configure proxies—perfect if you plan to stick with a specific server. Follow these steps carefully.
Step 1: Open the Settings Menu
Click the hamburger menu in the top-right corner, then select Settings.
Step 2: Navigate to Connection Settings
Scroll down in the General panel to Network Settings. Click Settings… to open the proxy configuration window.
Step 3: Choose Manual Proxy Configuration
Select Manual proxy configuration. This allows you to enter your proxy's IP address and port.
Step 4: Enter Your Proxy Server Details
HTTP Proxy: Input your proxy IP/hostname and port.
SOCKS Host (optional): Use this for SOCKS4 or SOCKS5 proxies.
Step 5: Configure Additional Options
Also use this proxy for HTTPS: Keep this checked.
No proxy for: Add domains you want to bypass the proxy, e.g., localhost, 127.0.0.1.
Step 6: Handle Authentication (If Required)
Private proxies often need a username and password. Firefox will prompt you the first time you connect. Save credentials to avoid repeated prompts.
Step 7: Save Settings
Click OK. Your traffic is now routing through the proxy.
Using a Firefox Proxy Extension
Switching proxies frequently? A proxy manager extension is a lifesaver.
Find an Extension: Search for "proxy manager" or "proxy switcher" in the Firefox Add-ons store.
Install the Extension: Click Add to Firefox.
Open Extension Options: Click the toolbar icon and navigate to settings.
Add a Proxy Profile: Enter proxy type, IP/hostname, port, and credentials.
Save and Activate: Switch between multiple proxies in seconds—no re-entry required.
Choosing a High-Quality Proxy Provider
Even a perfect setup fails if your proxy is slow or unreliable. Free proxies? They're risky, often offline, and prone to blocks.
Swiftproxy stands out:
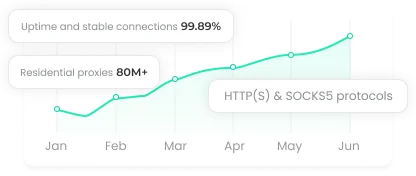
Massive IP Pool: 80+ million real IPs.
Residential Proxies: Look like real user traffic—perfect for scraping and ad verification.
Precise Geo-Targeting: Choose proxies from almost any city or country.
Easy Integration: Credentials plug directly into Firefox or extensions.
A solid provider turns a standard setup into a high-performance tool.
Conclusion
Setting up a proxy in Firefox puts you firmly in control of your web traffic. Manual configuration offers pinpoint accuracy, extensions add convenience, and premium providers ensure speed, reliability, and security. Once you master this skill, you can test, research, and collect data anywhere in the world.


