 EN
EN FRENCH
 繁体中文
繁体中文


Configuring VMLogin with Swiftproxy

Configuring VMLogin with Swiftproxy
Anti-detect browsers have become increasingly popular due to their ease of use and versatility, allowing users to manage multiple accounts on various platforms from a single device. These browsers are particularly prized by professionals in e-commerce, advertising, and web testing fields. In this discussion, we'll delve into VMLogin, examine its main features, and outline how to set up VMLogin with Swiftproxy.
What is VMLogin?
VMLogin Antidetect Browser offers users an unlimited environment of unique browser fingerprints. Each browser environment mimics natural and local settings, significantly reducing the risk of account blocks.
This tool is versatile for all types of browser-based activities, including account registrations, advertising verification, and management on platforms like Google, Facebook, Twitter, Amazon, eBay, Etsy, TikTok, Tinder, PayPal, Stripe, Outlook, and Gmail. It's also ideal for store operations, affiliate marketing, automated tasks, and more across various industries.
Configuring VMLogin with Swiftproxy
1. Download the appropriate version of VMLogin then create an account. [NEW USERS GET TO HAVE FREE TRIAL]
2. Each browser profile should be associated with a unique IP address, and should only be used to log into one account on a given website. If you wish to log into a second account, please create a new browser profile with a different IP address.
3. Visit the Swiftproxy dashboard and configure your proxies.
① For residential proxy: we are using IPs from Ohio/The United States with IP rotation on each request using SOCKS5 protocol in this case. Copy the proxy information after setting up the residential proxy.
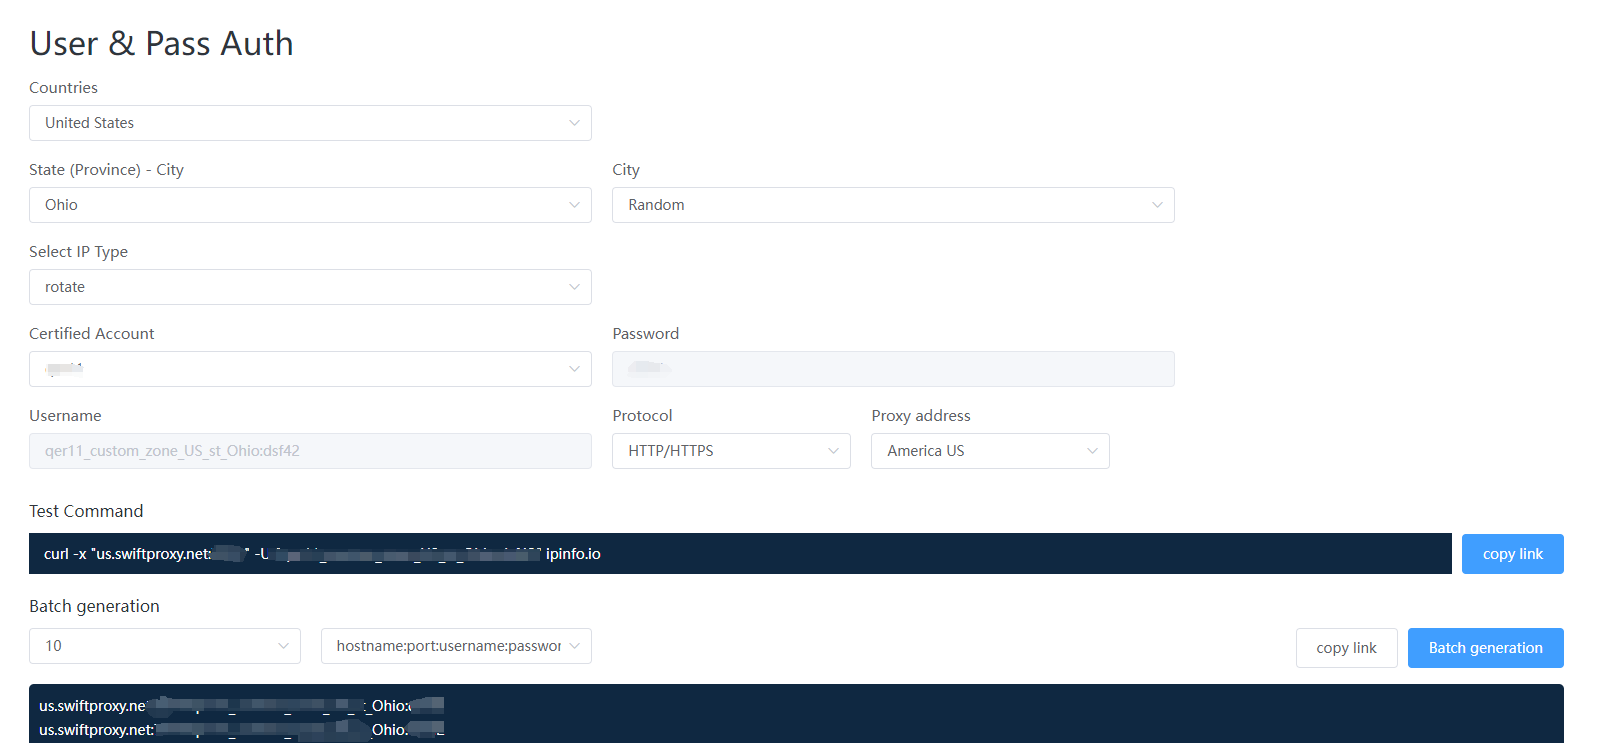
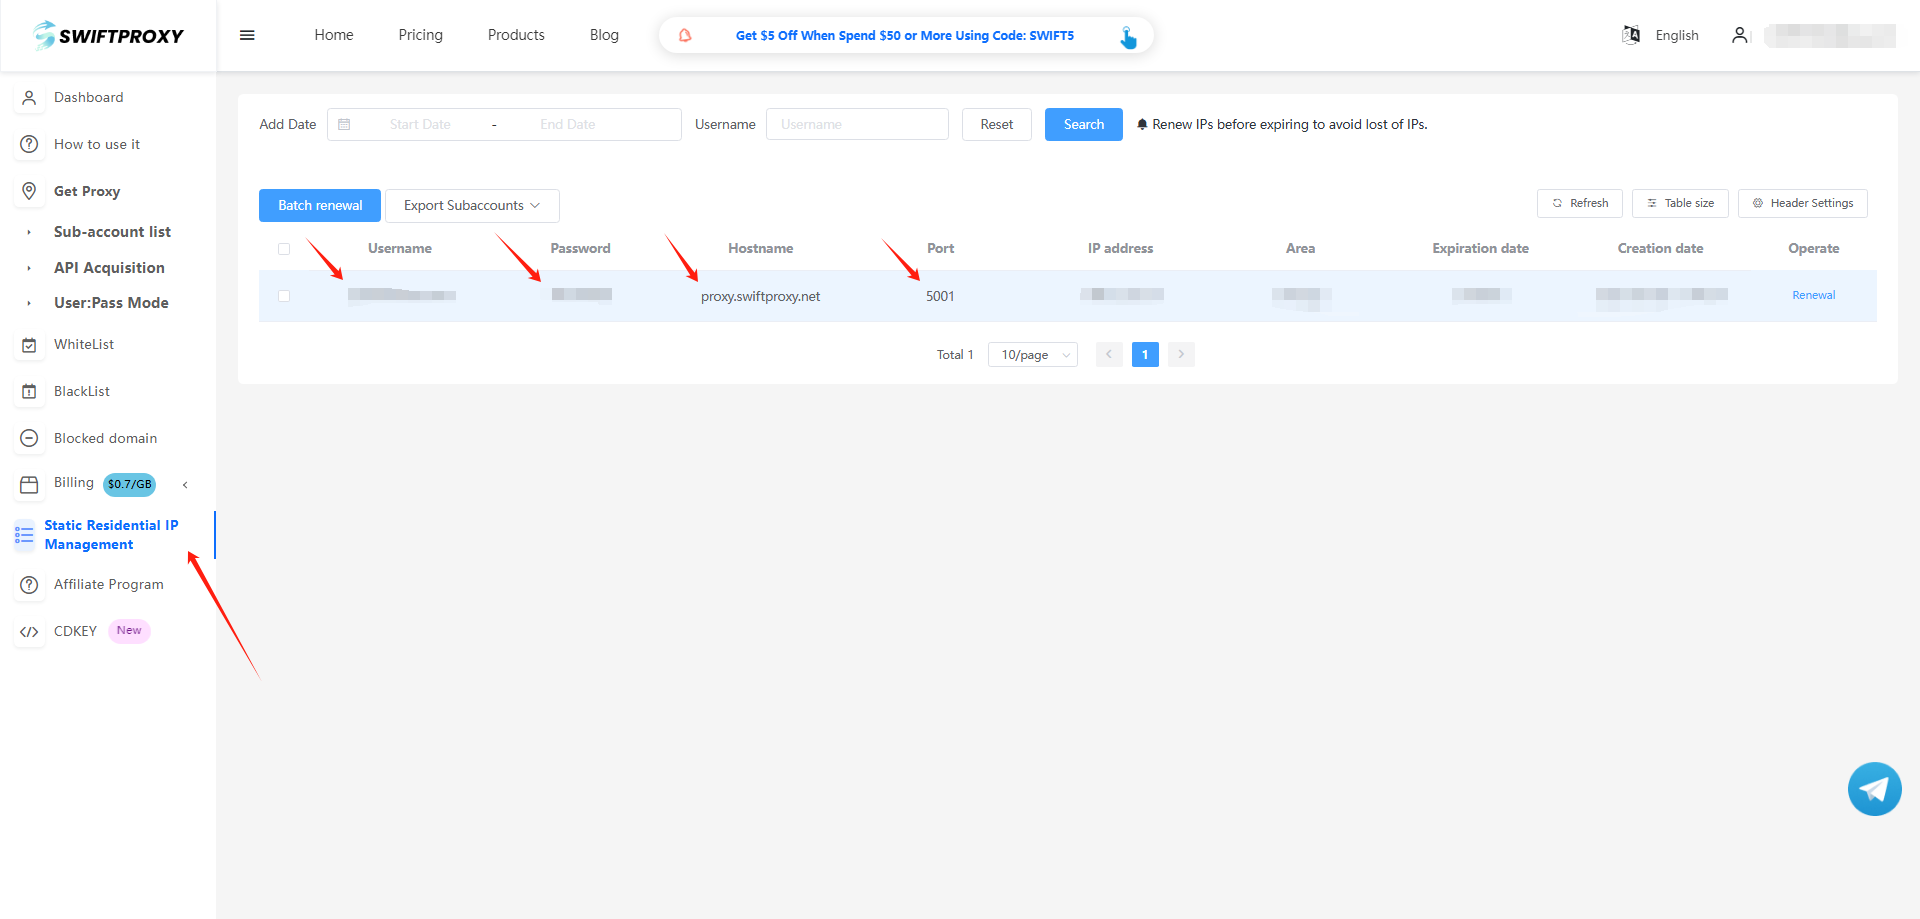
② For static proxy, copy visit the Swiftproxy dashboard and copy Username, Password, Hostname and Port.
4. After entering the proxy details provided by Swiftproxy, users can simply click "Paste proxy information" to automatically populate the proxy data. There are two formats for "Paste proxy information":
① The first one is: IP address:Port:User:Password
② The second one is : User:Password@IP Address:Port
[Users get to copy proxy information in correct format via Swiftproxy account dashboard]

To contact VMLogin support via Telegram: @VMLogin_us
To contact Swiftproxy support via Telegram: @swiftproxy_official
Note sur l'auteur
Articles liés


- Veuillez fournir votre numéro de compte ou votre adresse courriel.
- Fournissez des vidéos ou des captures d'écran et décrivez simplement les problèmes auxquels vous êtes confronté.
- Notre personnel répondra à votre message dans les 24 heures.


