Why choose Maxthon browser?
The main reasons for choosing Maxthon browser are as follows:
- Efficient multi-tab and low resource usage: Support multi-tab browsing, manage multiple pages in the same window, significantly reduce system resource usage, and improve operation fluency.
- Security and privacy protection: Built-in ad blocking function can block pop-ups and malicious plug-ins, and protect user privacy and security through encrypted storage, active blocking of phishing websites and other technologies.
- Dual-core engine and compatibility: Adopting IE and Webkit dual-core design, taking into account traditional web page compatibility and modern rendering speed, and high support for new standards such as HTML5.
On the whole, Maxthon has outstanding performance in feature richness, cross-platform collaboration, and security and privacy, and is suitable for users who pursue efficiency and convenience.
Configuring Maxthon Browser With Swiftproxy
Step 1: Get proxy information
1.Register and log in to Swiftproxy and enter the dashboard
2.configure your proxies. We are using Random IPs from United States of America with IP rotation on each request using HTTP/HTTPS protocol in this case.

Step 2: Configure the proxy in Maxthon Browser
1. Download Maxthon Browser
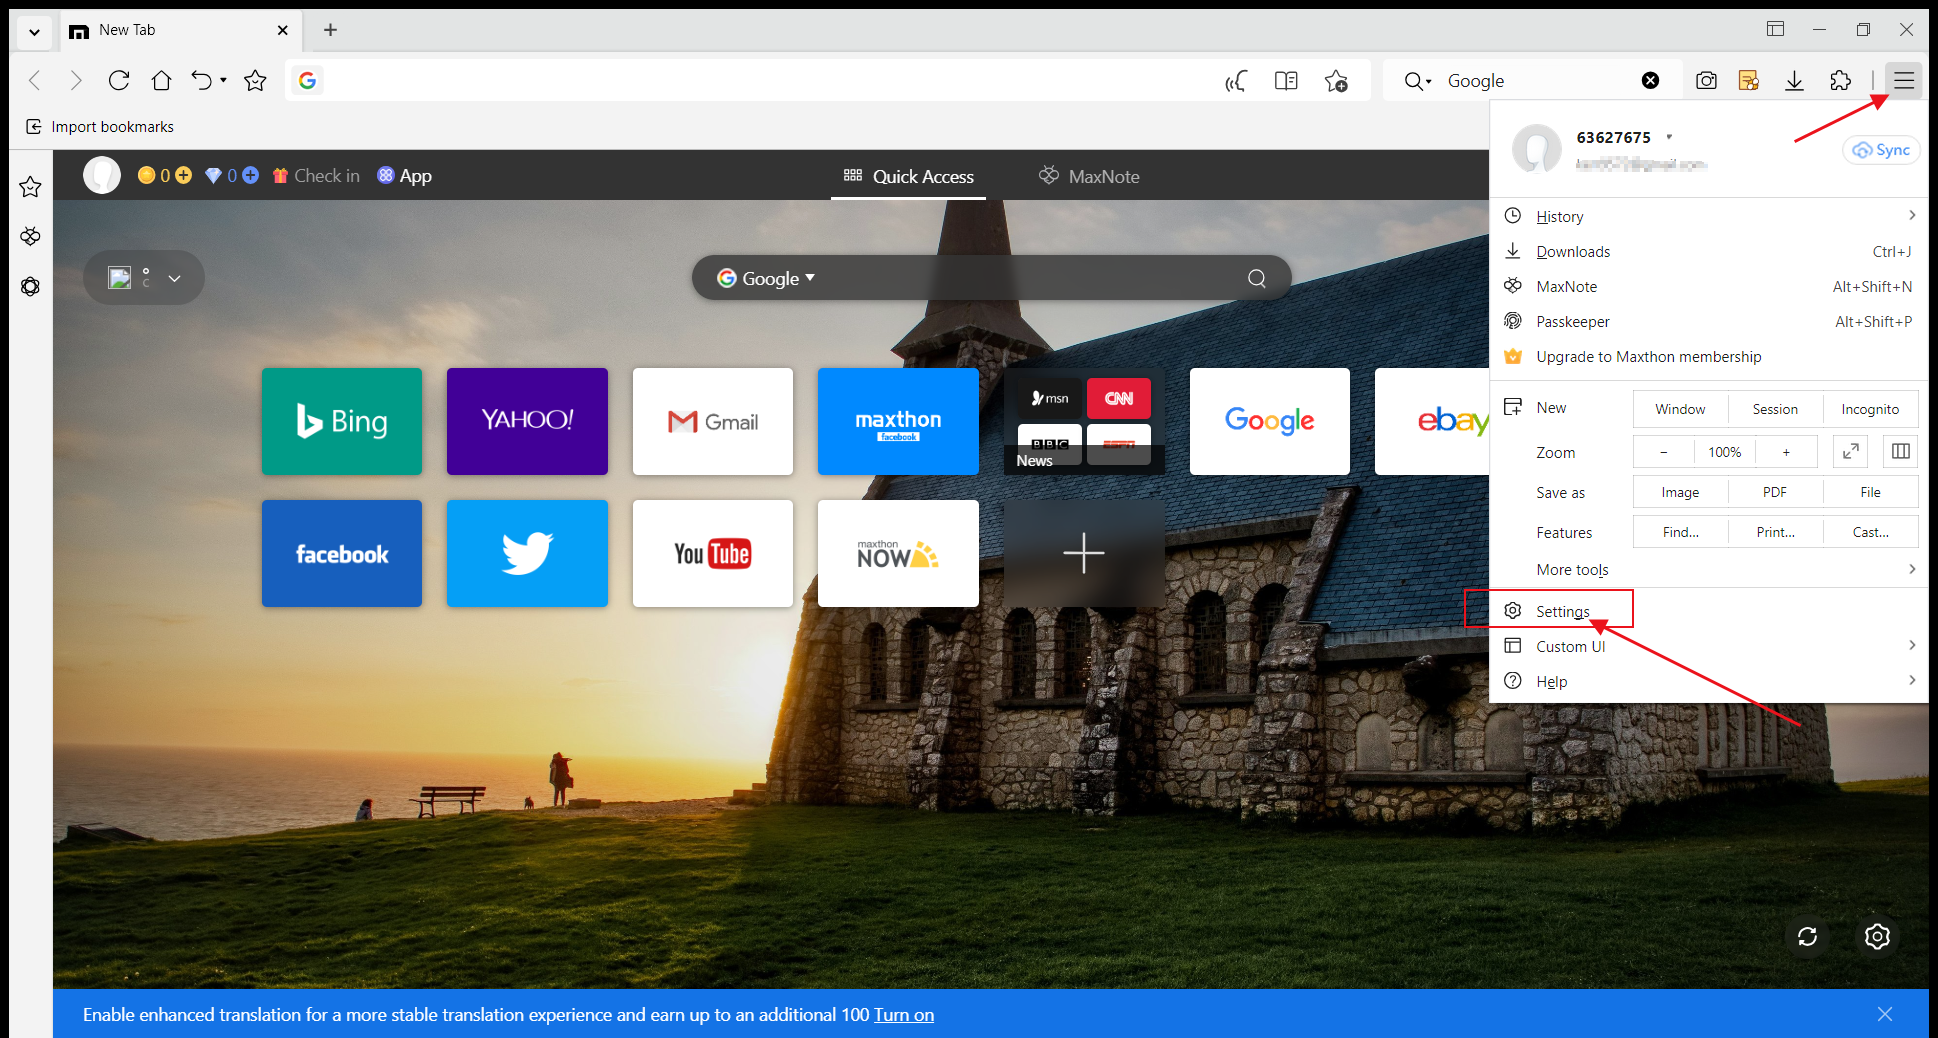
2. Open Maxthon, click the menu in the upper right corner, and select "Settings".
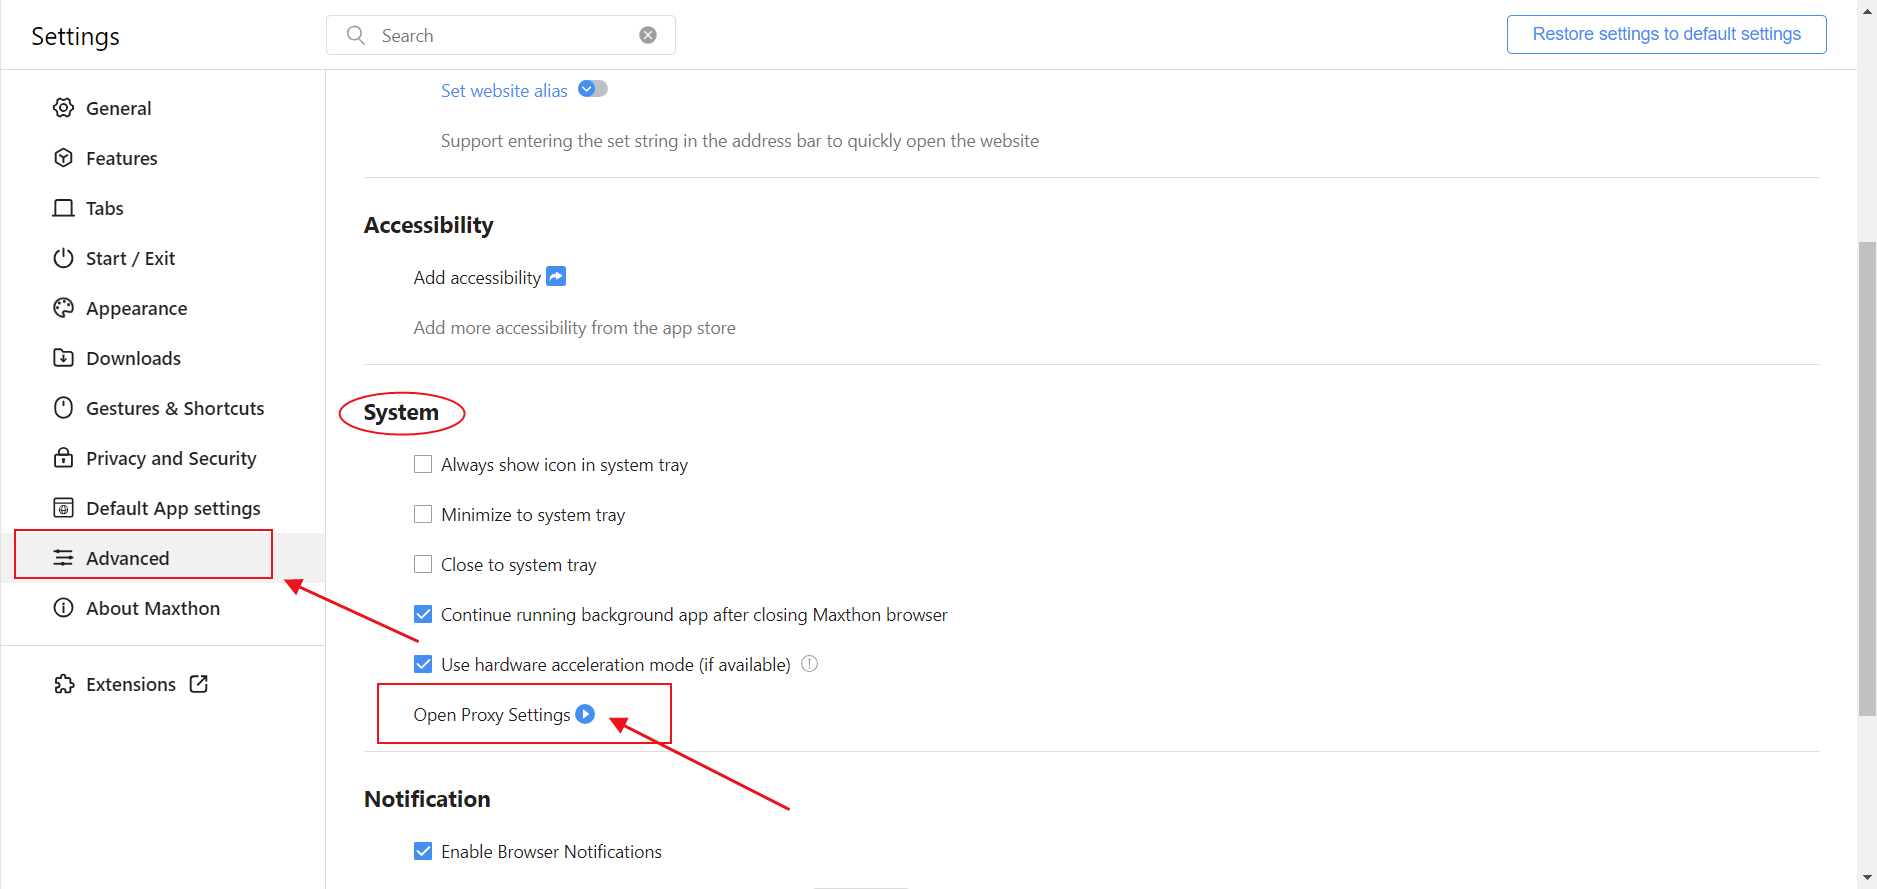
3. Select "Advanced". Scroll down to the "System" section and click "Open Proxy Settings" to jump to the system settings page.
4. Open the "Use a proxy server" button, enter the address and port number you just obtained, and click Save.
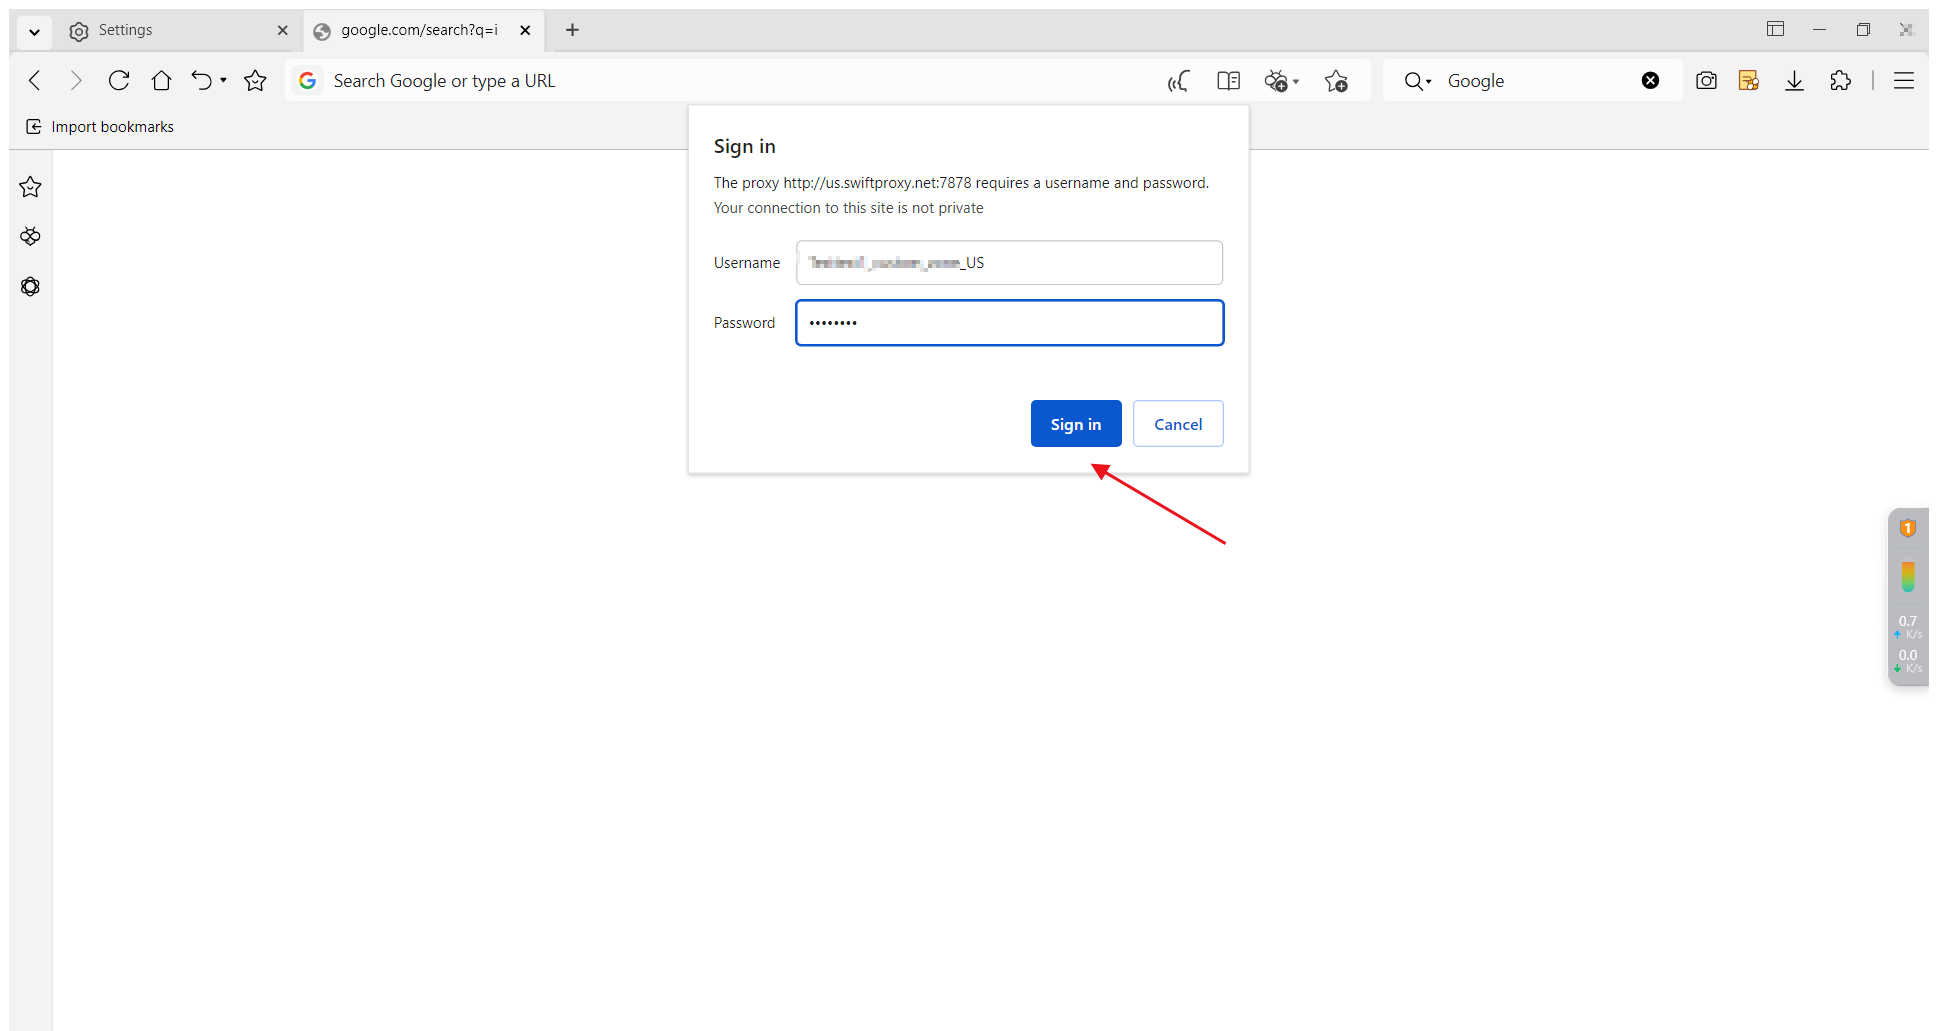
5. Next, when you open a new page, a proxy username and password login reminder will pop up. Fill in the corresponding information in sequence and click "Sign in".