


This guide explains how to configure Swiftproxy (HTTP/HTTPS/SOCKS5 proxy) in Maskfog Browser to ensure secure, anonymous browsing and prevent account association bans on platforms like:
- E-commerce (Amazon, eBay, Shopify)
- Social Media (Facebook, TikTok, Instagram)
- Advertising (Google Ads, Facebook Ads)
Key Benefits:
- IP Masking – Hide your real IP address
- Fingerprint Spoofing – Avoid browser fingerprint detection
- Multi-Account Safety – Manage multiple accounts without bans
Before starting, ensure you have:
Step 1: Get proxy information
1. Go to the Swiftproxy website and log in to your account
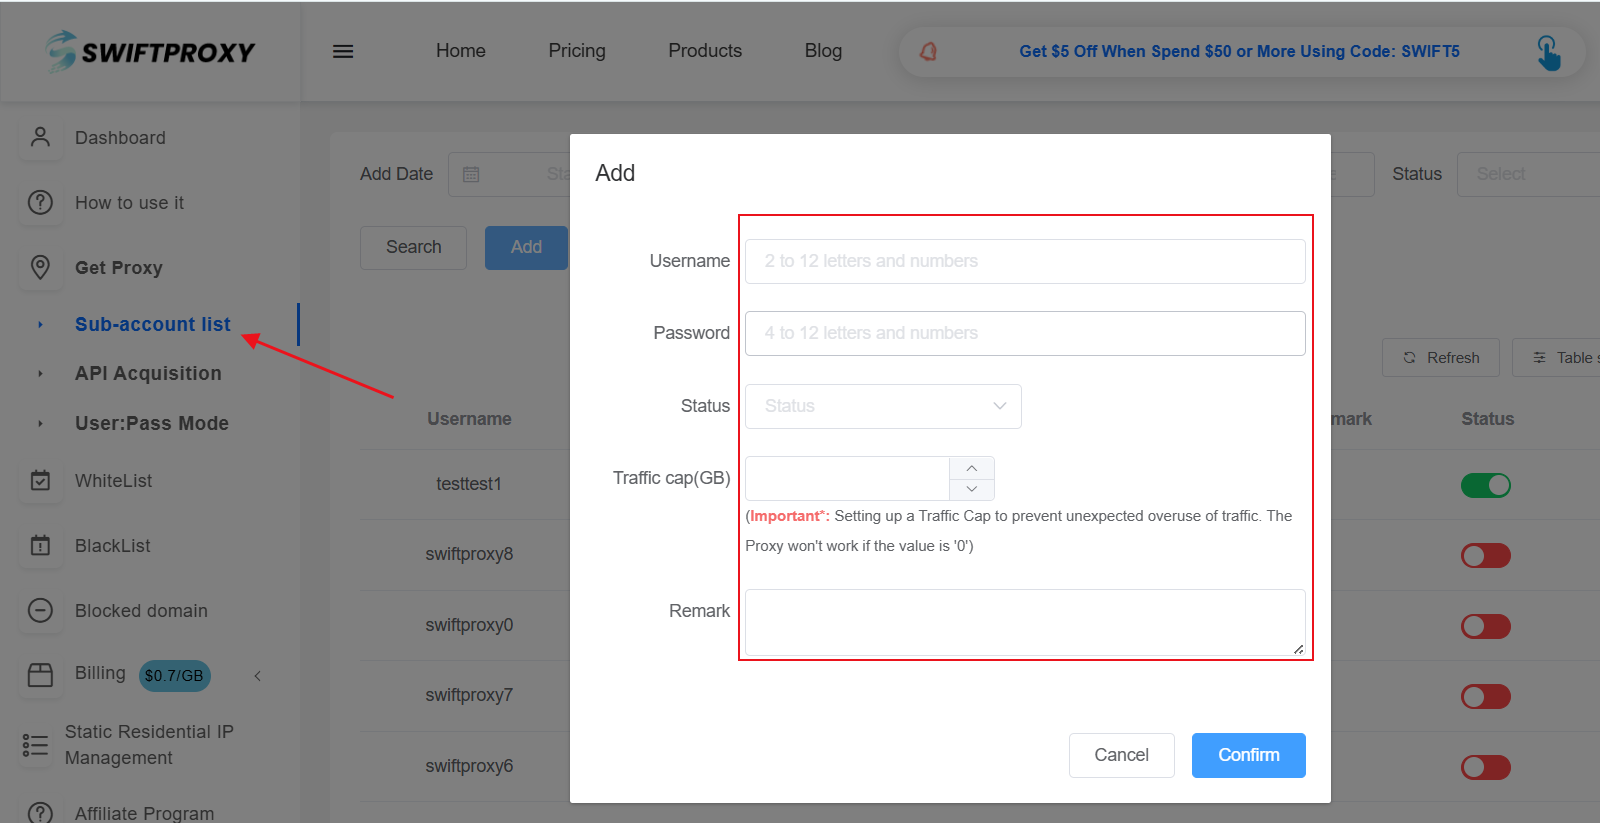
2. Before extracting the proxy, we need to create a subaccount, enable the proxy service and set a traffic limit to avoid overuse.
3. Generate a proxy list.
In "User: Pass Mode", select the region, IP type, and proxy protocol and generate the proxy information.
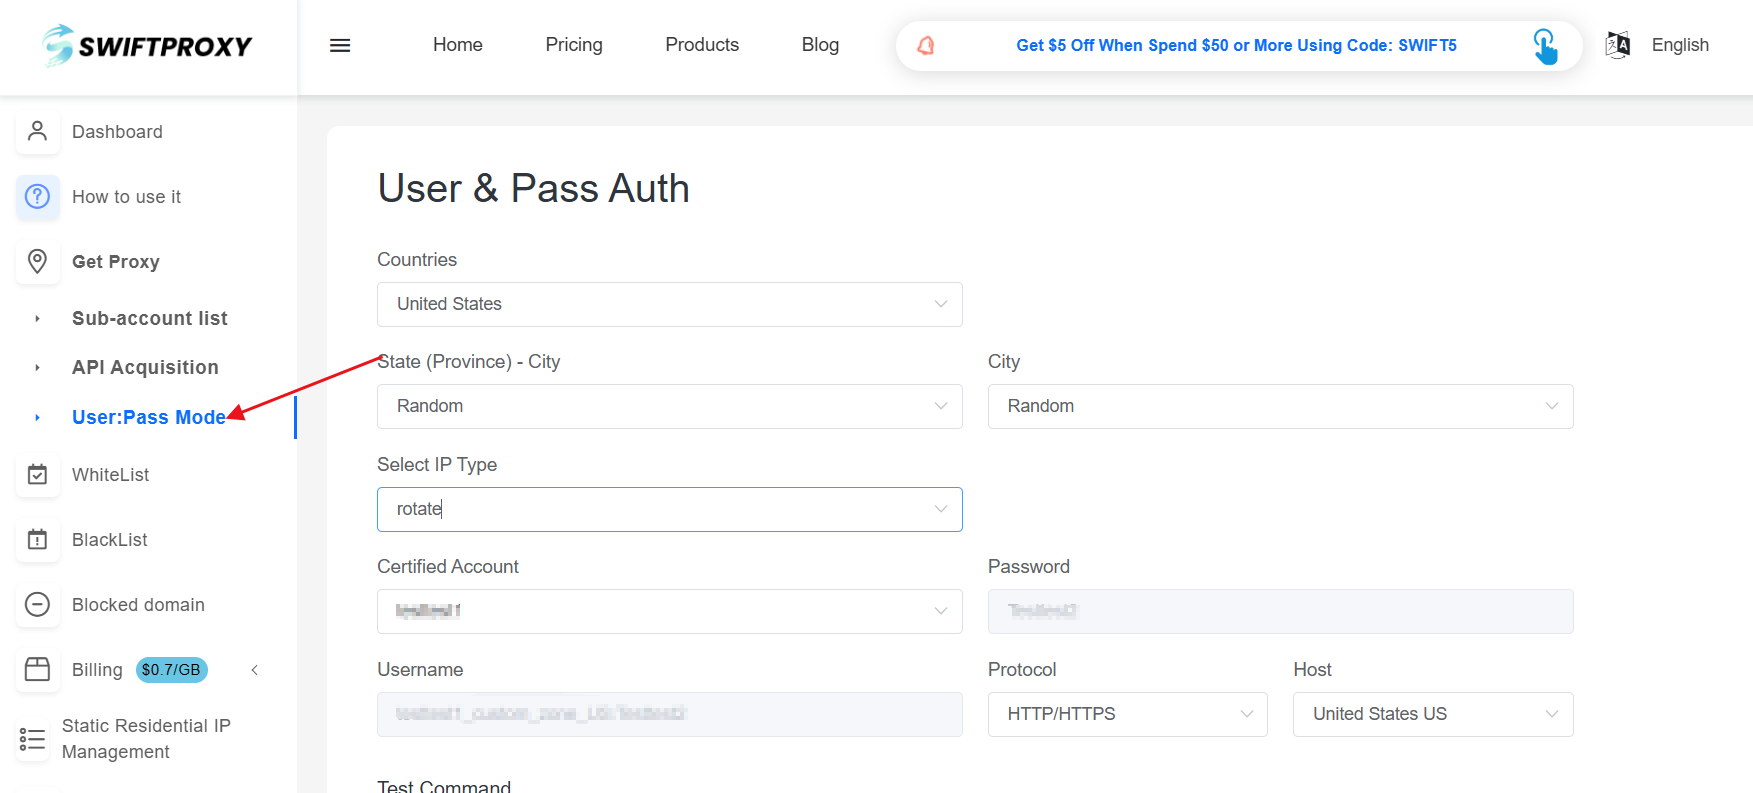
After the configuration is completed, the proxy credentials are generated, which will be used when Maskfog configures the proxy.
Step 2: Configure Swiftproxy in Maskfog Browser
1. Open the Maskfog browser and log in to your account.
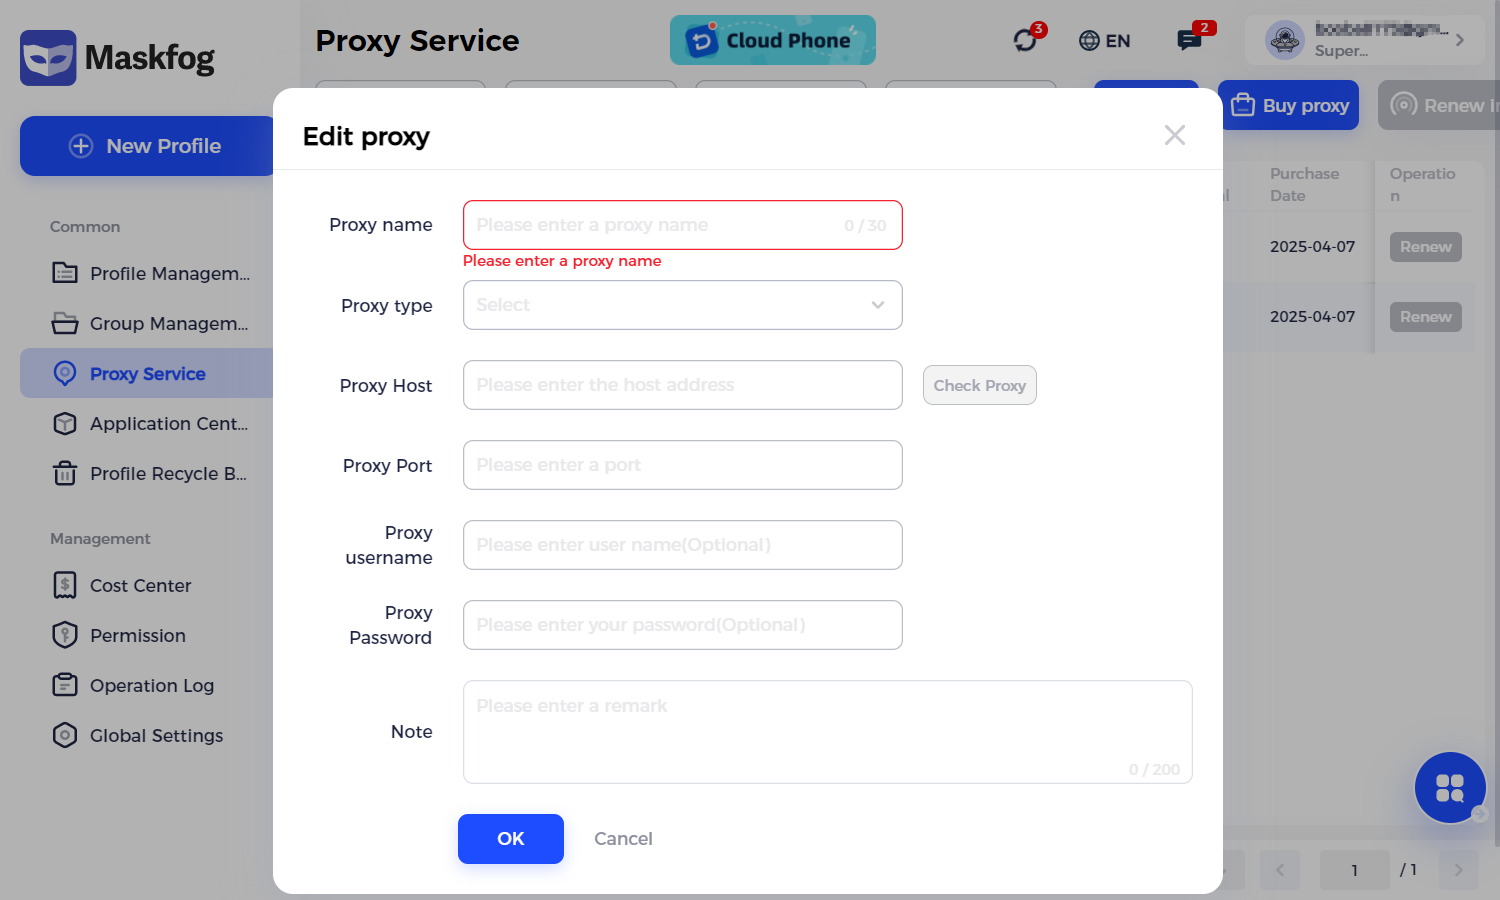
2. Enter the "Proxy Service" option and click "Configure Device".

3. After filling in the Proxy name, select the proxy protocol. It should be noted that it needs to be consistent with the proxy information just created.
Paste the proxy information obtained from Swiftproxy in sequence.
4. After filling in, click "OK".
5. Click "New Profile" to create a new browser.
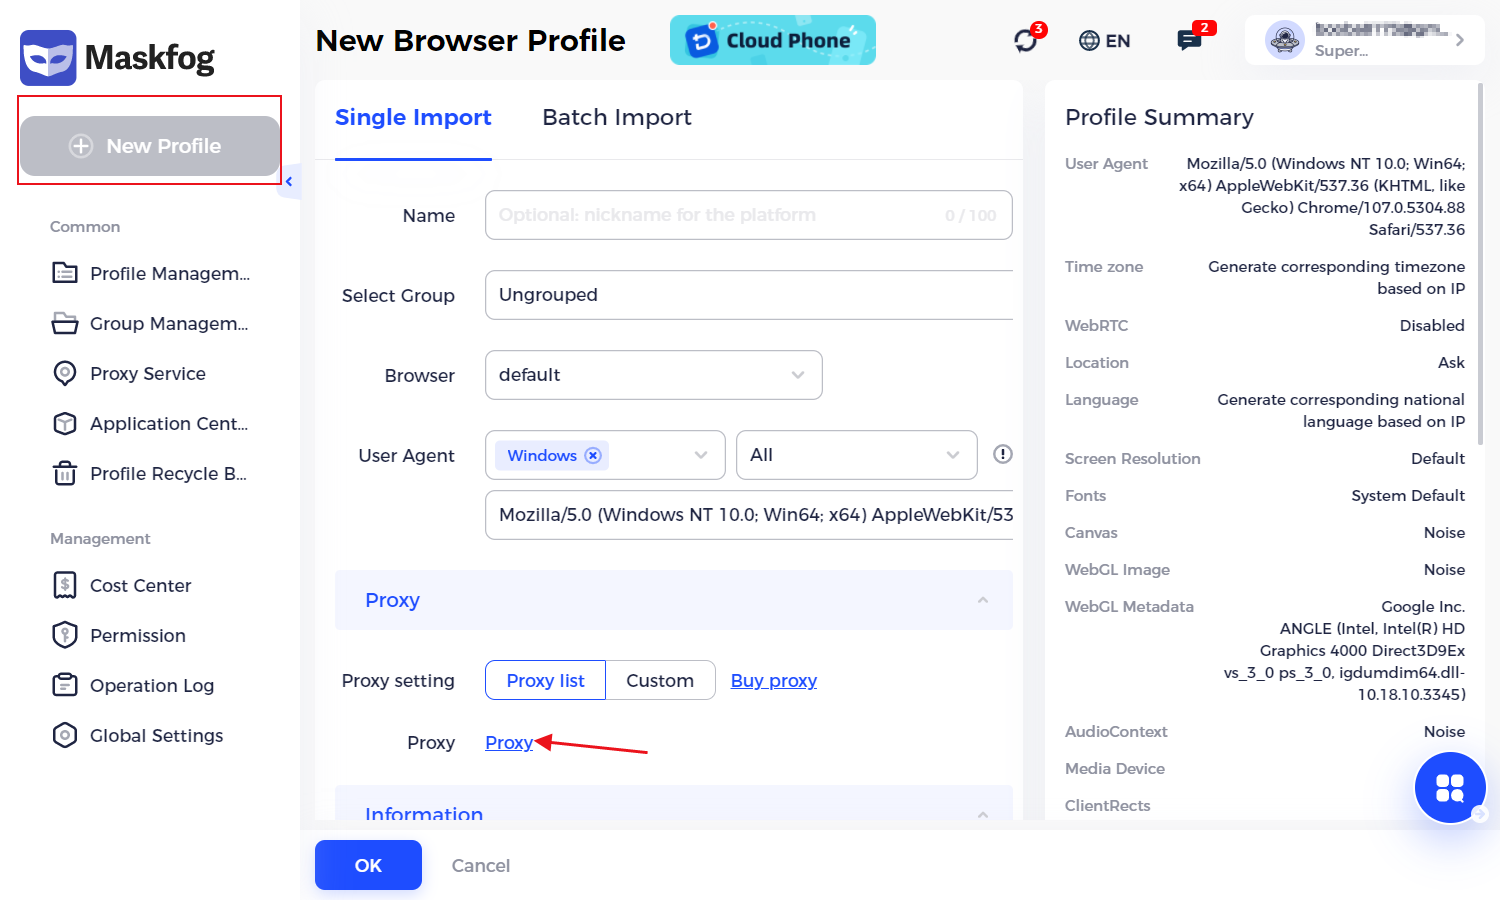
6. Select to bind the proxy just created and save it.
At this time, open the MaskFog software, run the browser that has been created, You can see that your Maskfog browser has perfectly hidden your real IP and fingerprint


