Why Choose Genlogin?
Genlogin streamlines your digital tasks by automating browser actions without the need for coding, boosting productivity with multi-threading for simultaneous task execution. It offers seamless team collaboration through easy role and access management, ensuring efficient coordination. Additionally, Genlogin provides opportunities to earn money via its Affiliate Program and GenStore, with a transparent dashboard for effortless monetization. Whether you're looking to automate, collaborate, or profit, Genlogin is the all-in-one solution for optimizing your workflows.
Configuring Genlogin with Swiftproxy Residential Proxy
2. Launch the app, create an account, and log in.
3. Once log in, tap "Add Profile" at the sidebar:
4. After 3 steps, visit the Swiftproxy dashboard and configure your proxies. We are using Random IPs from United States of America with IP rotation on each request using HTTP/HTTPS protocol in this case.

5. Copy the first proxy string and save it for later use in Genlogin.
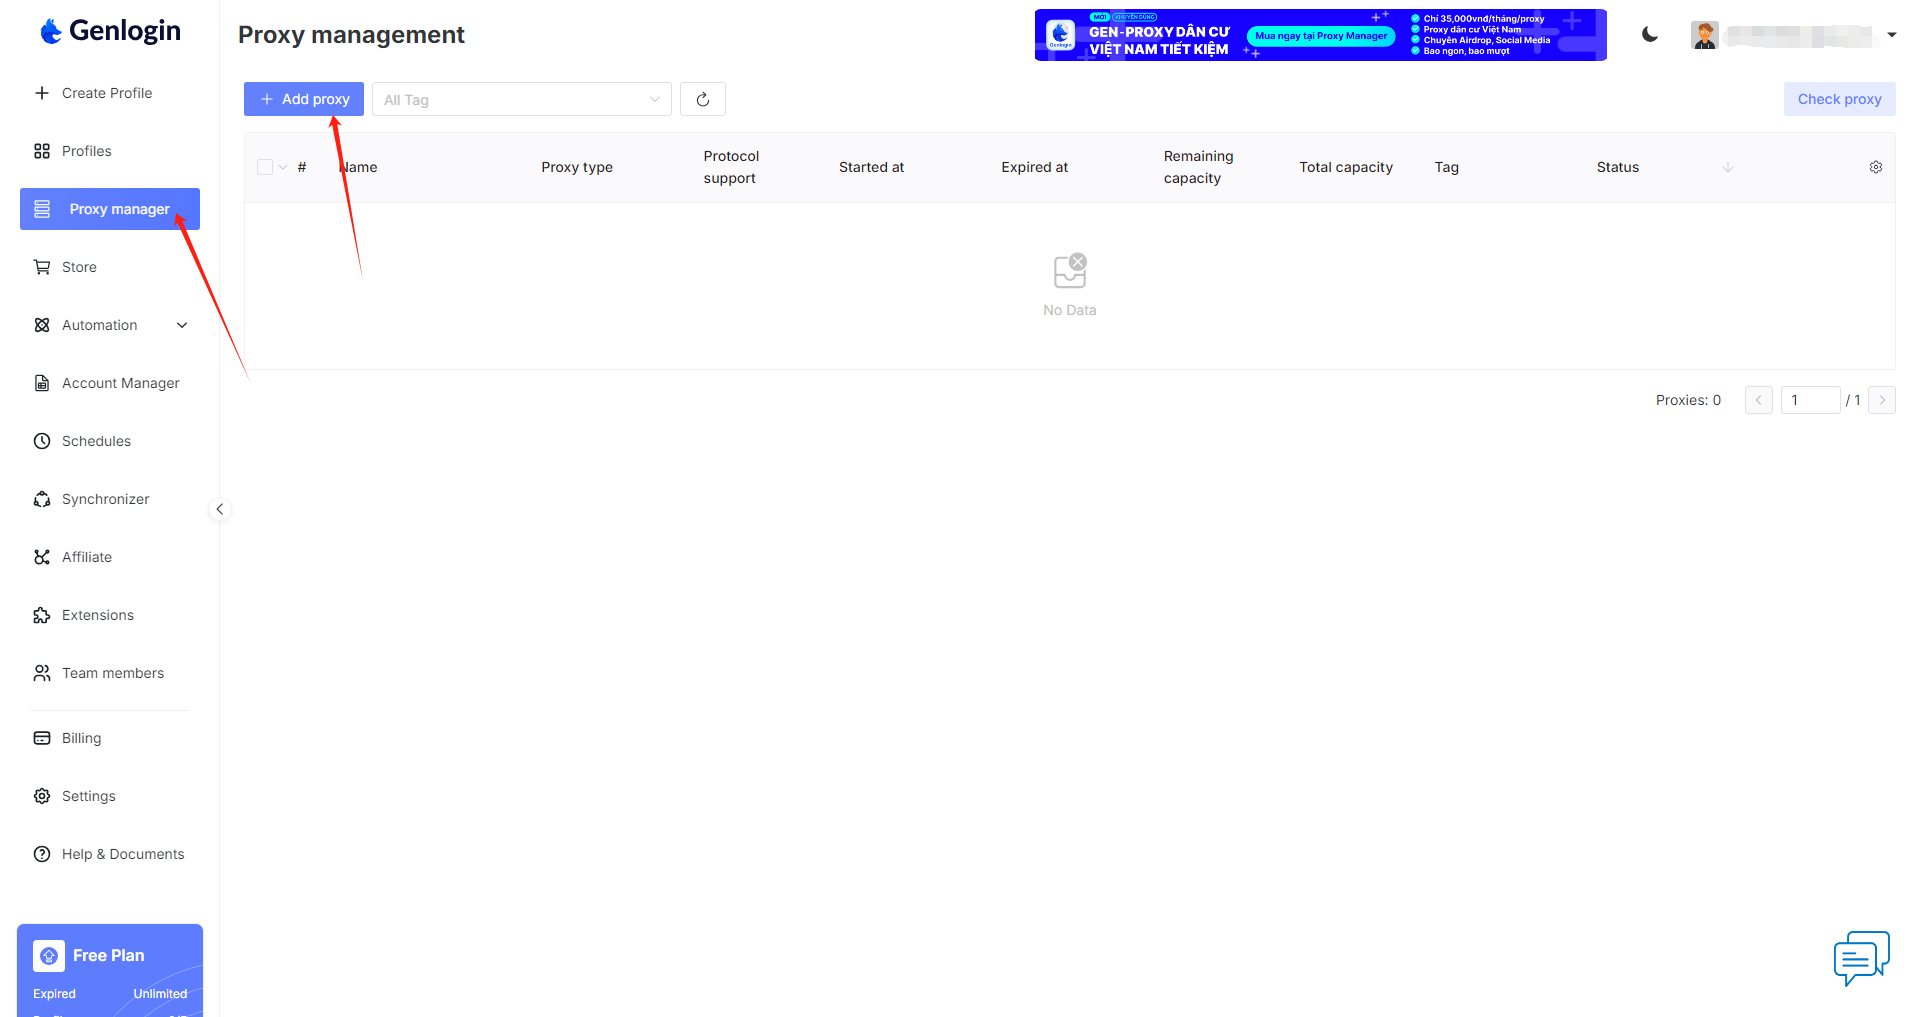
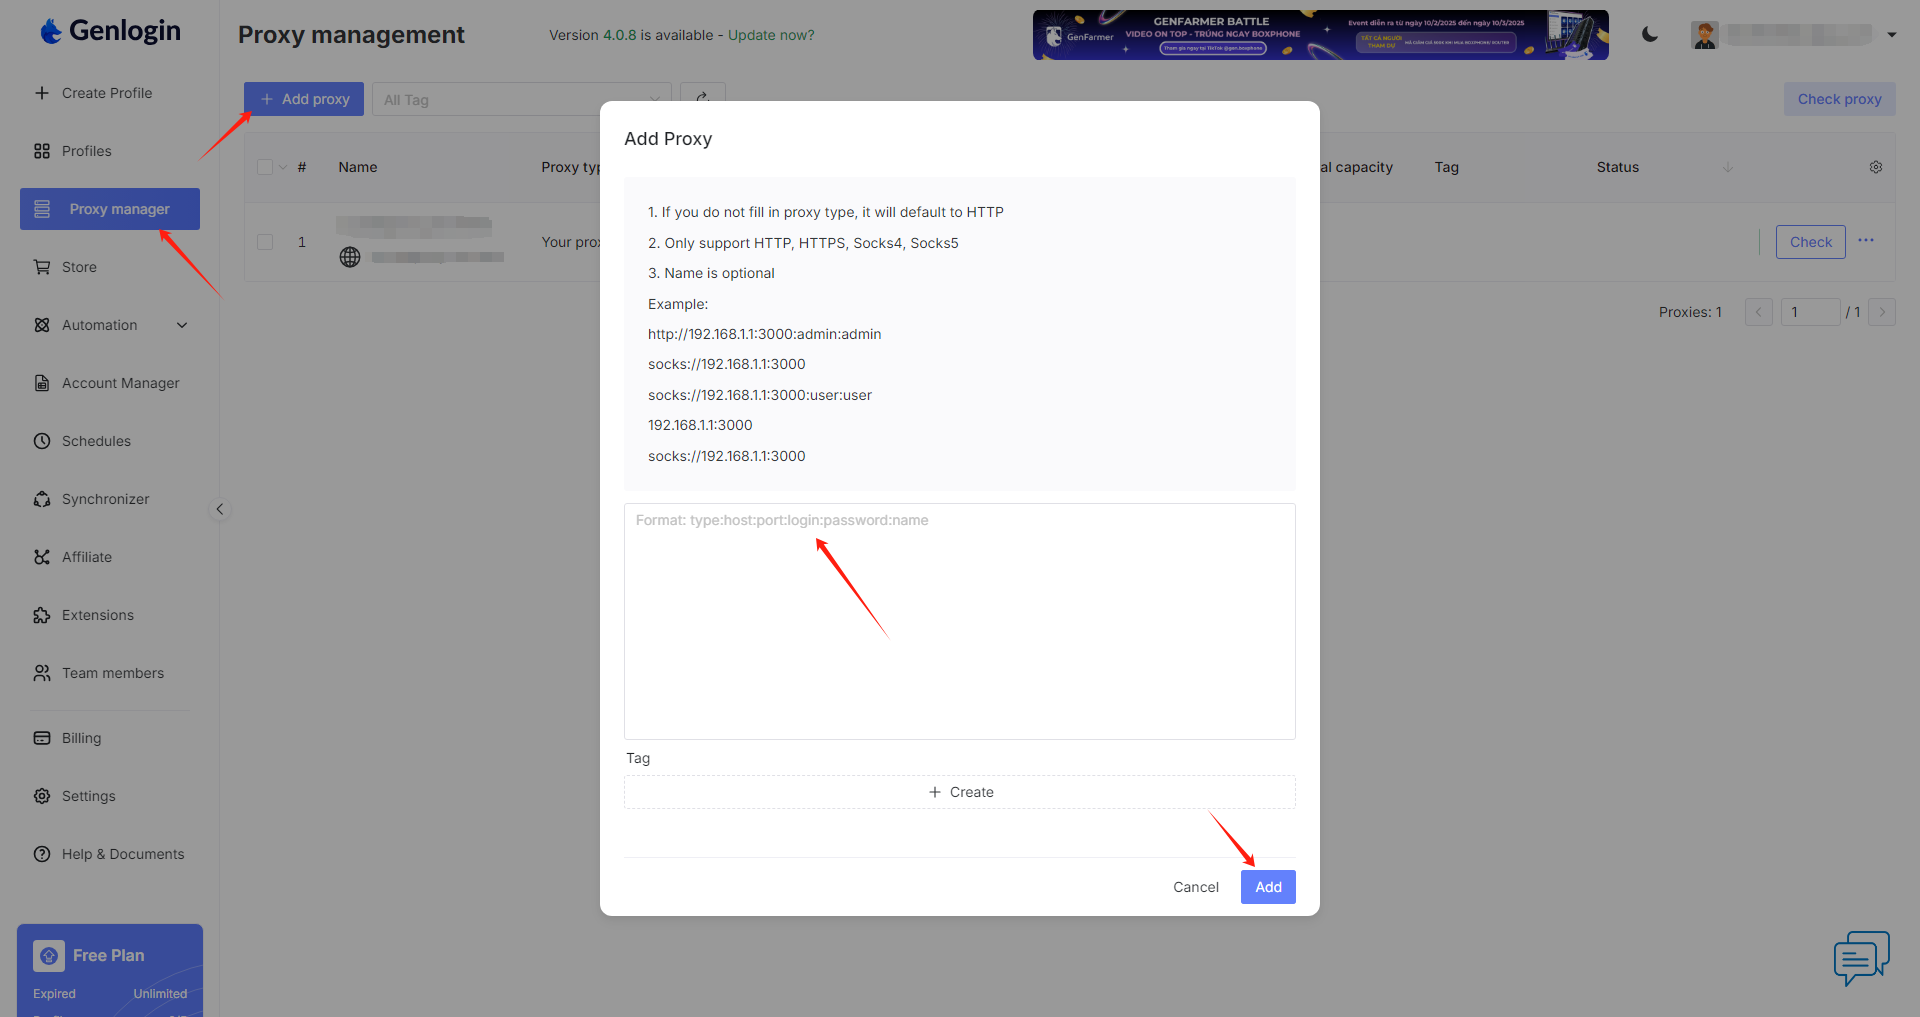
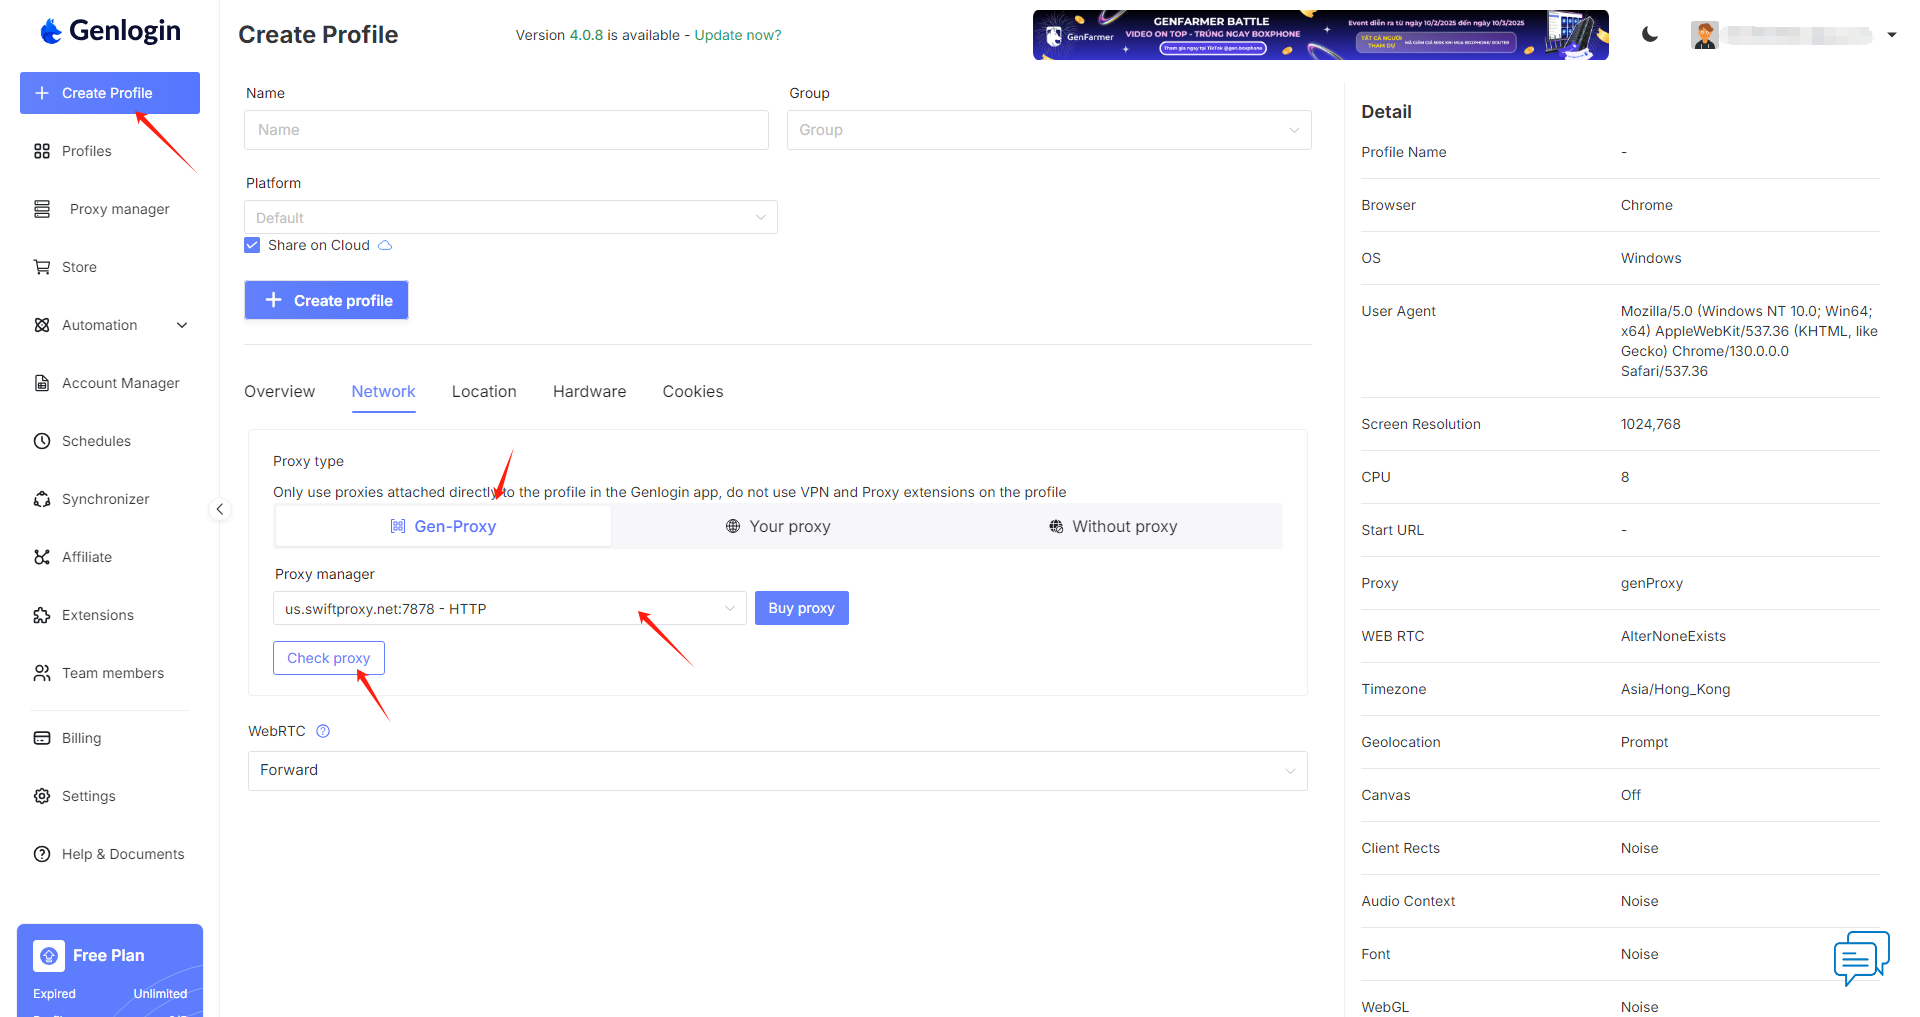
6. Back to Proxy configuration in Genlogin, paste the proxy string we copied from Swiftproxy dashboard, click "add" in the end.
7. Click "Create Profile" and choose "Gen-Proxy", in the proxy manager section select the proxy we set up in step 6, and click "check" will allow you to quickly check the functionality of the proxy, if the proxy is valid, click "Creat profile" in the end. Remember to give this new profile a name to make it easier to find it.
8. Click "Profile" and select "Local", tap "Start" to open the browser window: 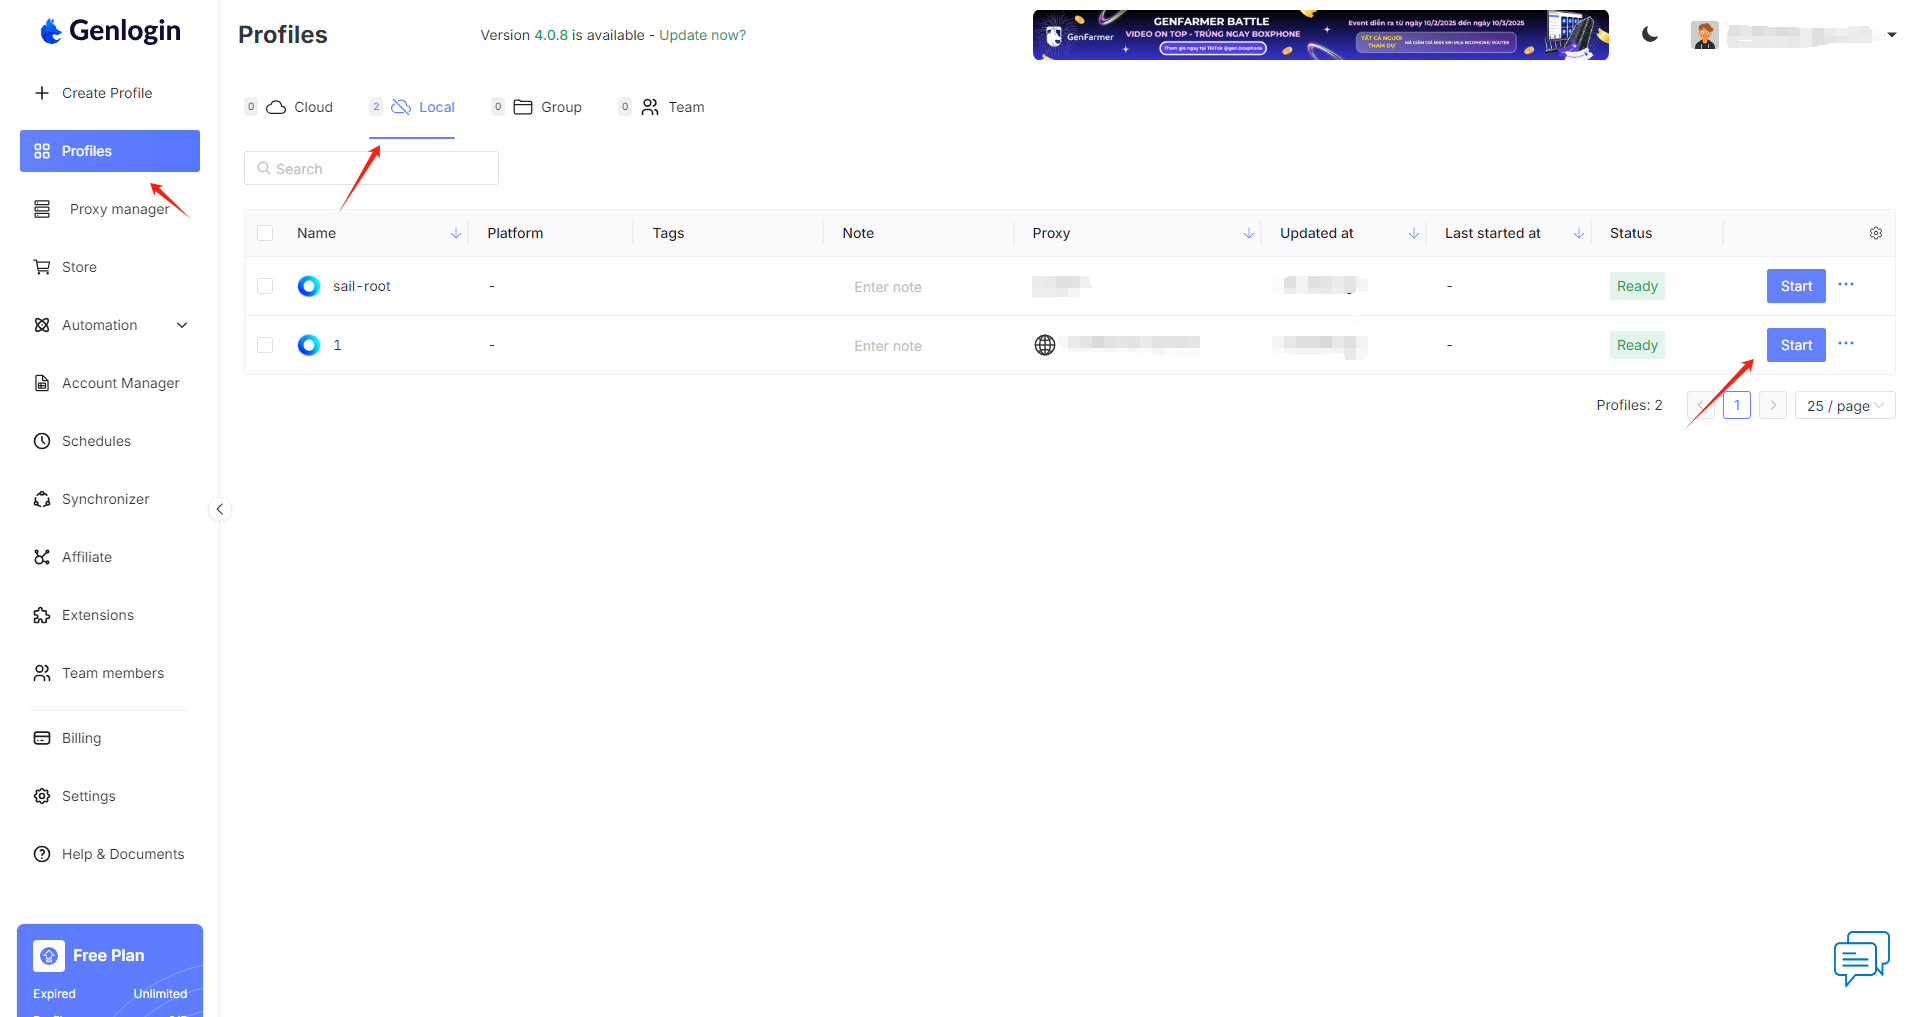
Configuring Genlogin with Swiftproxy Static Proxy.
1. The first three steps are the same as the first three steps of the previous part
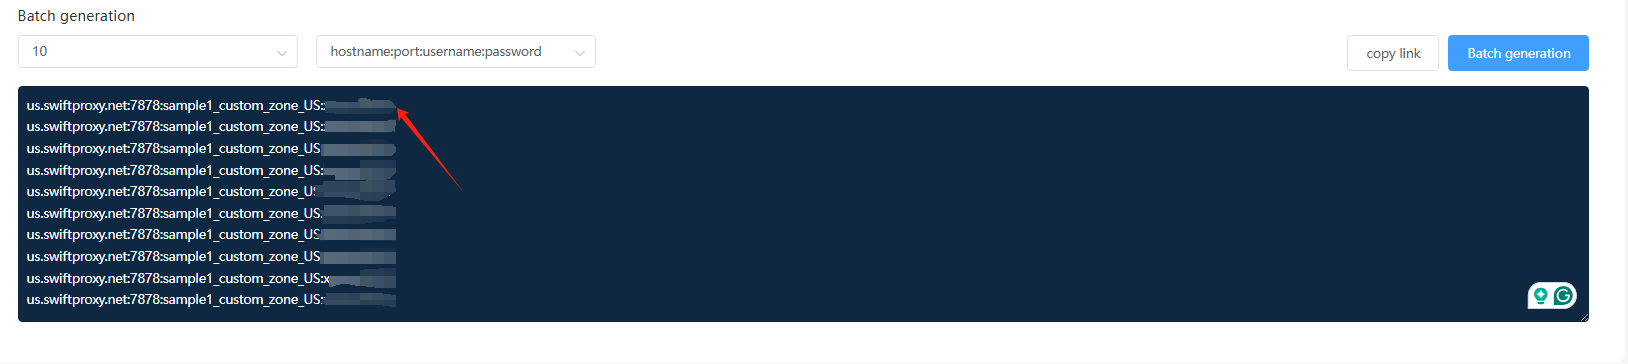
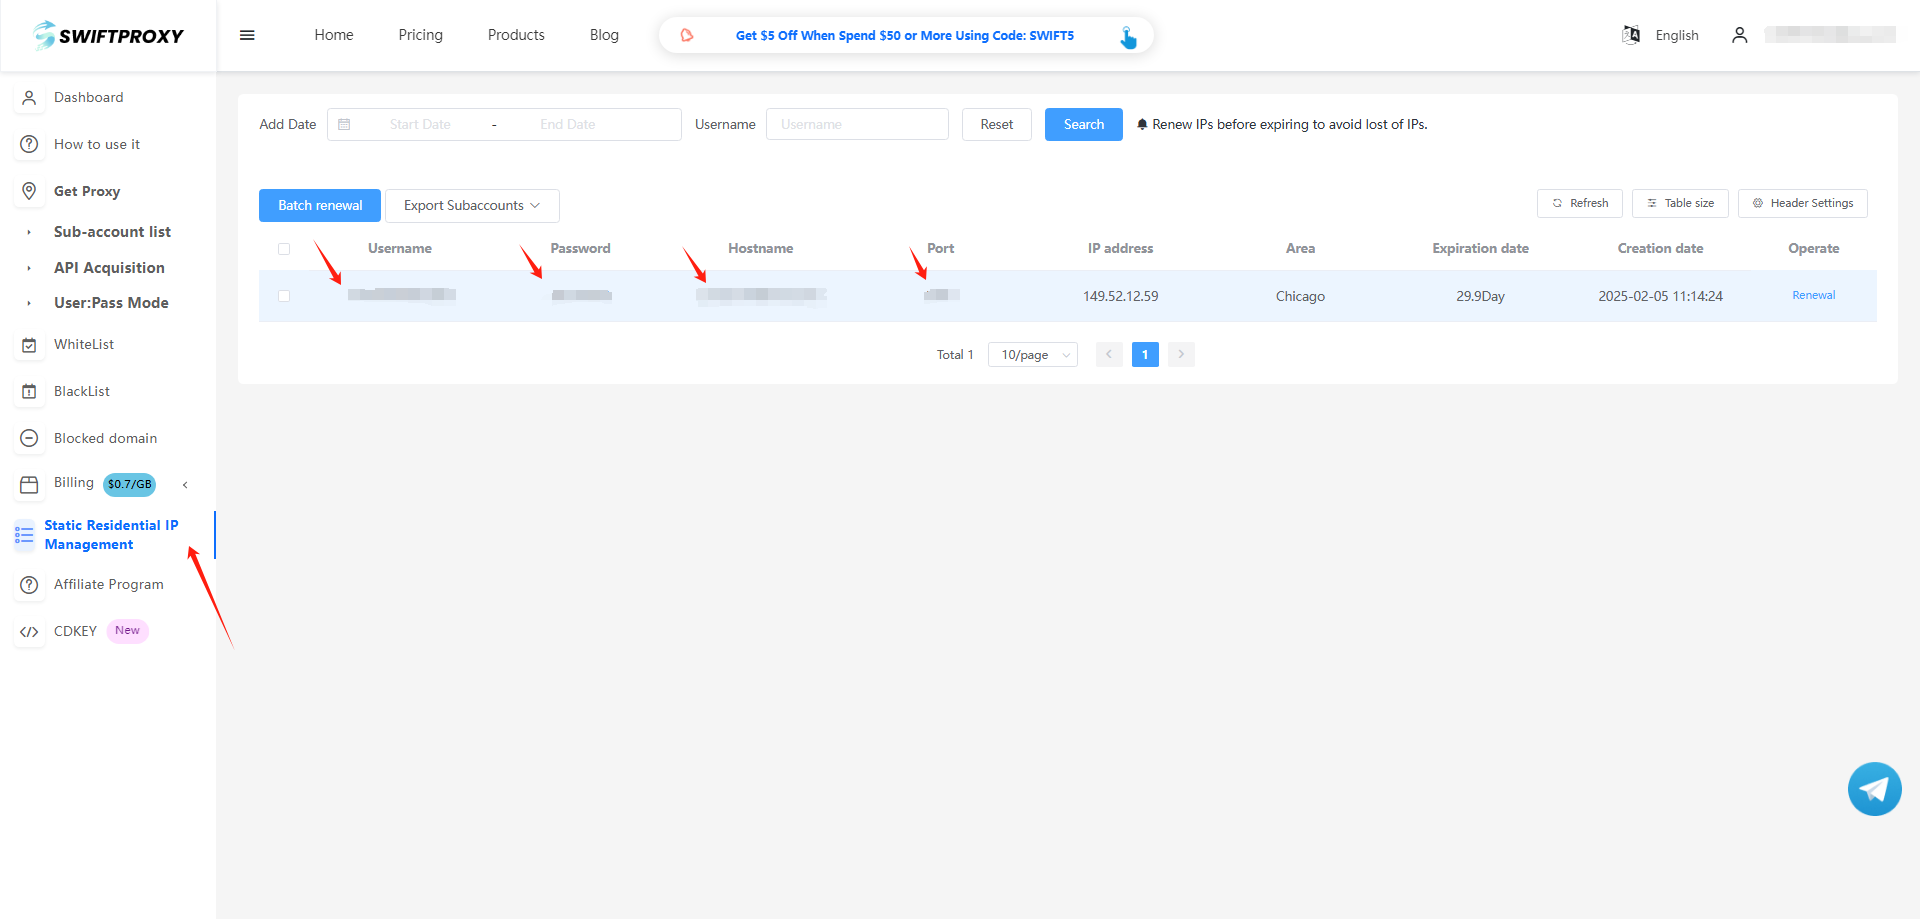
2. Then, visit the Swiftproxy dashboard and copy Username, Password, Hostname and Port.
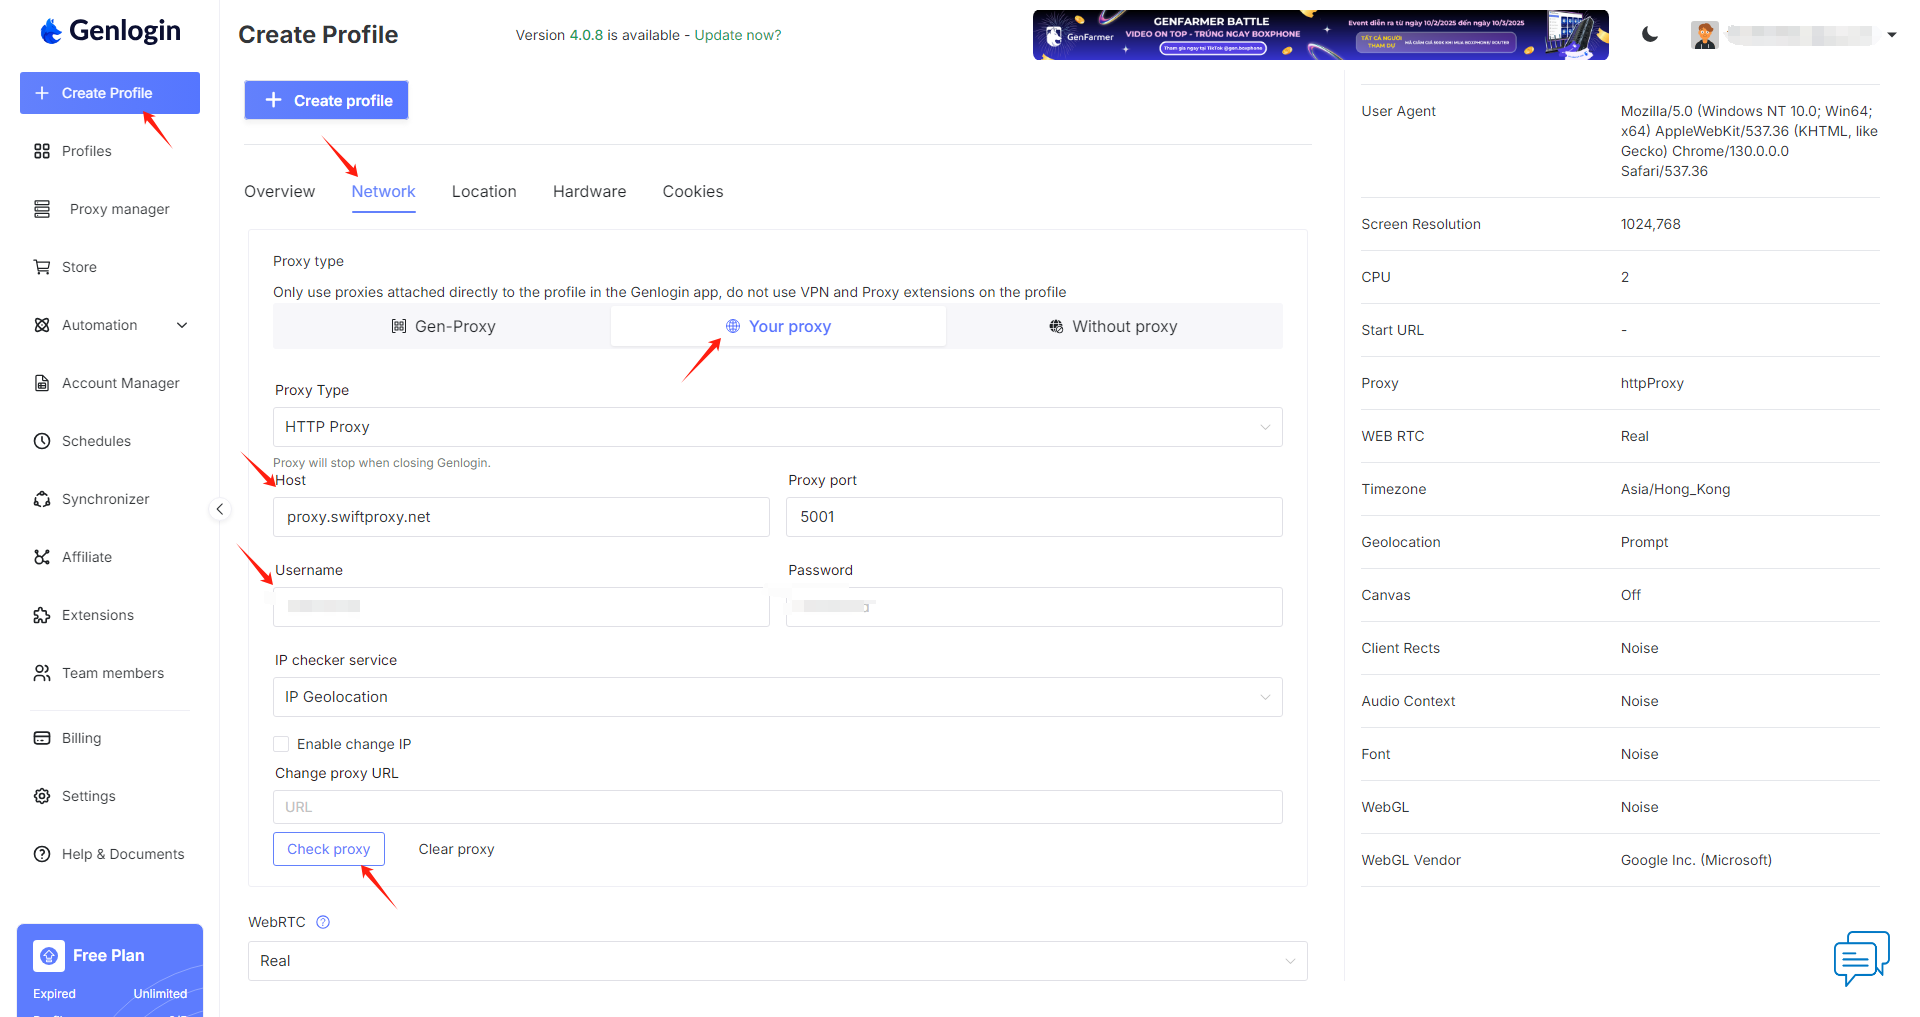
3. Click "Create Profile" and choose "You Proxy".
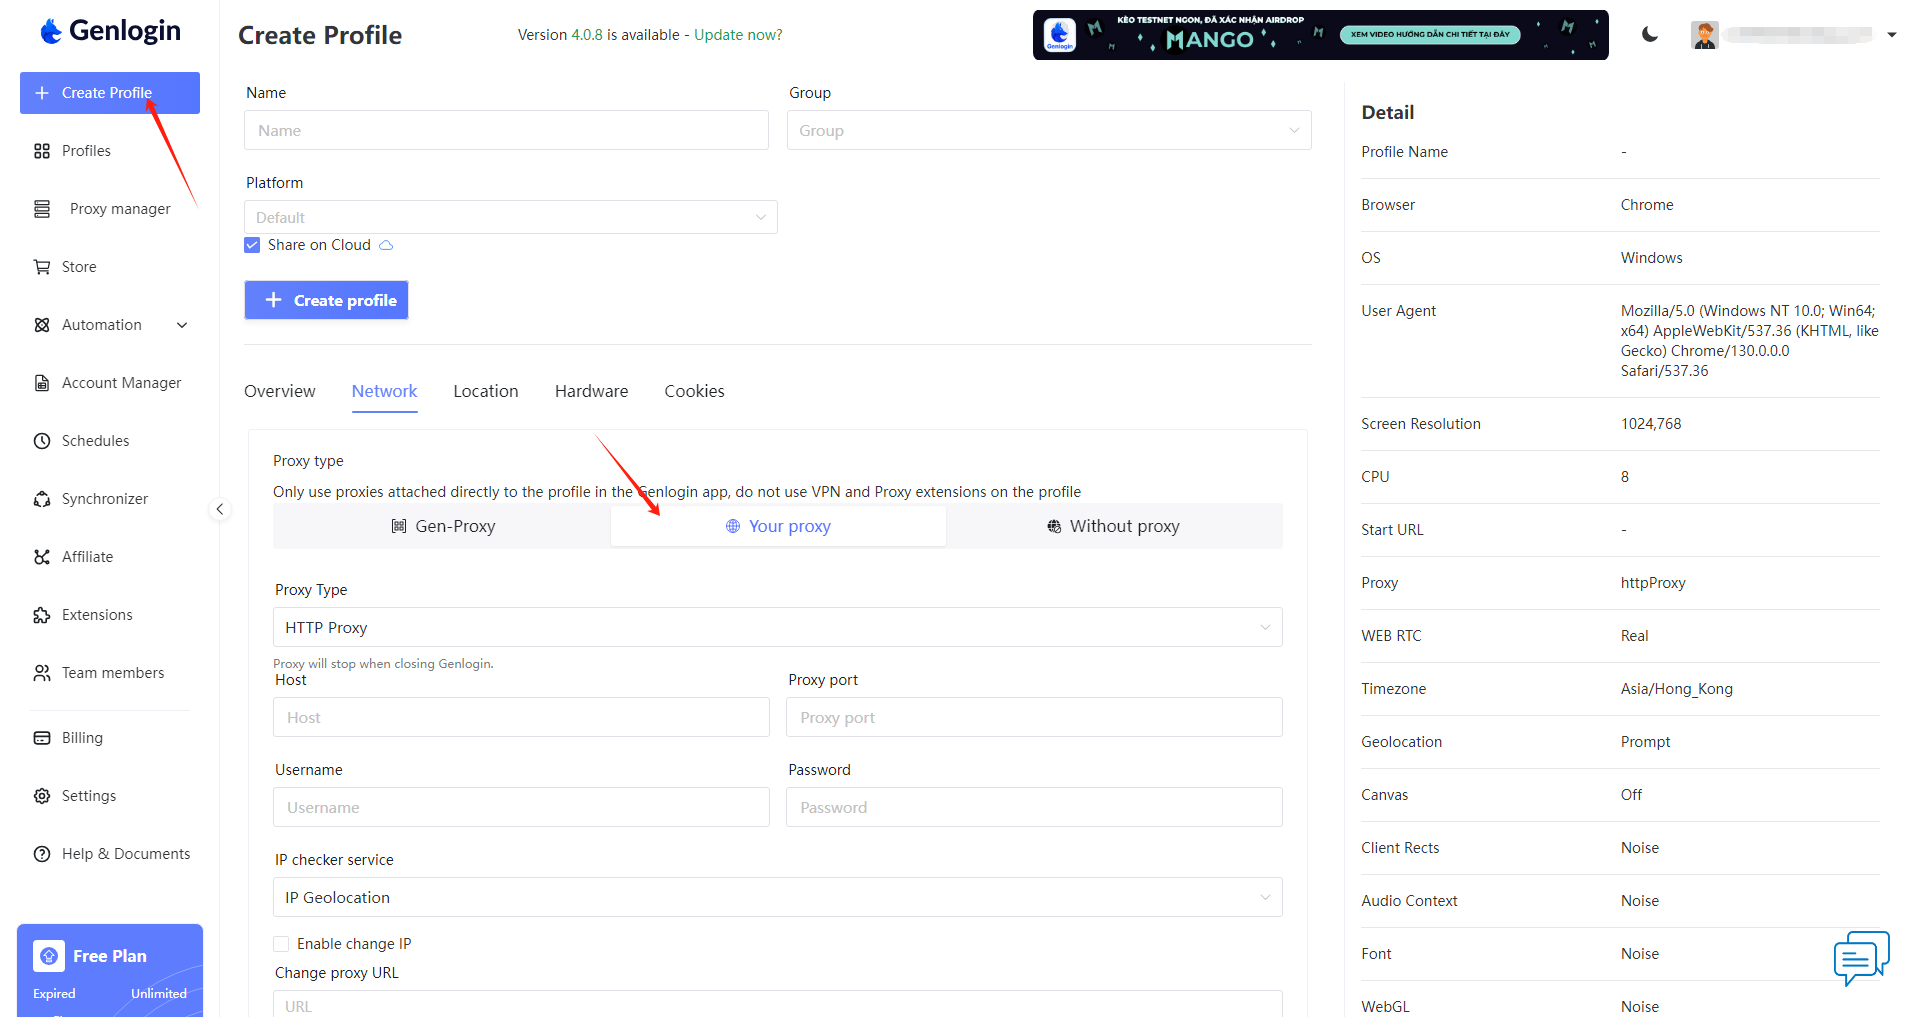
4. Back to Proxy configuration in Genlogin, and paste the proxy information we copied from Swiftproxy dashboard, click "Create Profile" in the end.