Configuring Incogniton Yunlogin Browser with Swiftproxy Residential Proxy
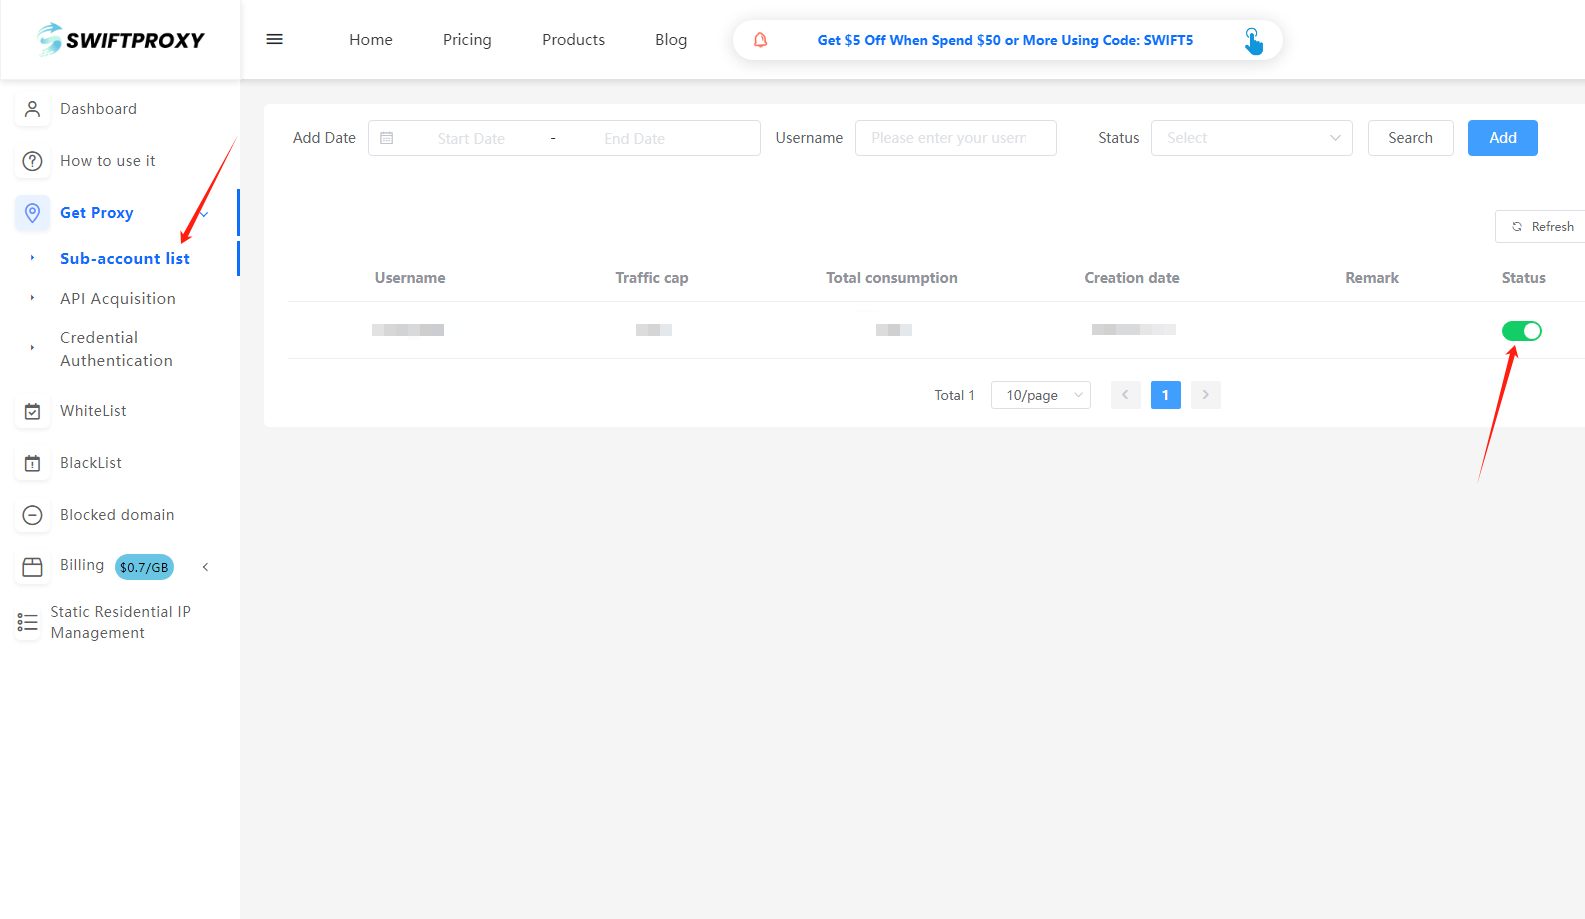
1. Create a Sub-Account
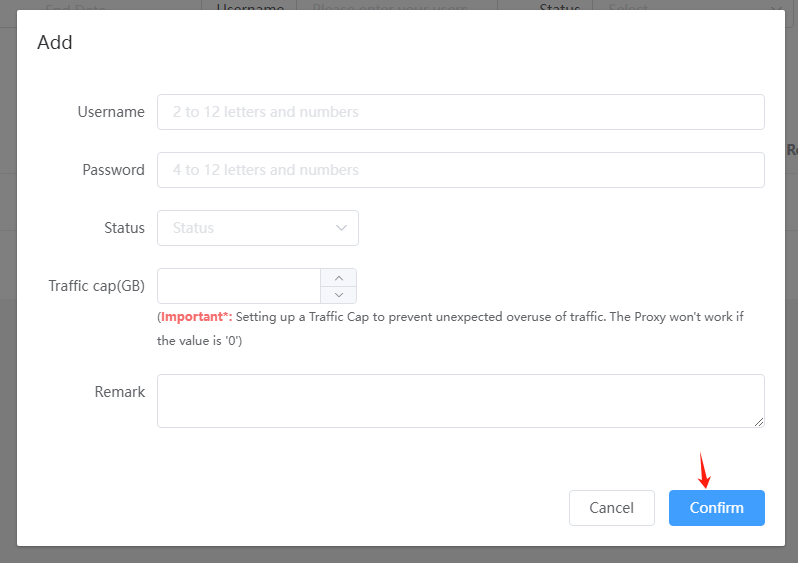
- After logging in, create a sub-account via your personal account dashboard.
- Ensure to change the sub-account status from "Pause" to "Enable" and set up a data usage cap (Traffic Cap) to prevent unexpected overuse.
- Hit "Confirm" to finish creating the sub-account.
2. Access "Get Proxy" and Configure Settings
- Head to the "Get Proxy" section and select "Credential Authentication".
- Configure your residential proxy based on your needs. For example, select "Random in North America".
Note: Swiftproxy offers two IP types:
- Sticky Session: For sticky IP, select the IP stabilization time (e.g., if set to 3 minutes, the IP will change every 3 minutes).
- Rotation Mode: IPs will change every time it is requested.
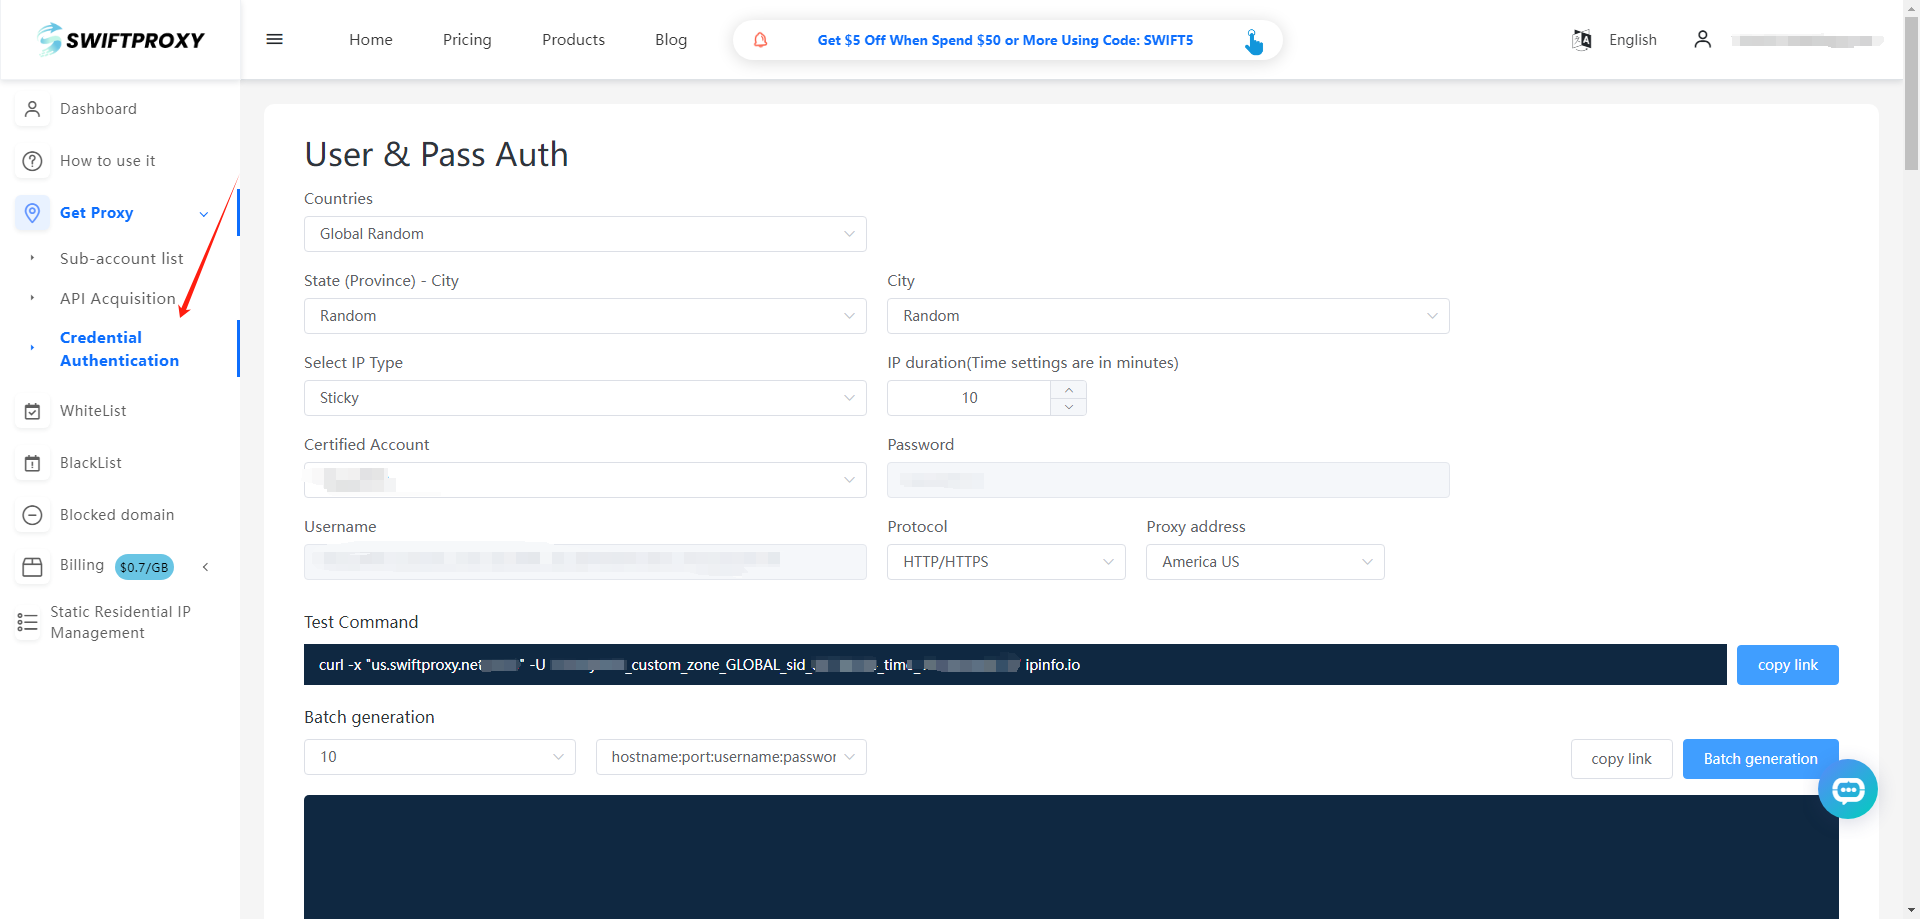
3. Finish Proxy Extraction
- Tap "Copy link" or "Batch Generation" to finish the proxy extraction.
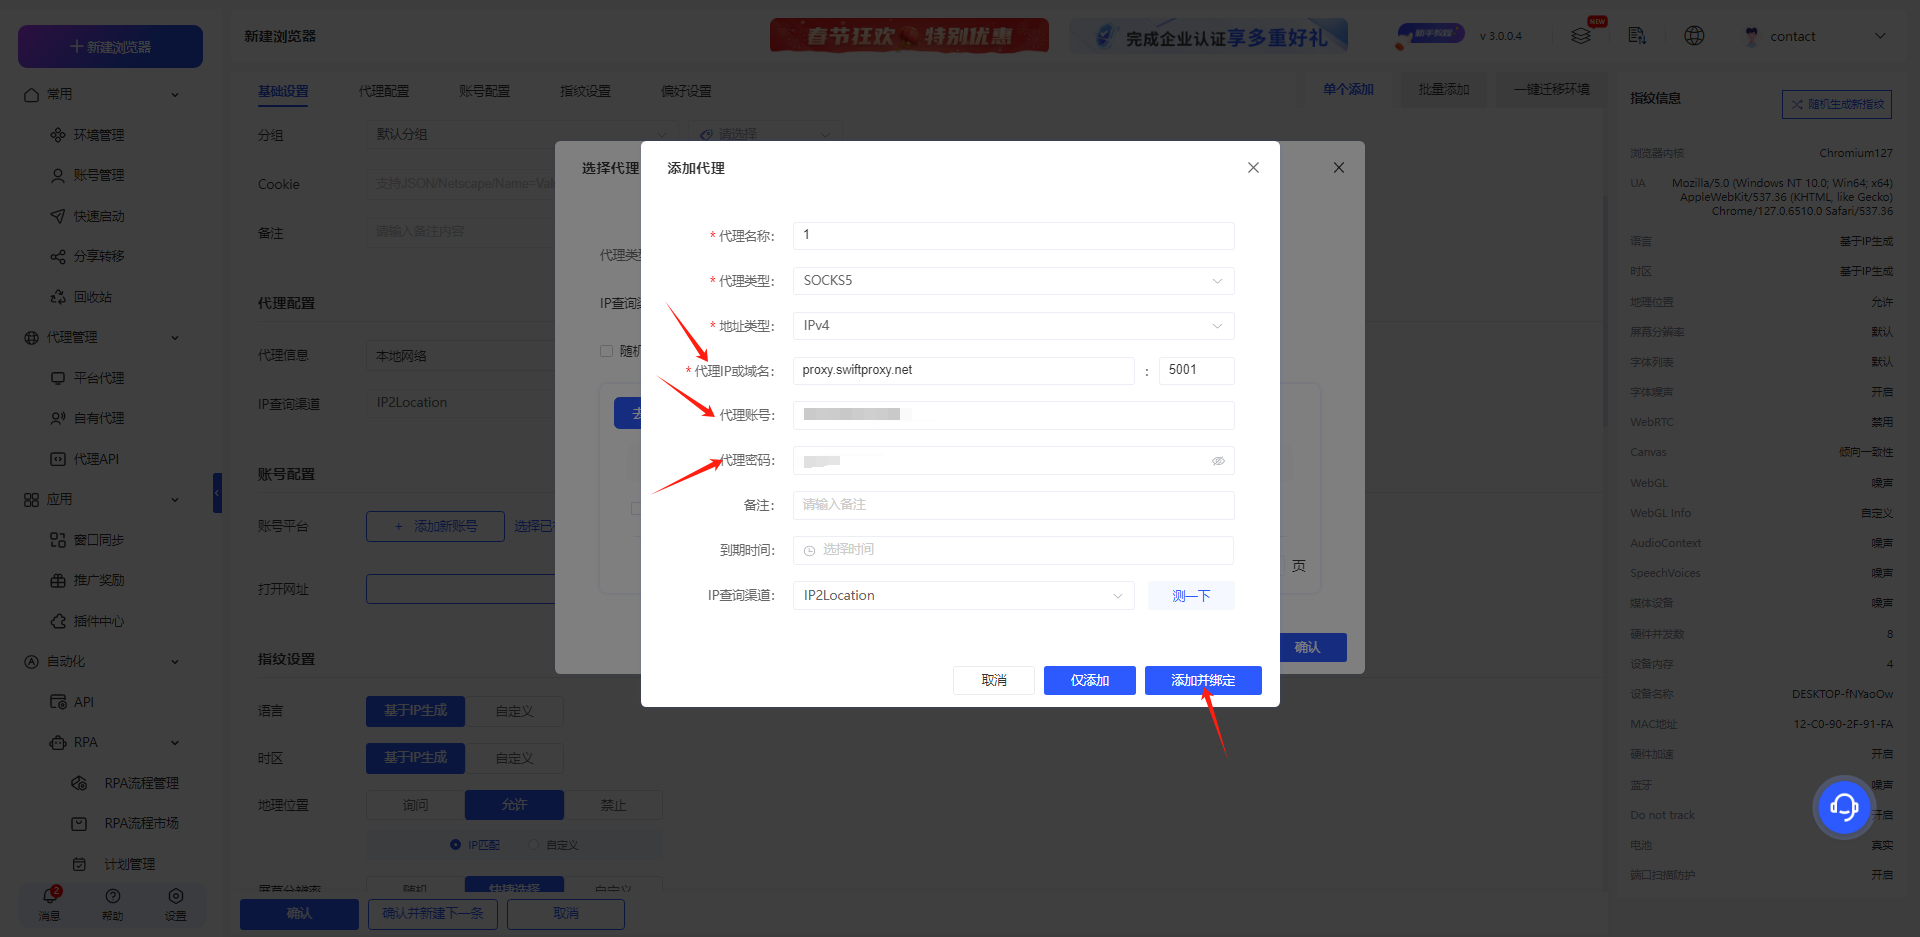
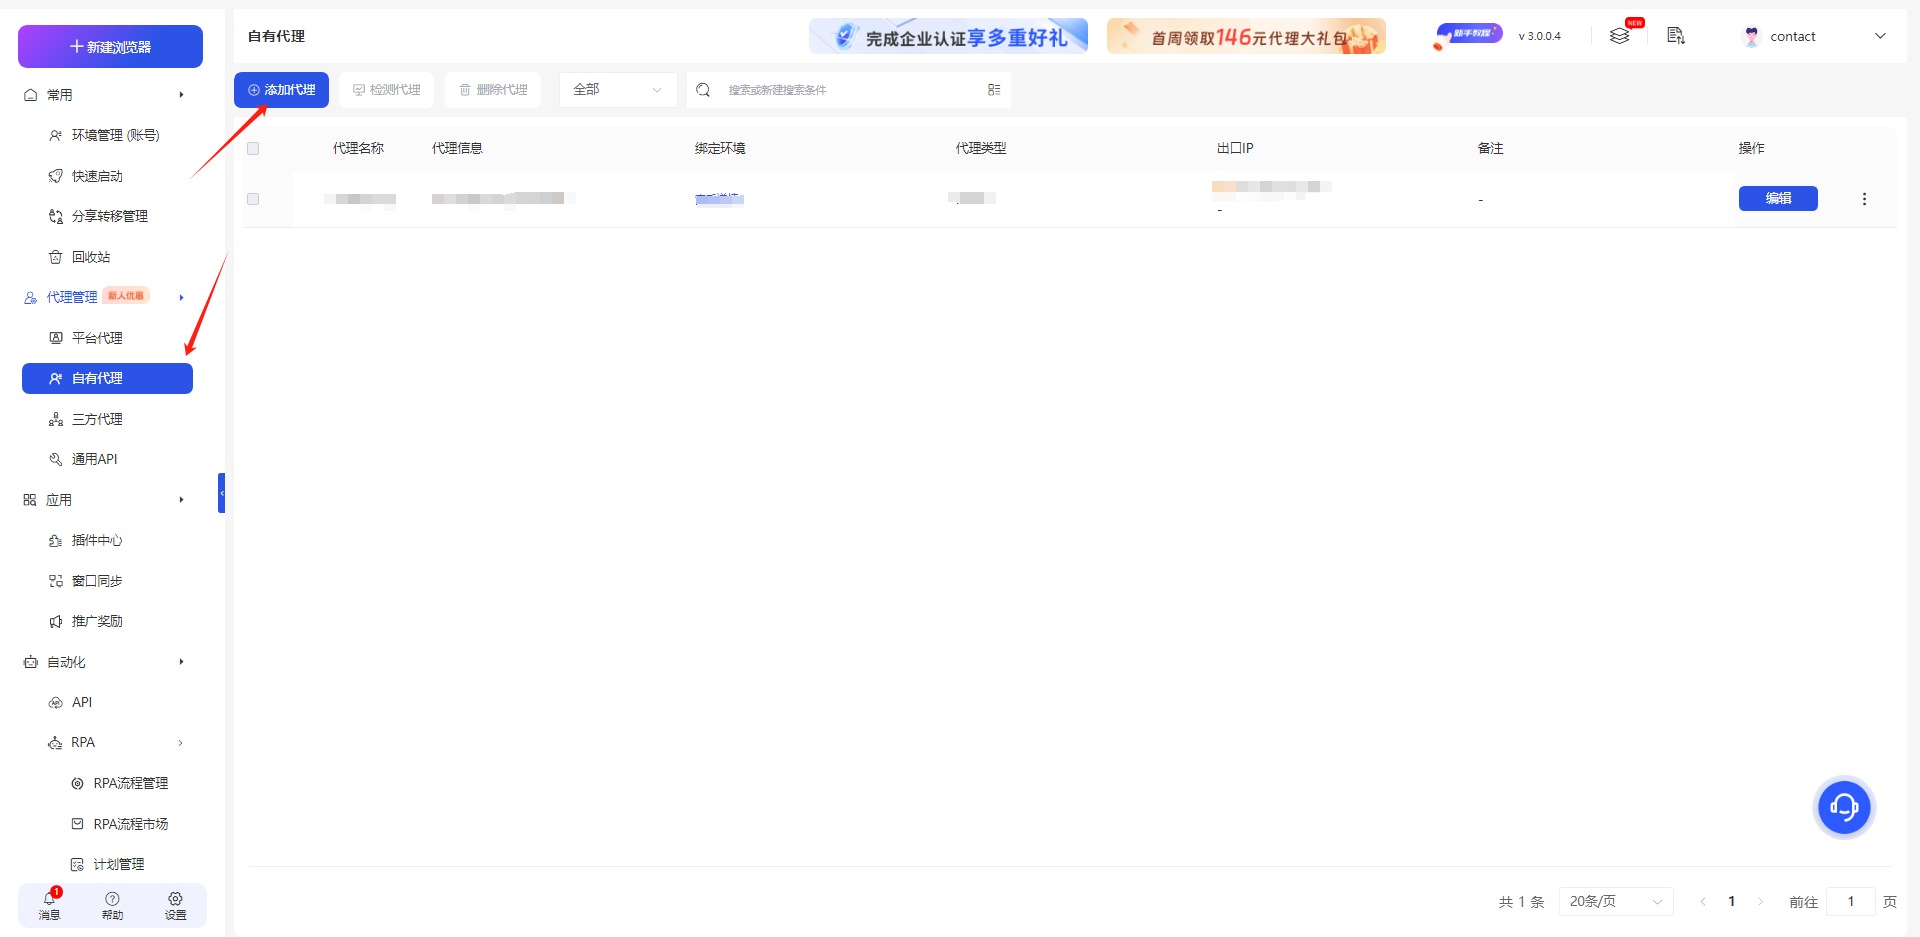
4. Setting on Yunlogin Browser
- Download Yunlogin Browser from the official website.
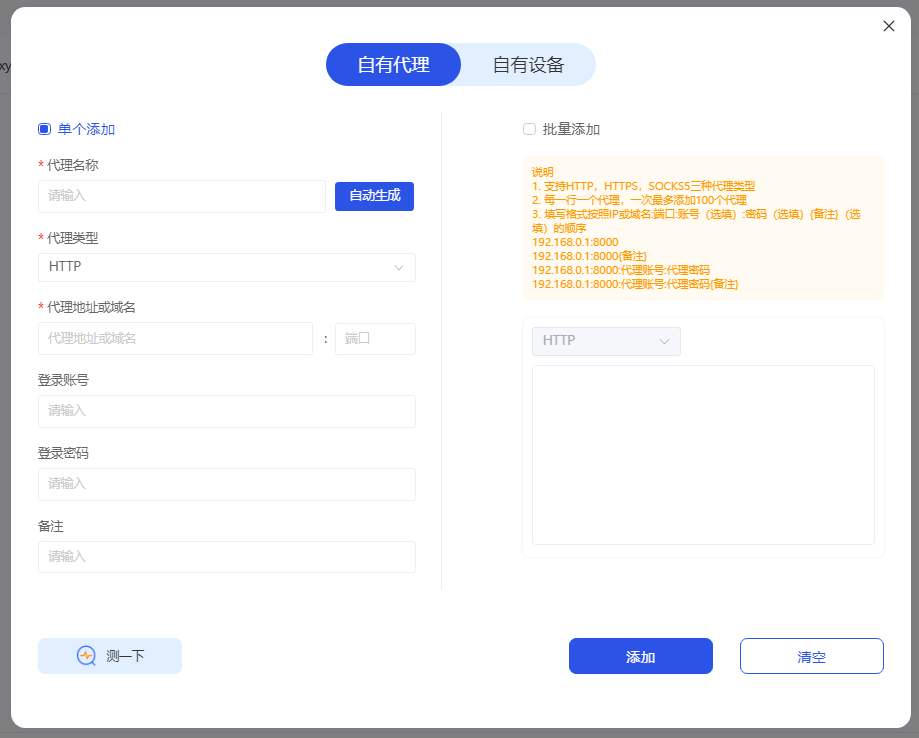
- Launch the app, hit"Own Proxy"on the left side, and hit "Add Proxy", hit "Confirm"to finish adding.
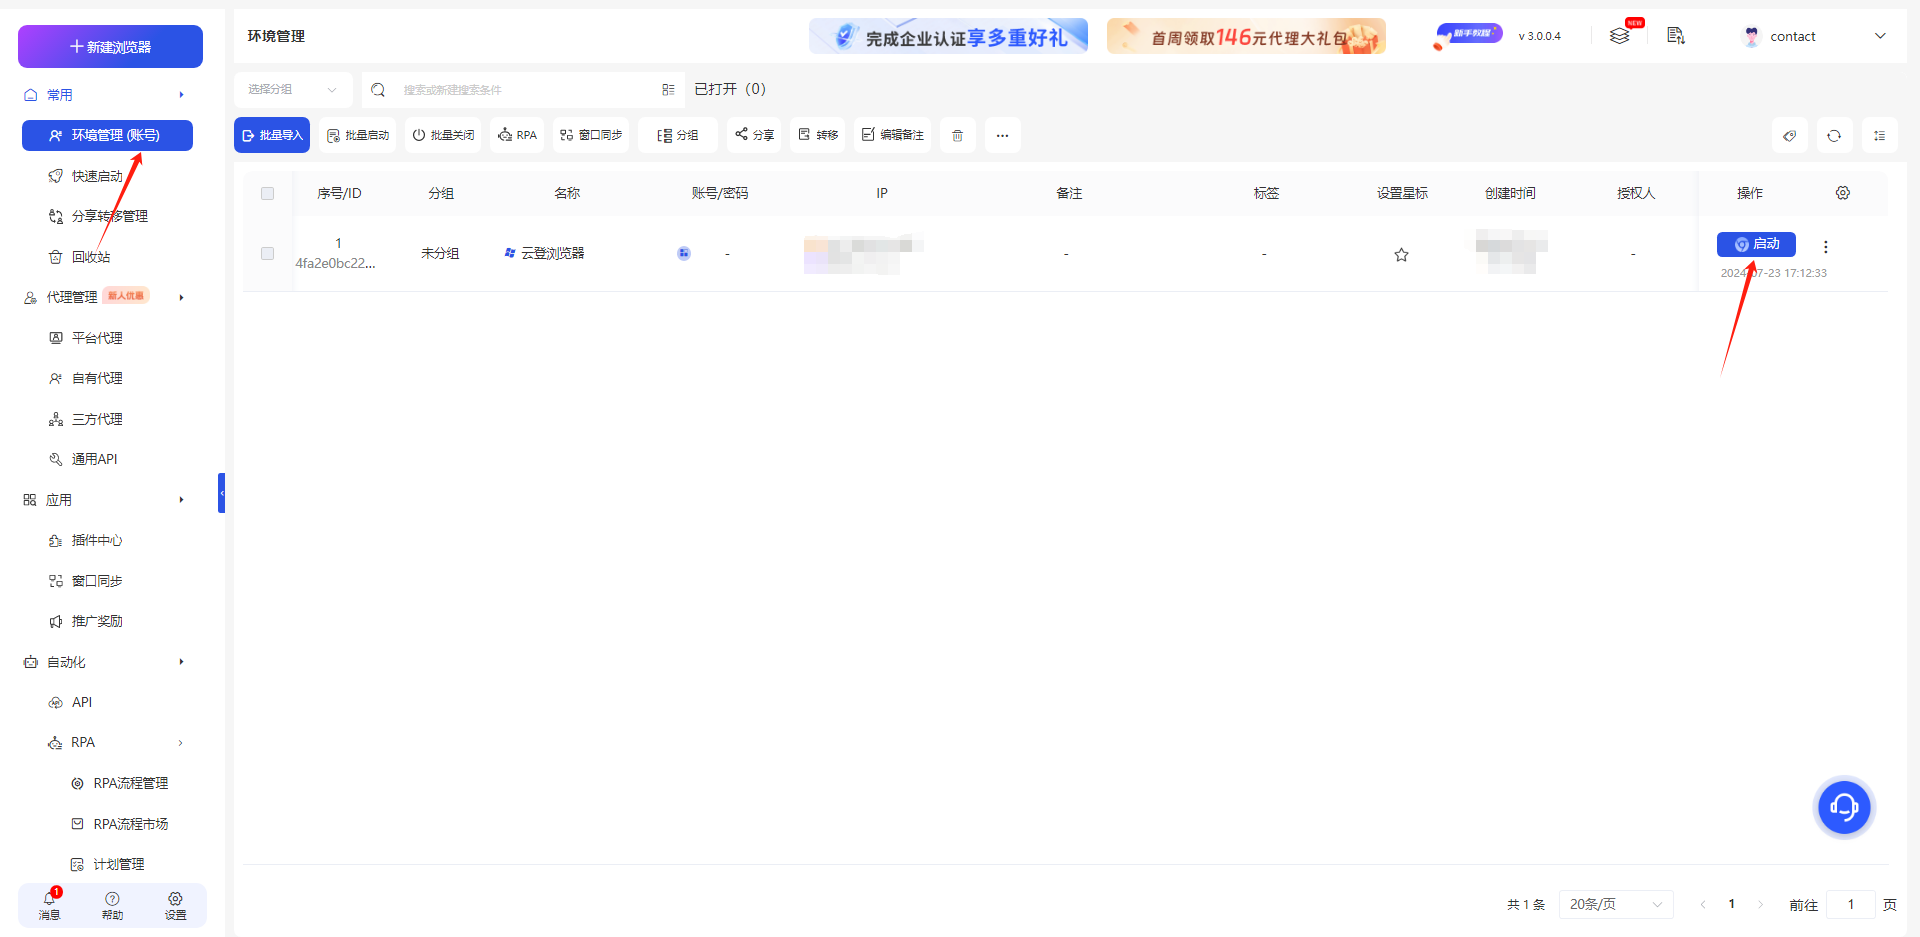
5. Completing the setup
- Hit"Environment Management (Account)"and hit"Enable"to complete the settings.
Configuring Incogniton Yunlogin Browser with Swiftproxy Static Proxy
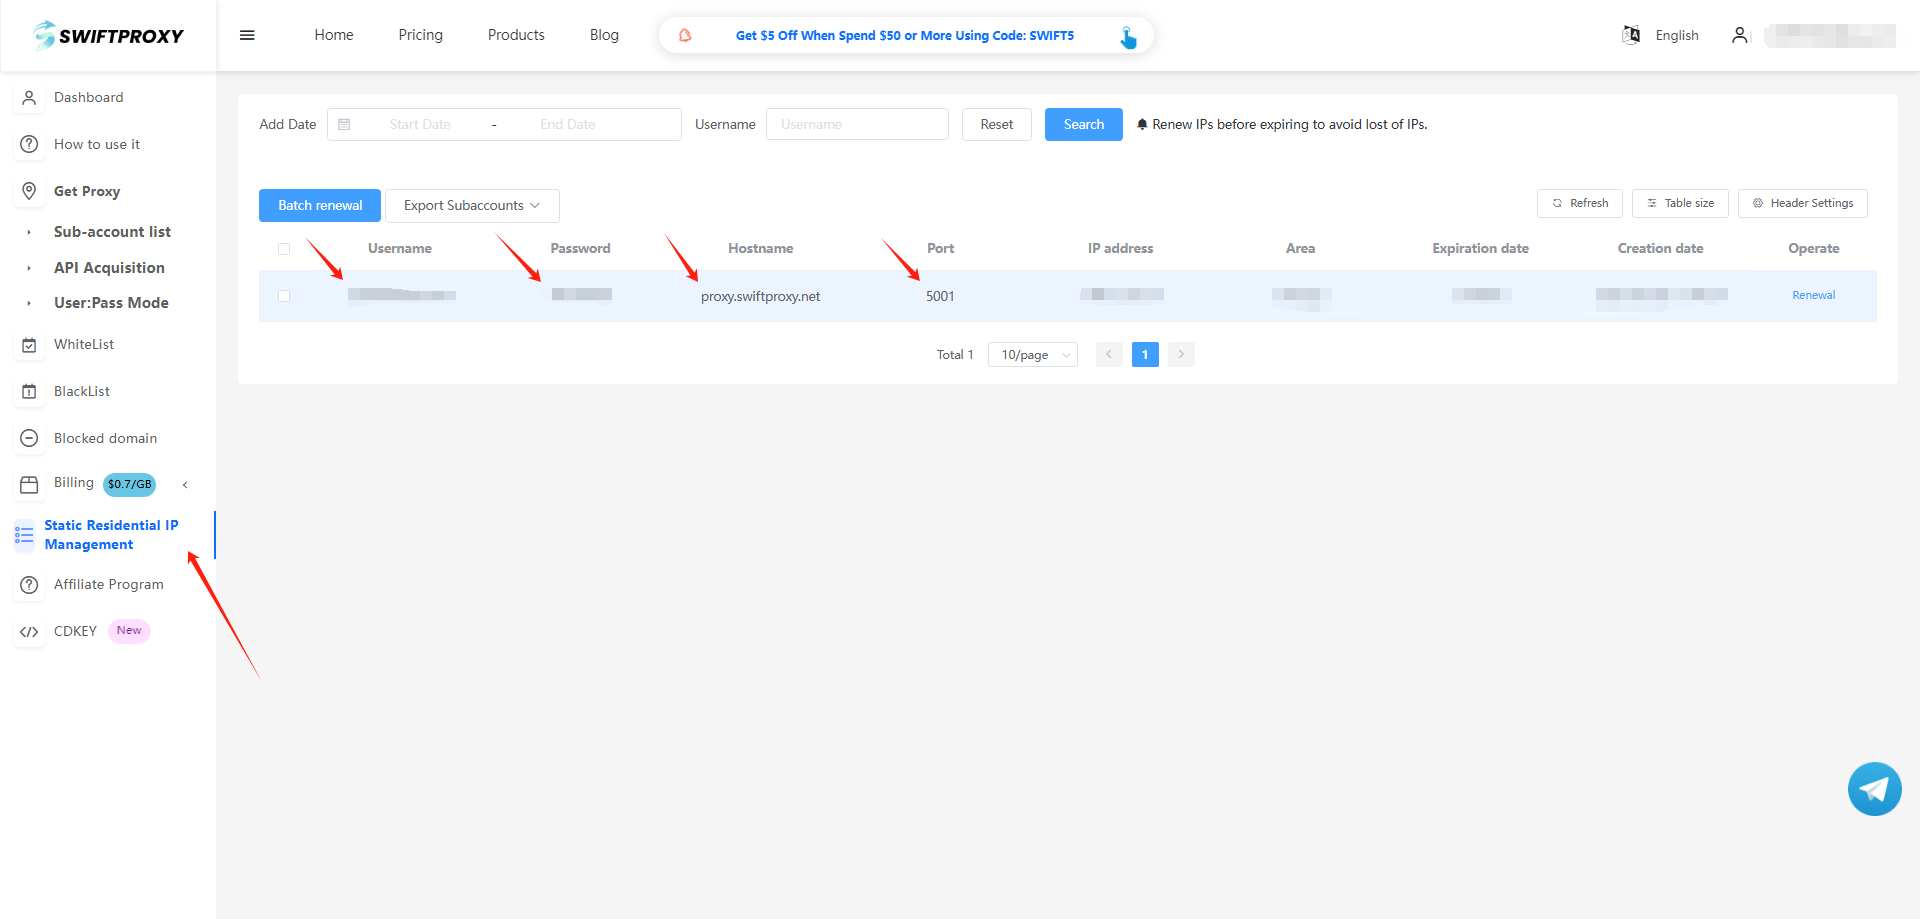
1. Visit the Swiftproxy dashboard and copy Username, Password, Hostname and Port.
2. Back to Proxy configuration in Yunlogin, paste the proxy information we copied from Swiftproxy dashboard, click "Save" in the end.