


Configuring Yunlogin with Swiftproxy

2024-07-31 17:48:18
Configuring Incogniton Yunlogin Browser with Swiftproxy Residential Proxy
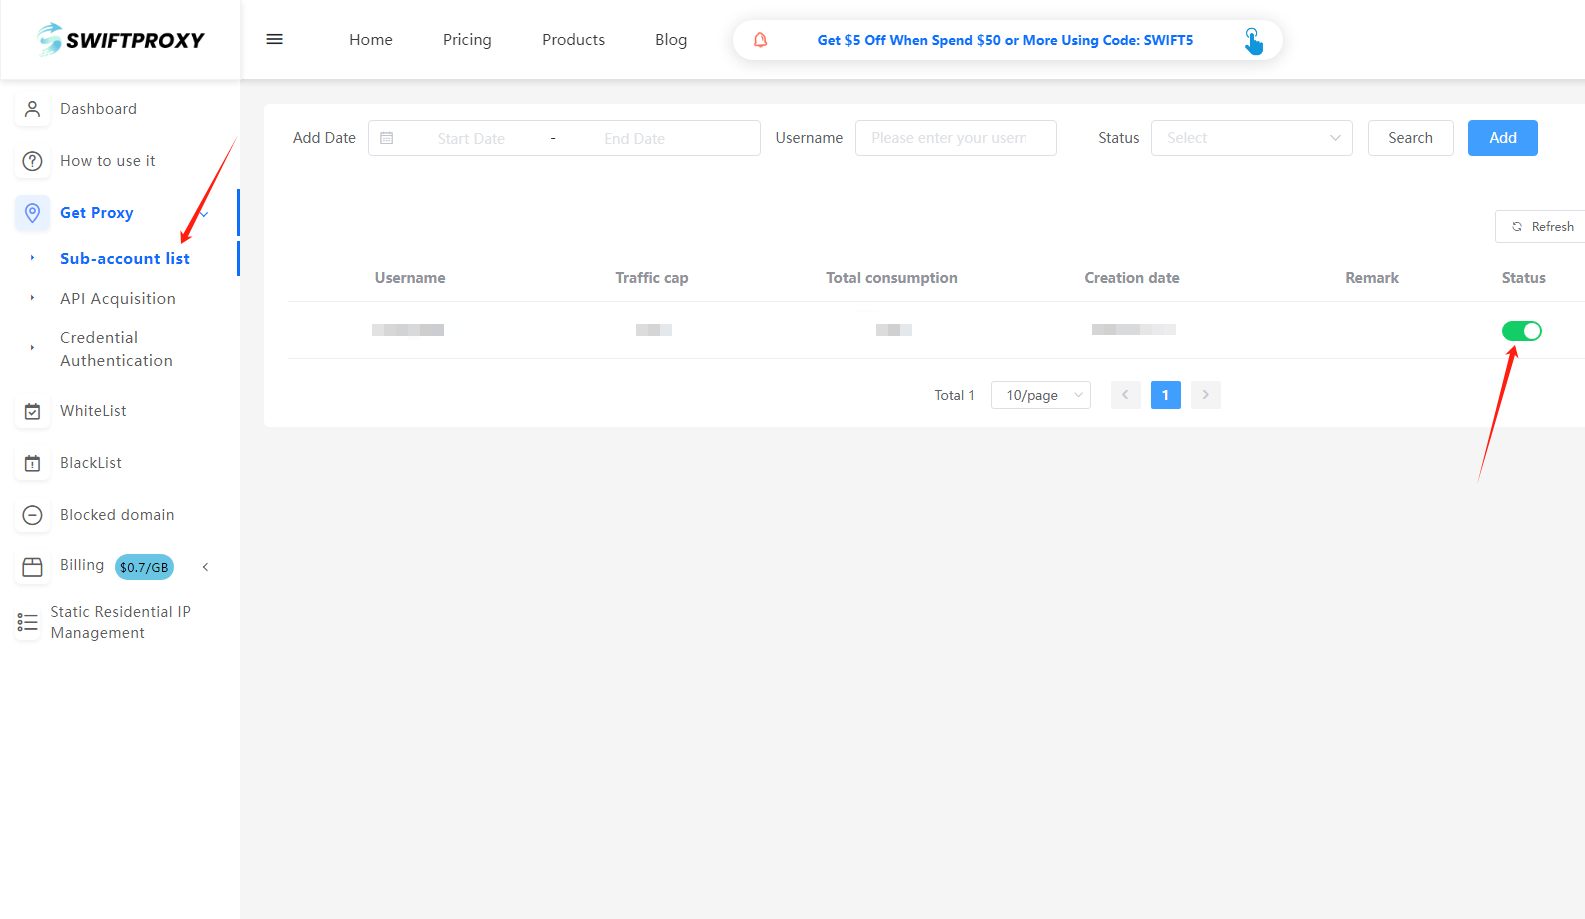
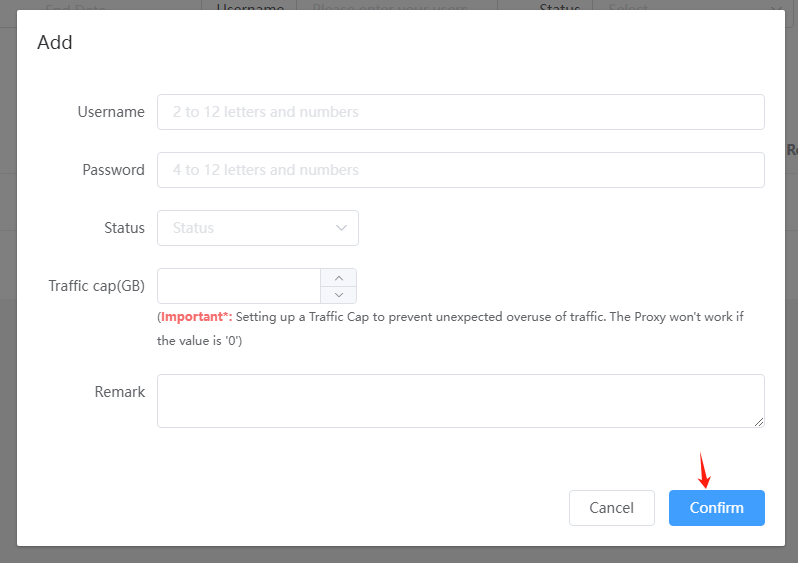
1. Create a Sub-Account
- After logging in, create a sub-account via your personal account dashboard.
- Ensure to change the sub-account status from "Pause" to "Enable" and set up a data usage cap (Traffic Cap) to prevent unexpected overuse.
- Hit "Confirm" to finish creating the sub-account.
2. Access "Get Proxy" and Configure Settings
- Head to the "Get Proxy" section and select "Credential Authentication".
- Configure your residential proxy based on your needs. For example, select "Random in North America".
Note: Swiftproxy offers two IP types:
- Sticky Session: For sticky IP, select the IP stabilization time (e.g., if set to 3 minutes, the IP will change every 3 minutes).
- Rotation Mode: IPs will change every time it is requested.
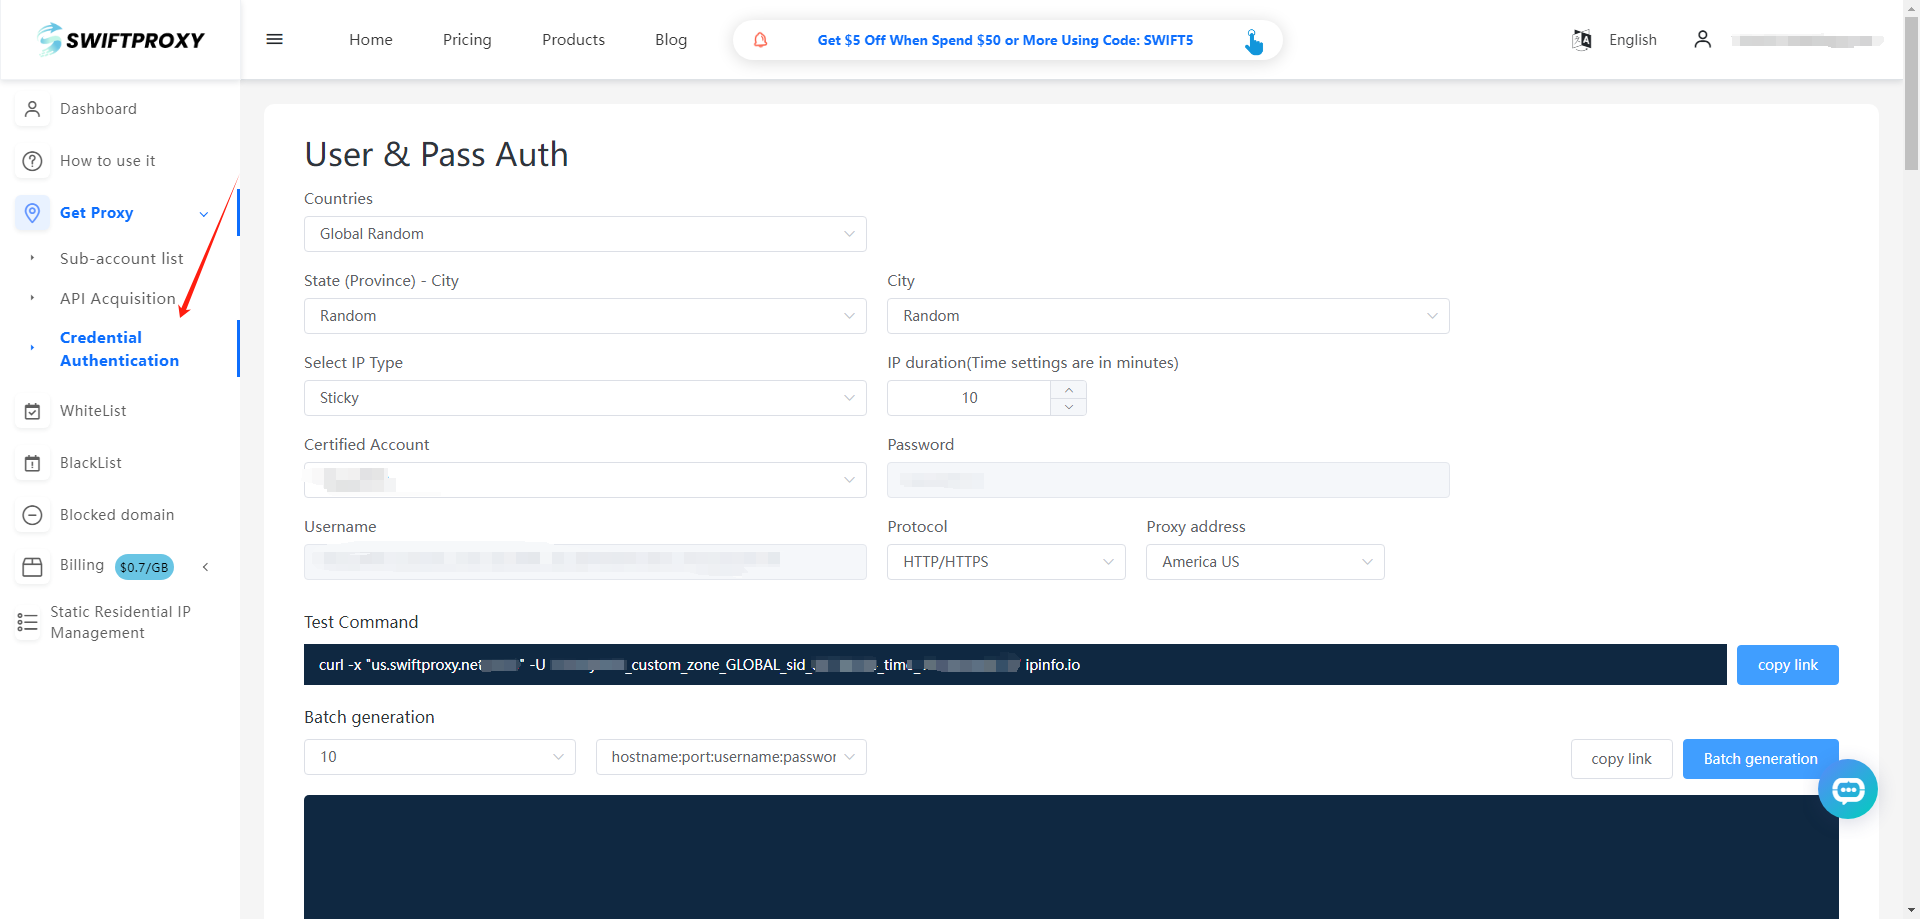
3. Finish Proxy Extraction
- Tap "Copy link" or "Batch Generation" to finish the proxy extraction.
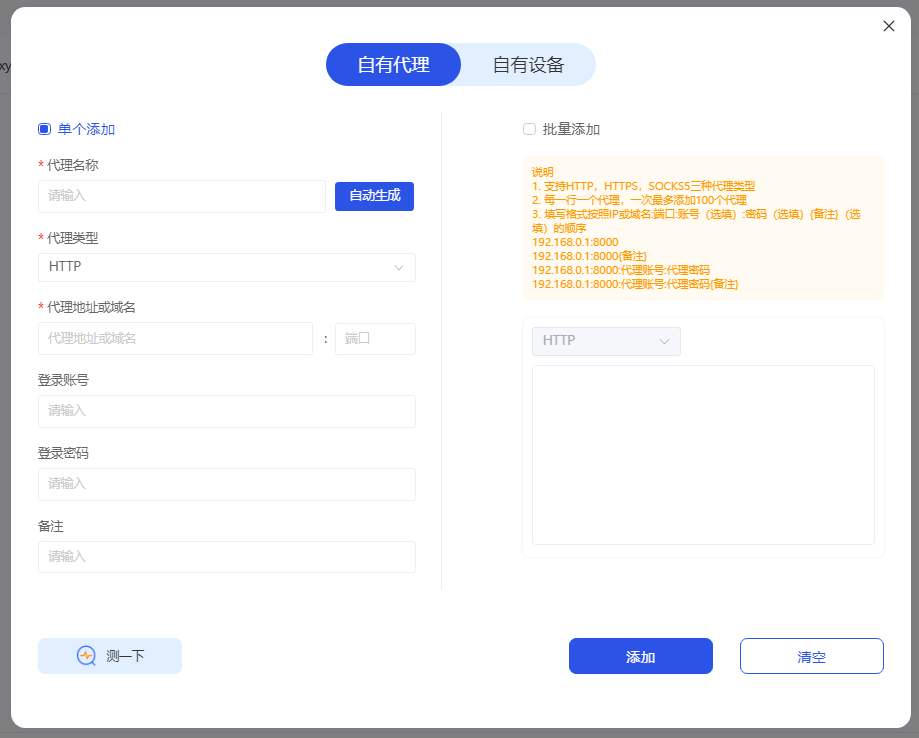
4. Setting on Yunlogin Browser
- Download Yunlogin Browser from the official website.
- Launch the app, hit"Own Proxy"on the left side, and hit "Add Proxy", hit "Confirm"to finish adding.
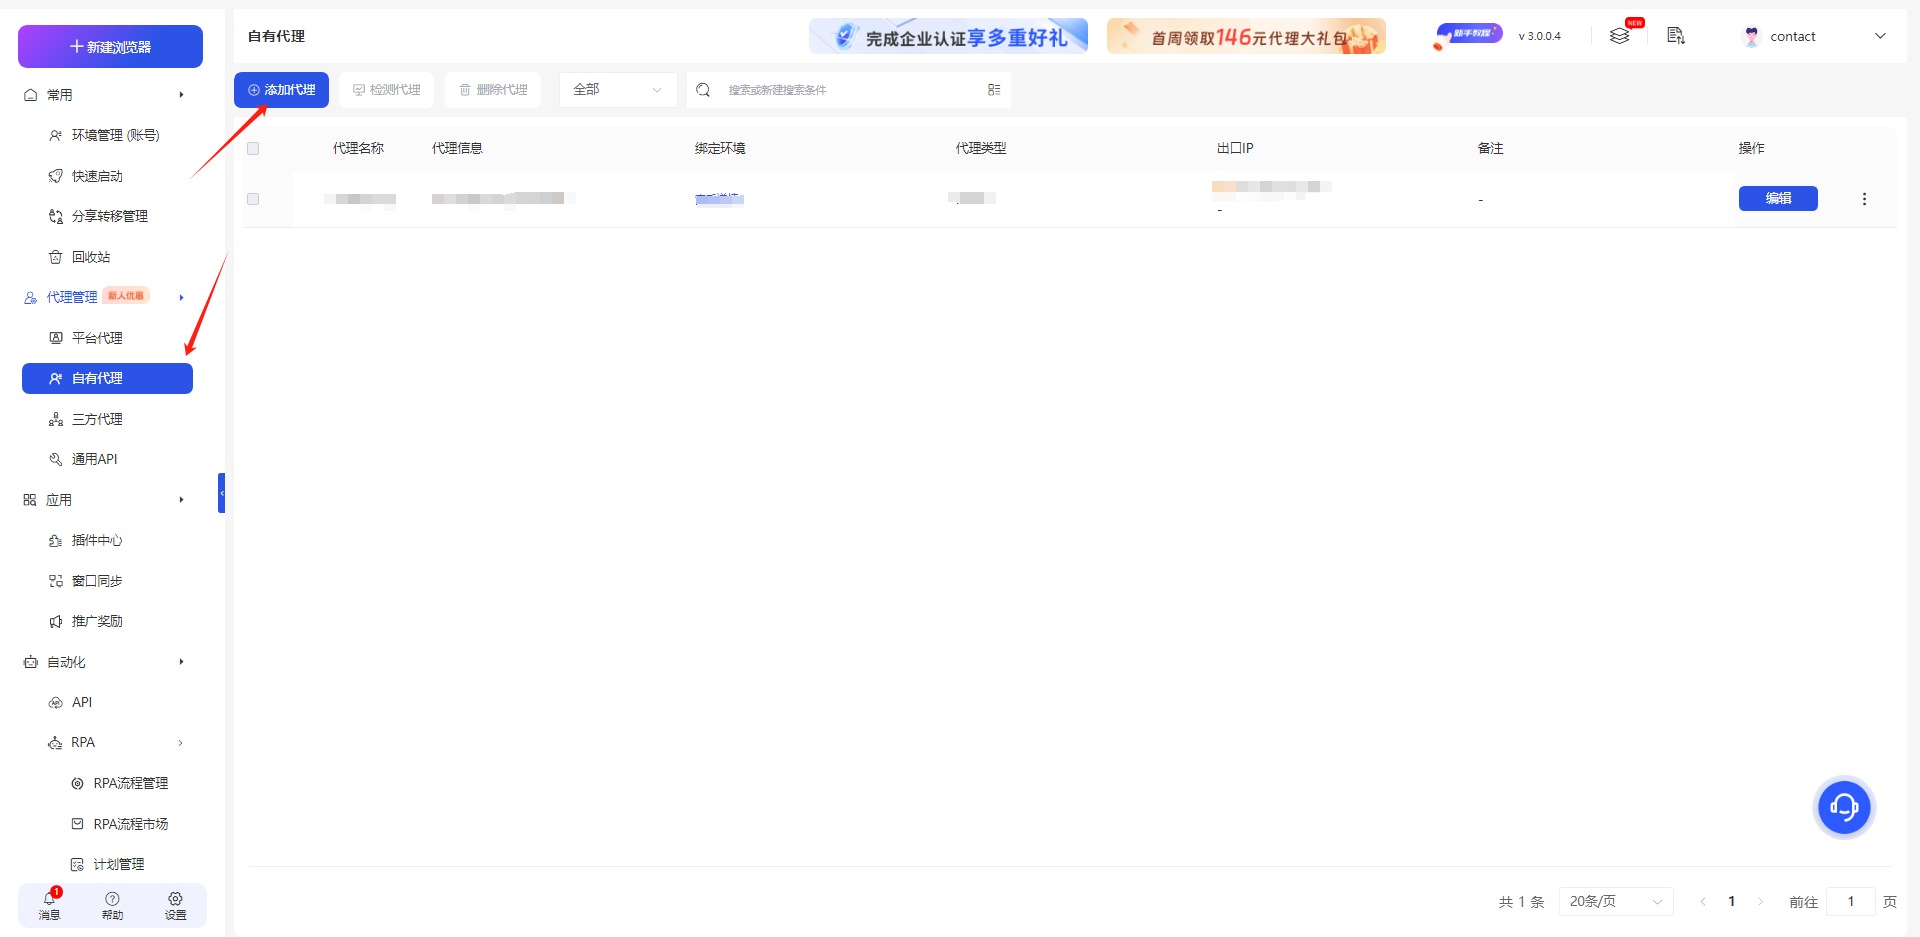
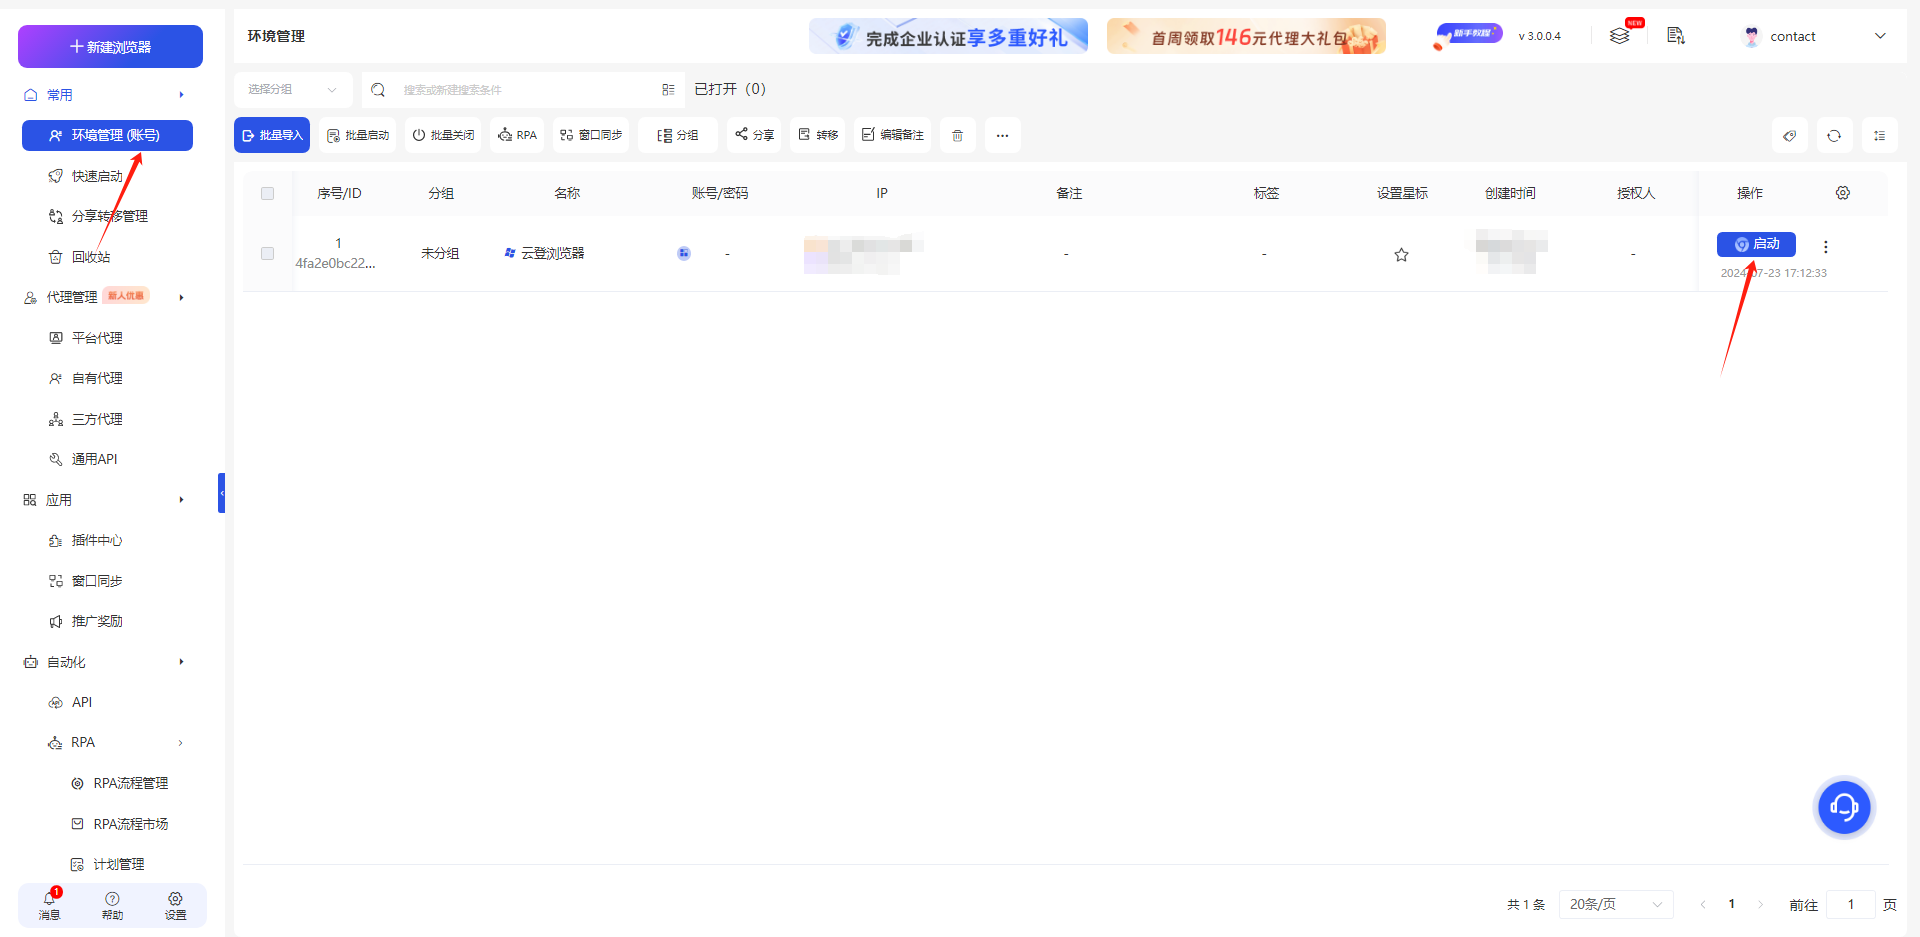
5. Completing the setup
- Hit"Environment Management (Account)"and hit"Enable"to complete the settings.
Configuring Incogniton Yunlogin Browser with Swiftproxy Static Proxy
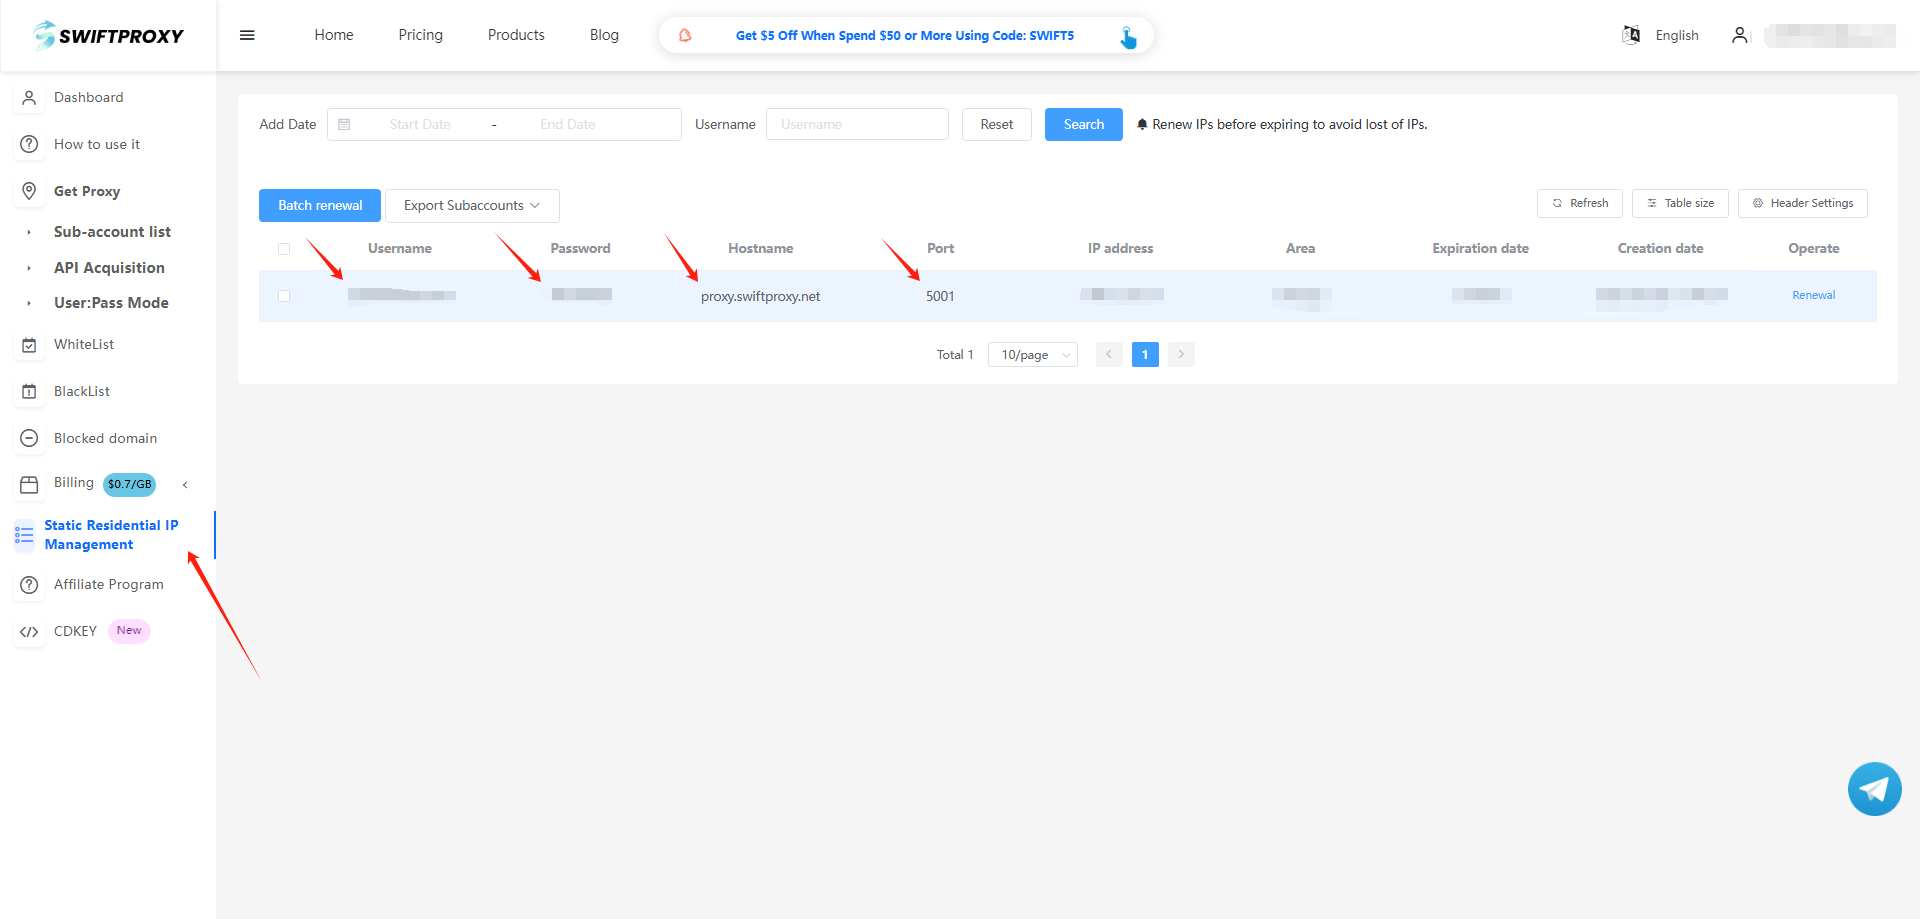
1. Visit the Swiftproxy dashboard and copy Username, Password, Hostname and Port.
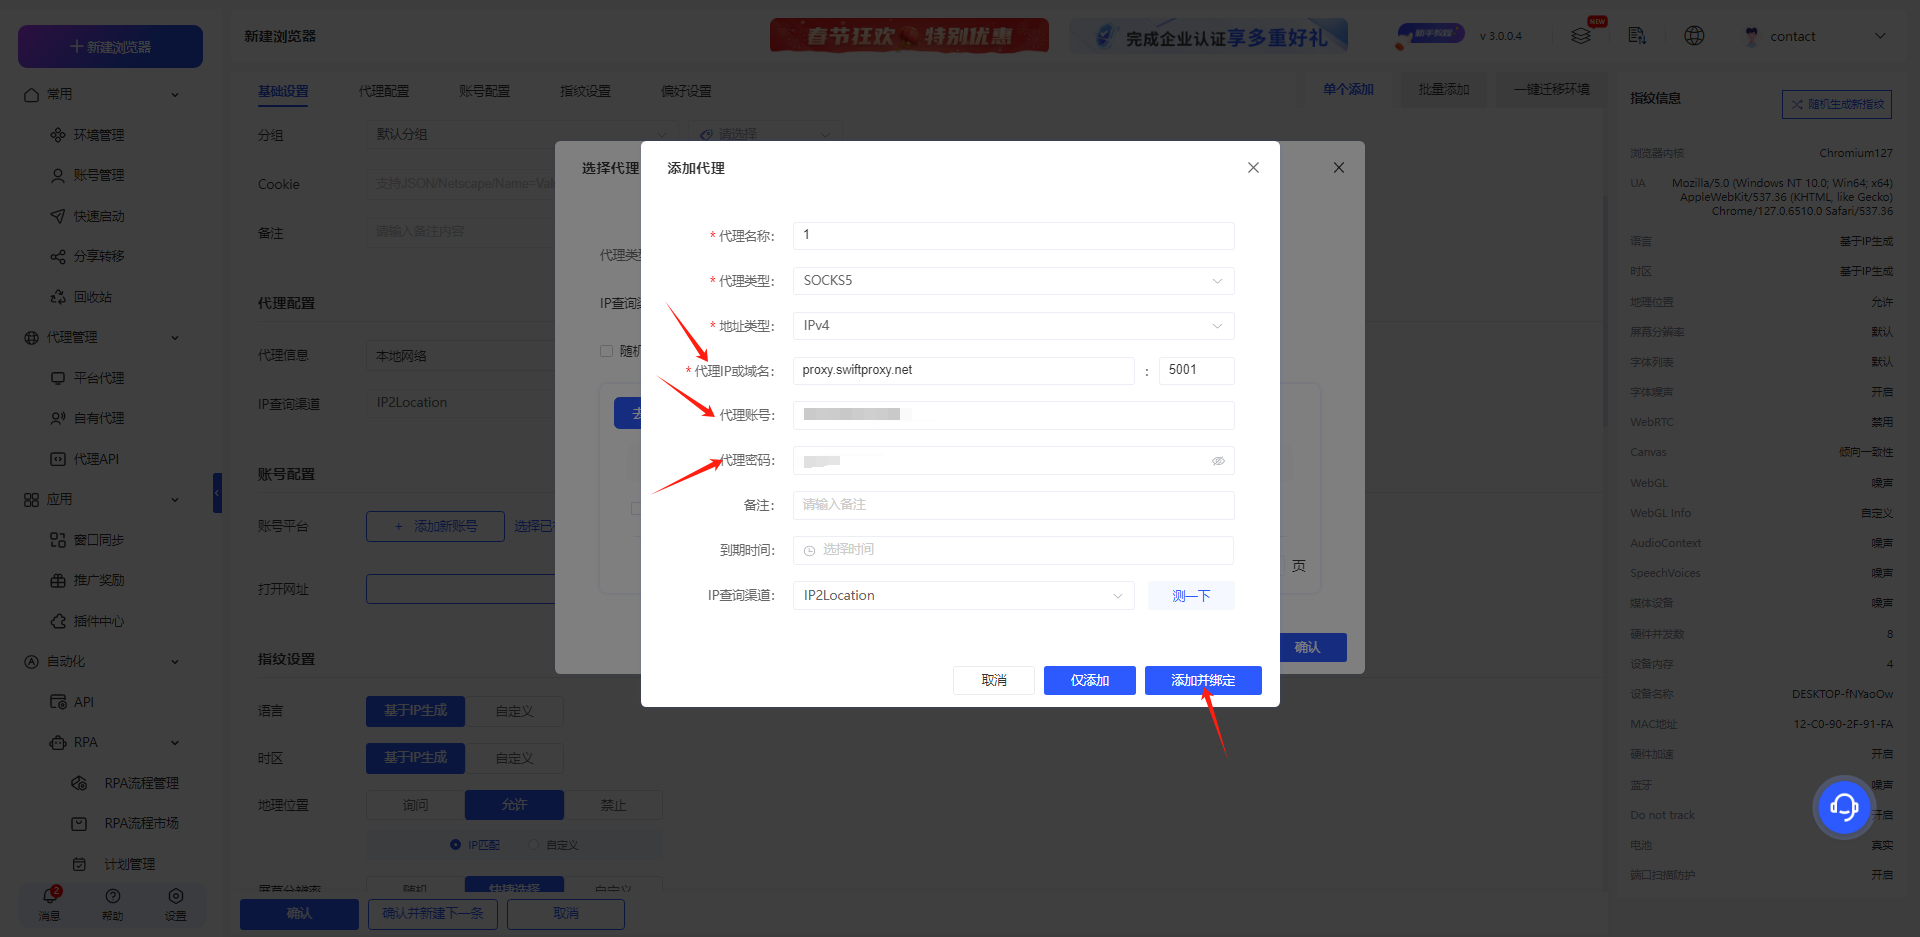
2. Back to Proxy configuration in Yunlogin, paste the proxy information we copied from Swiftproxy dashboard, click "Save" in the end.
關於作者
Swiftproxy部落格提供的內容僅供參考,不提供任何形式的保證。Swiftproxy不保證所含資訊的準確性、完整性或合法合規性,也不對部落格中引用的第三方網站內容承擔任何責任。讀者在進行任何網頁抓取或自動化資料蒐集活動之前,強烈建議諮詢合格的法律顧問,並仔細閱讀目標網站的服務條款。在某些情況下,可能需要明確授權或抓取許可。
常見問題
{{item.content}}
加載更多
加載更少


