


Configuring XLogin with Swiftproxy

Why use an Anti-detect Browser?
Anti-detect browsers are popular due to their user-friendly design and versatile capabilities. They allow efficient management of multiple accounts on various platforms from a single device, making them crucial for e-commerce, advertising, and web testing.
In this guide, we'll delve into XLogin, highlight its key features, and provide instructions on setting it up with Swiftproxy.
What is XLogin?
XLogin Anti-detect Browser offers users a unique and unlimited browser fingerprint environment. Each browser environment appears as a natural and native local setting, significantly reducing the risk of account blocks. This tool is suitable for a wide range of browser-based activities, including managing accounts on platforms like Google, Facebook, Twitter, Amazon, eBay, Etsy, TikTok, Tinder, PayPal, Stripe, Outlook, Gmail, and other online services. It supports various applications such as account registration, advertising verification, store management, affiliate marketing, automated tasks, and more.
Configuring XLogin with Swiftproxy Residential Proxy
1. Download XLogin from the official website.
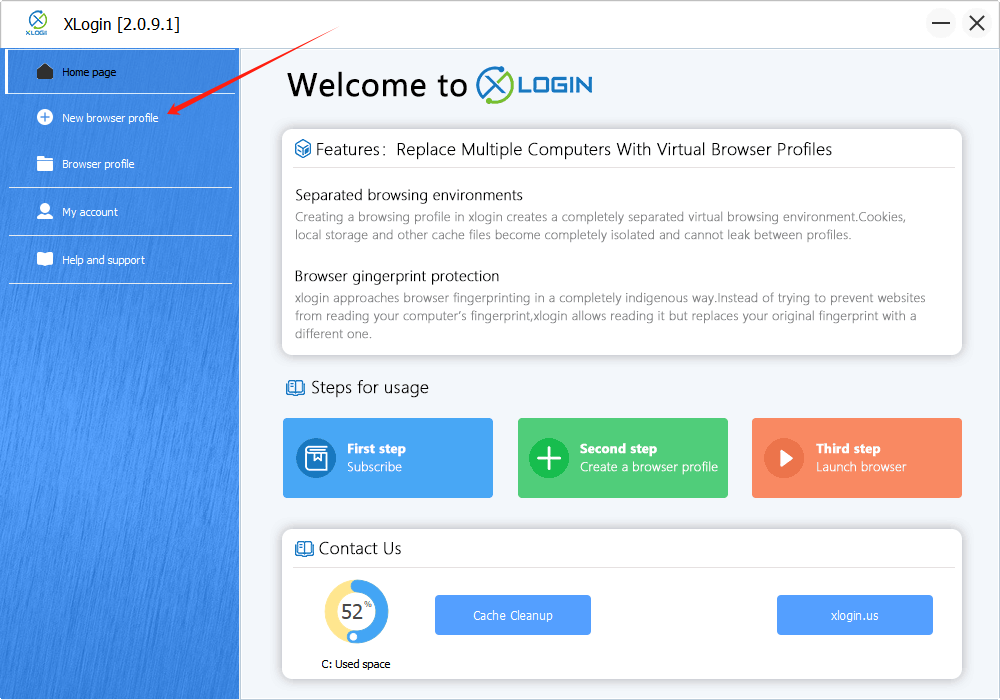
2. Launch the app, create an account, and log in.
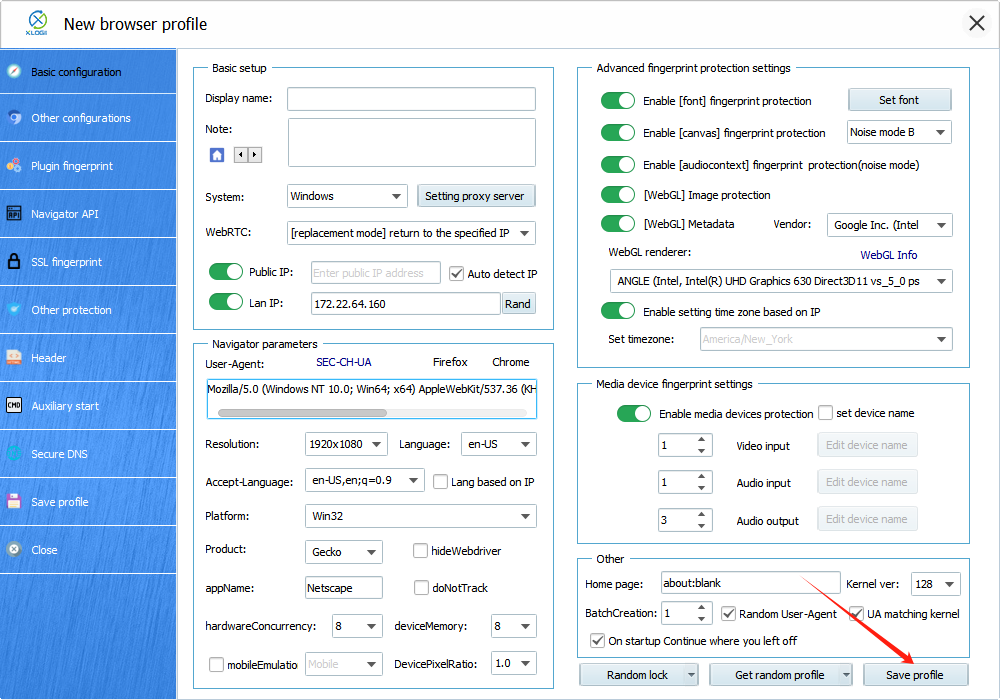
3. Once log in, select "New Browser Profile" at the sidebar:
4. A new window will pop up afterwards, tap "Setting proxy server" button.
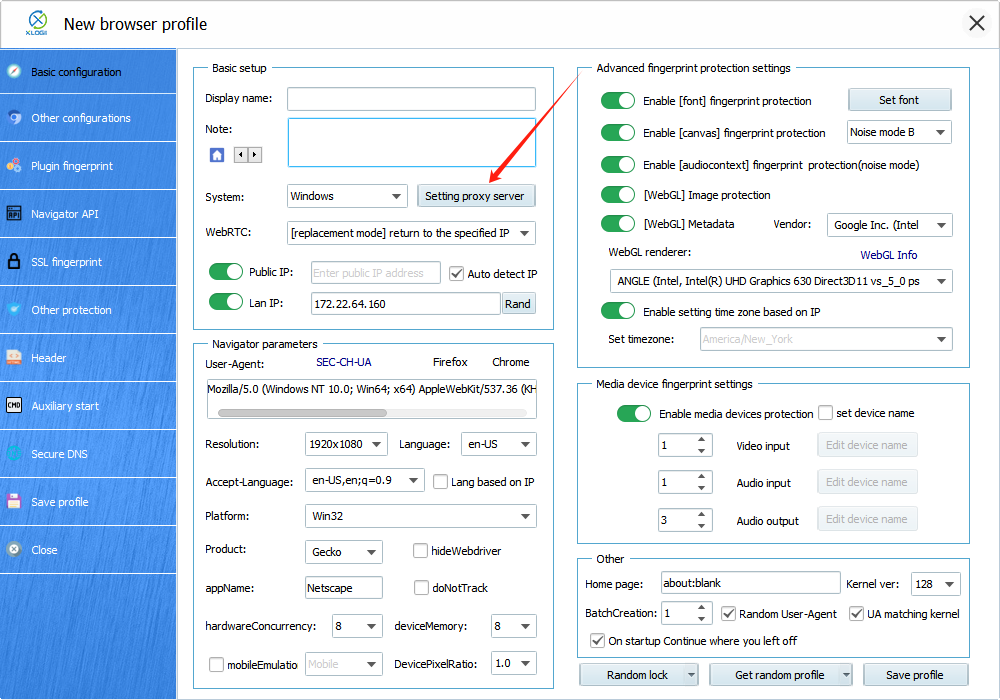
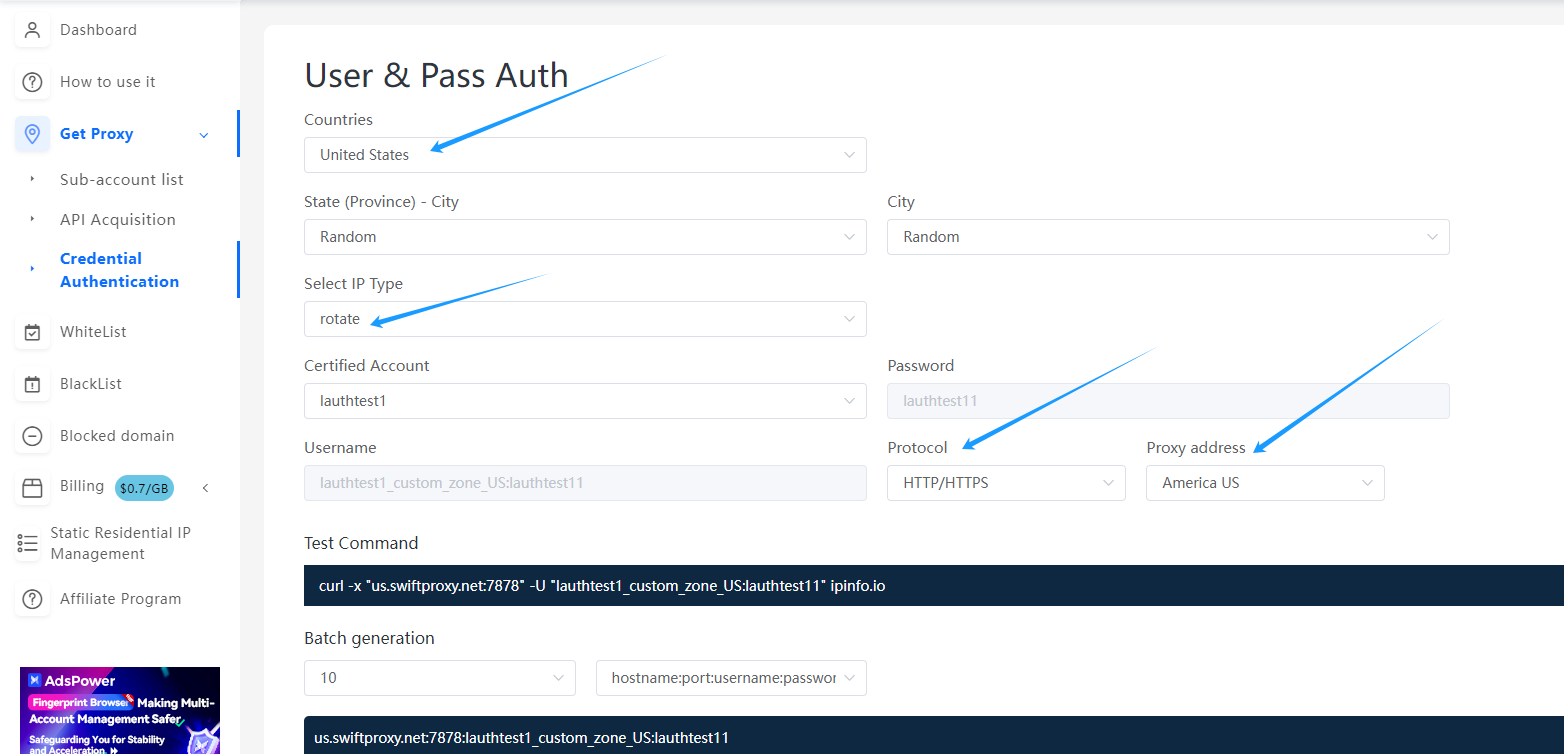
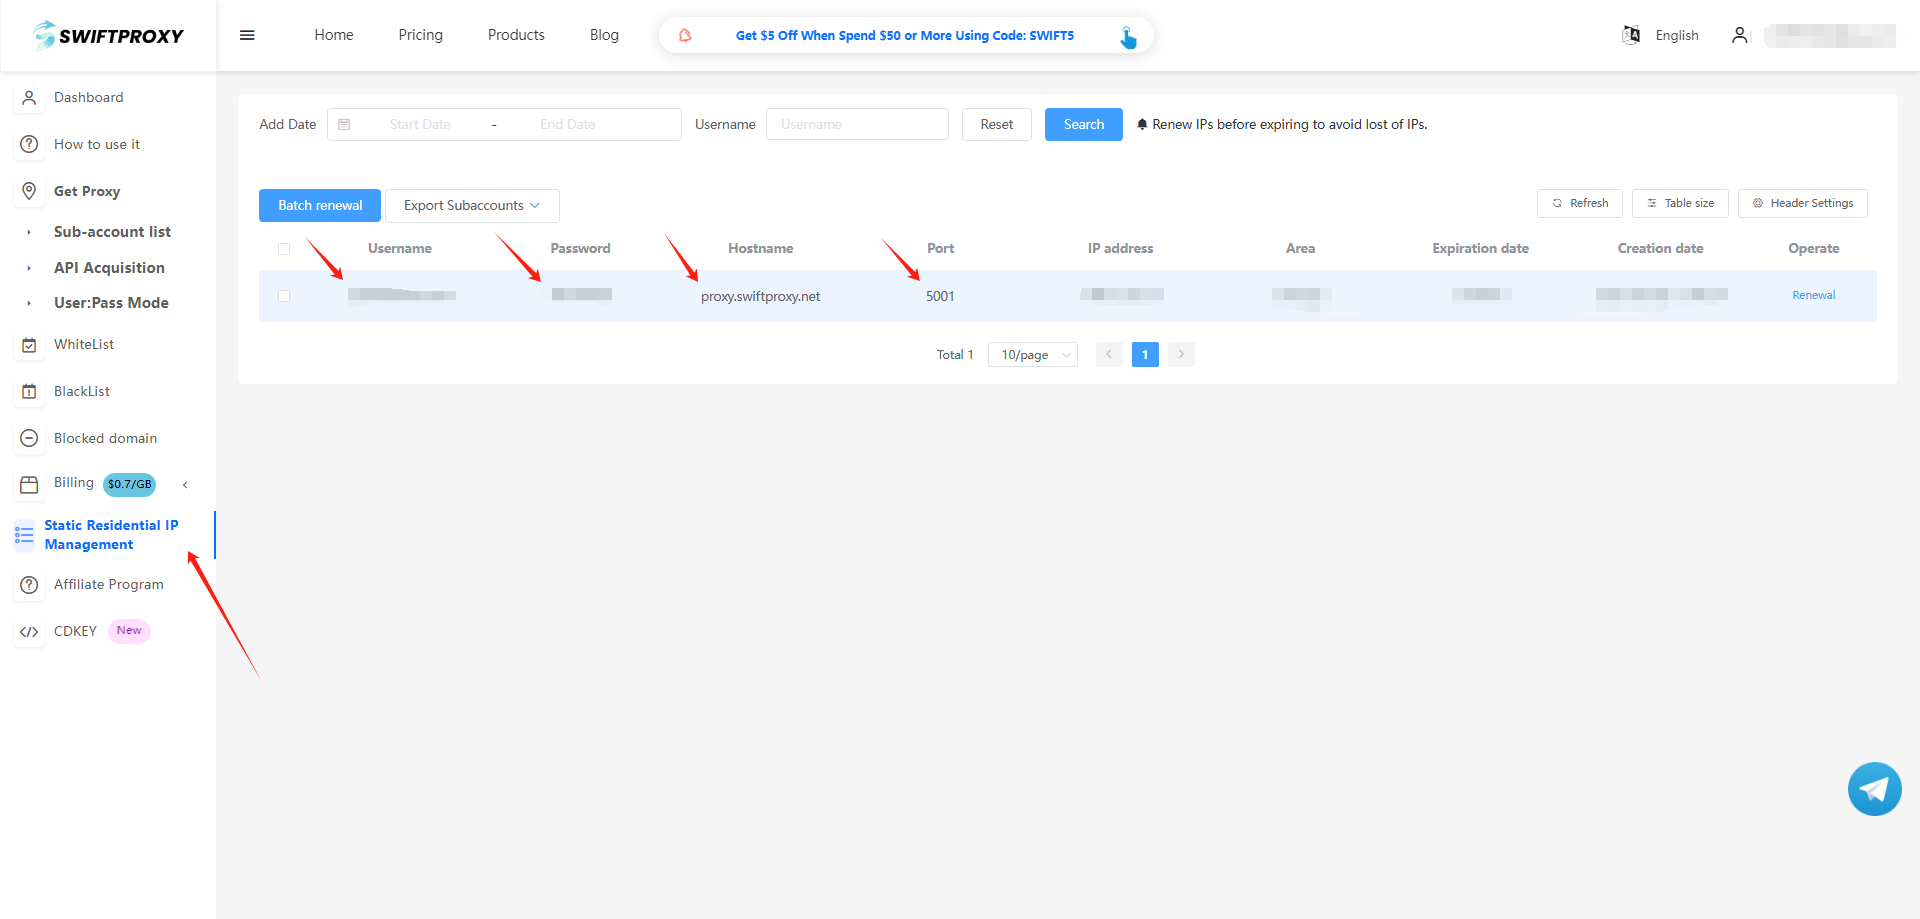
4.(1) To get the proxy details from the highlighted area let's go to Swiftproxy account dashboard:
5. Now, visit the Swiftproxy dashboard and configure your proxies. We are using USA IPs with IP rotation mode turned on under HTTP/HTTPS protocol in this case.
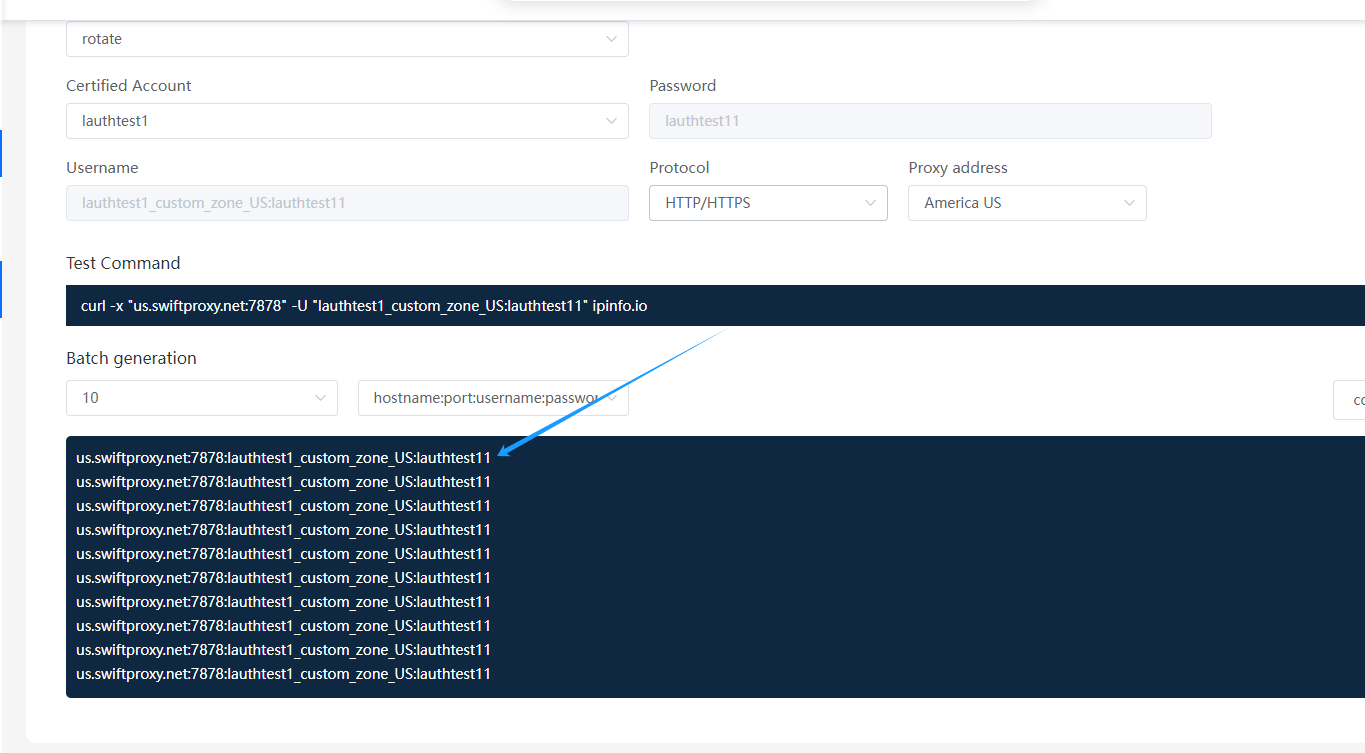
6. Copy the first proxy string here:
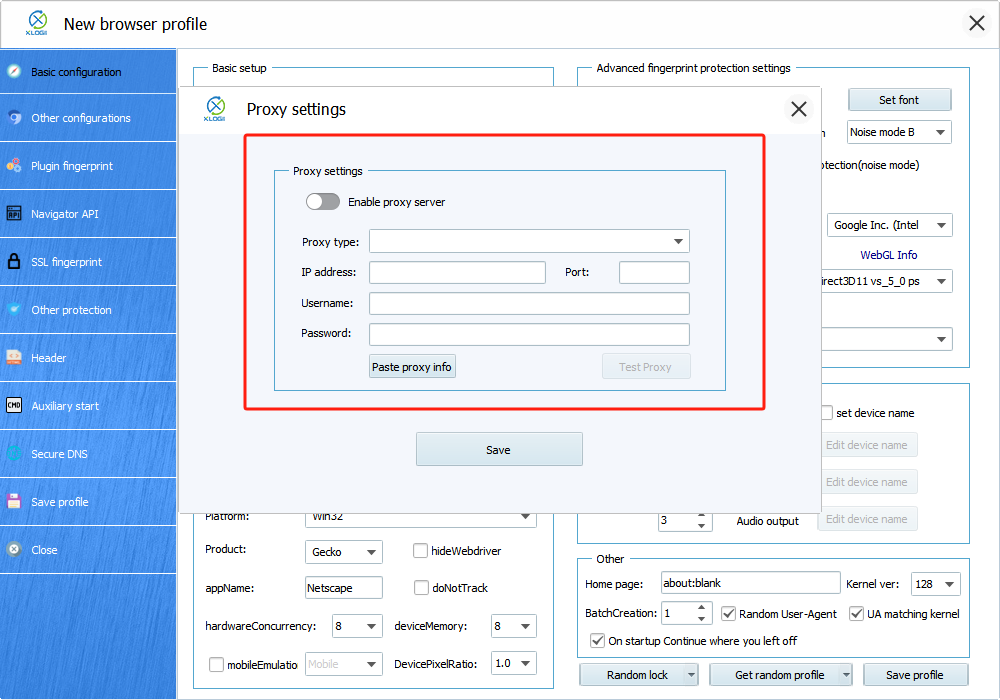
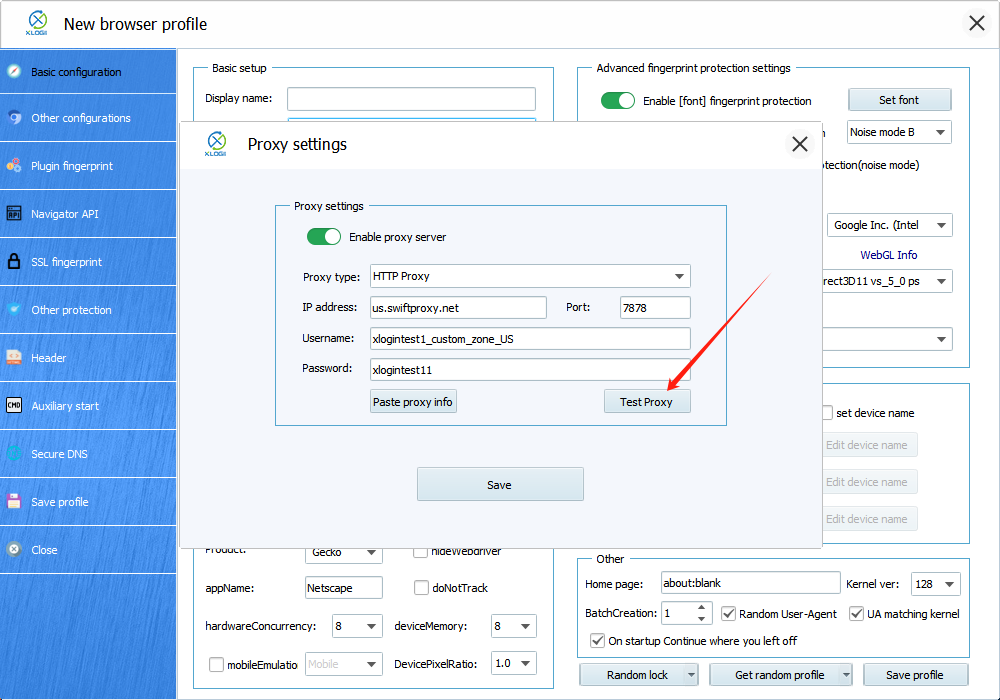
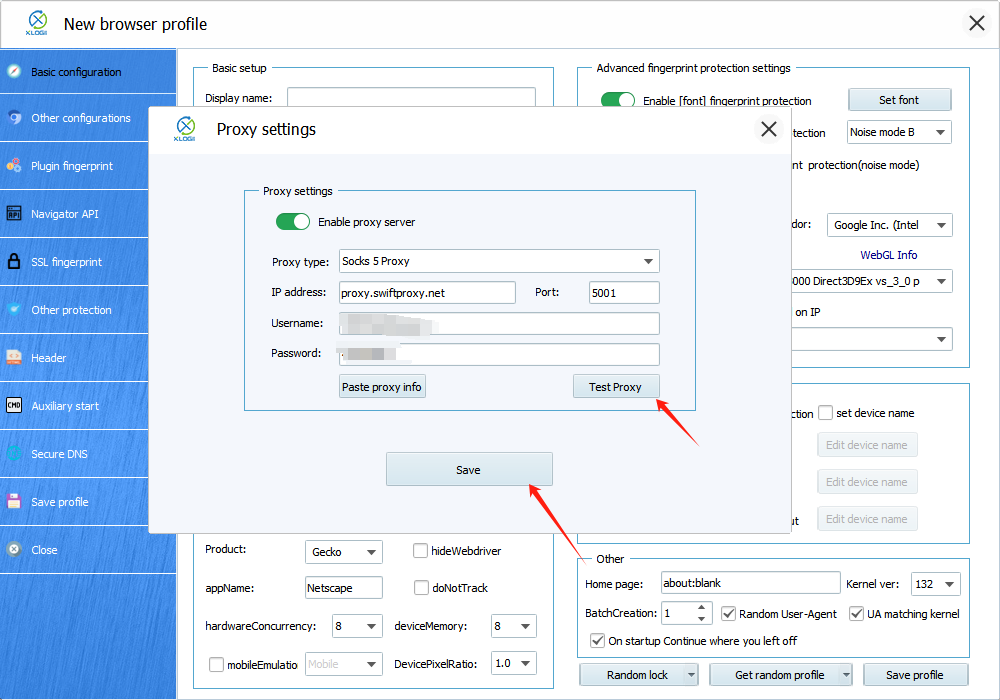
7. Back to XLogin Application and paste the copied proxy string into its proxy setting then tap "Test Proxy" to see if the proxy is valid.
8. Here we see the connection is valid.
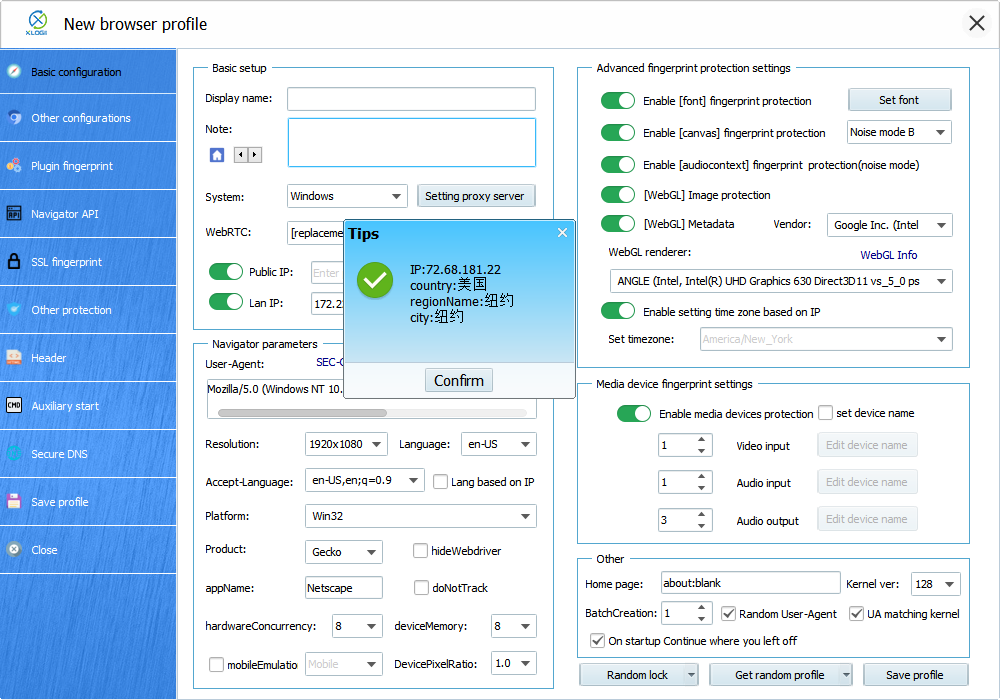
9. After setting up the proxy, we may now tap "Save profile" to finish setting up proxy in XLogin Anti-detect Browser.
Configuring XLogin with Swiftproxy Static Proxy
1. The first three steps are the same as the first three steps of the previous part
2. Then, visit the Swiftproxy dashboard and copy Username, Password, Hostname and Port.
3. Back to XLogin Application and paste the copied proxy string into its proxy setting then tap "Test Proxy" to see if the proxy is valid.
4. After setting up the proxy, we may now tap "Save profile" to finish setting up proxy in XLogin Anti-detect Browser.
關於作者


