Bypass Restrictions and Protect Your Privacy with TacoProxy

Privacy online isn't just a "nice-to-have." It's essential. With tools like TacoProxy, you gain the power to bypass restrictions and keep your online presence secure and private. Developed on Node.js, TacoProxy is designed to help you dodge network filters, avoid censorship, and expand your access to information on the web.
As the front end of AlloyProxy, TacoProxy delivers a user-friendly interface that lets you route your internet traffic through various IP addresses with just a few clicks. This doesn't just keep your data private; it secures the entire transmission process. And if you're locked out of content due to geographic restrictions, TacoProxy has you covered.
Key Features of TacoProxy
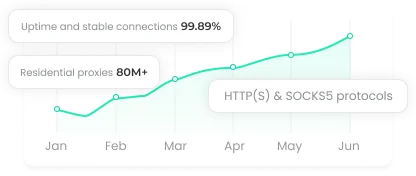
1. Supports HTTP and SOCKS5 Protocols: TacoProxy integrates seamlessly with HTTP and SOCKS5, making it compatible with many applications and services. This compatibility means you can browse privately across platforms with ease.
2. Strong Encryption with SSL/TLS: By using SSL/TLS encryption, TacoProxy ensures data remains safe from prying eyes, shielding you from man-in-the-middle attacks and other online threats.
3. Privacy with IP Masking: Route your traffic through different IP addresses to hide your real one, protecting your identity and browsing habits from unwanted attention.
4. Speed Optimized for Performance: Thanks to Brotli compression and other optimizations, TacoProxy delivers a smooth, fast connection—no lag, just seamless browsing.
5. Simple Setup, No Complex Configuration Needed: Setting up TacoProxy on your device or application is straightforward. You don't need to be a network expert to get started.
Step-By-Step Guide to Set Up TacoProxy
Step 1: Install AlloyProxy
To get started, first install AlloyProxy. Using NPM (Node.js's package manager) is quick and ensures compatibility with Node.js. Run the command:
npm install Alloyproxy
This installs AlloyProxy and its dependencies. Yes, you'll need some basic command-line knowledge, but it's straightforward—and necessary for keeping the software up-to-date.
Step 2: Configure Your Node Application
Now, it's time to configure your Node application. Open your application's master file and set the proxy parameters. Customize settings like the proxy prefix and request/response handling to tailor the proxy to your needs. Done right, this configuration will optimize your proxy for performance and security.
Step 3: Start TacoProxy
Finally, launch TacoProxy. Run:
npm start
By default, the proxy service will run on \`localhost:8080\`. If you need to, adjust the port number in the \`config.json\` file. Once running, the proxy will handle all network traffic routed through it, adding a layer of security and privacy to your browsing experience.
Of course, startup issues like missing dependencies or configuration errors can happen. Follow the error messages to debug or double-check your configurations. But once it's up and running, TacoProxy becomes a powerful shield for your online activities.
Why TacoProxy?
In an era where privacy is priceless, TacoProxy is a must-have tool for anyone serious about secure, private browsing. It's easy to set up, effective at bypassing restrictions, and, most importantly, puts you in control. Similarly, Swiftproxy offers a robust solution for enhancing security and privacy, making it another excellent choice for users looking to maintain anonymity and bypass geo-restrictions.


